Planning and Managing Risks on the Trail
During my formative days hiking in Japan, I must confess I didn’t devote much time to planning my hikes even the overnight ones. My usual approach back then was print out a hike some random person posted on the now defunct forums on Japan Today and start navigating my way from the trailhead to summit. It’s nothing short of a miracle that I’m still here. Happily, those cavalier days are behind me and now take great pains to plan out each new hike. Not only does it give me some extra self-assurance before I set forth, but hopefully also for those of you following in my footsteps.
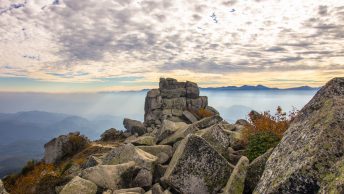
The inspiration for this how-to guide comes from a reader who asked what research and precautions I take before hitting the trail to minimise risks. It’s a terrific question and have attempted to answer it by summarising the process in three steps. My most recent hike to Mt. Toridani located on the Tokyo and Saitama Prefectural border will serve as a case study. .
Step 1. Unfurl the Yama to Kogen Chizu
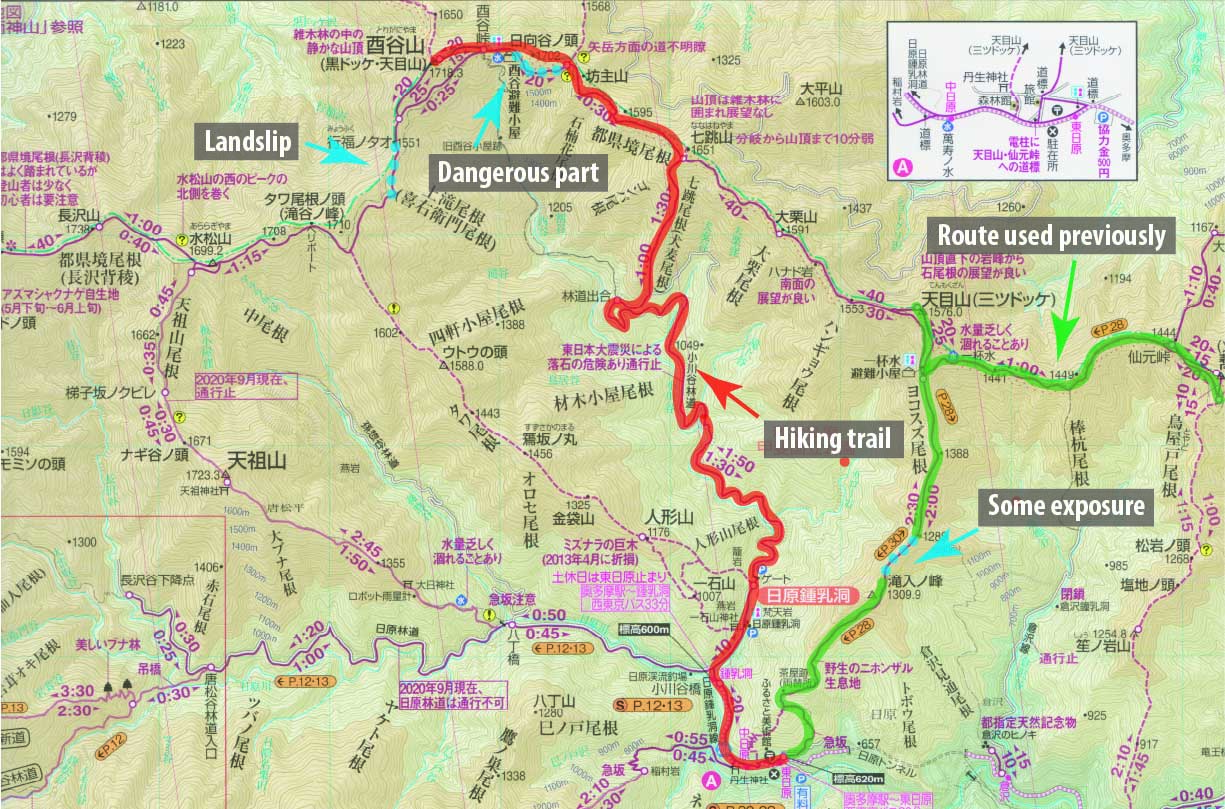
Mt.Toridani hike Yama to Kogen map.
Once you’ve homed in on which mountain you’d like to climb, it’s time to look at which trails will get you there. Far and away the best Japanese hiking maps are Yama to Kogen Chizu by Shobunsha Publications (MAPPLE). Along with the 100, 200, and 300 Famous Mountains their full catalogue of 61 maps covers approximately 1,500 mountains throughout the archipelago. Each map packs in plenty of detail regarding trail dangers and warnings, mountain huts, water sources, toilets, and taxi fares to the trailhead. The three main symbols to look out for are “!” denoting danger, “?” for ill-defined trails and “水” marking a water source. For more information about reading Yama to Kogen Chizu topo maps check out this how-to guide.
If for some reason the mountain you’re climbing falls outside one of the Yama to Kogen map sheets or you require the extra detail of a small-scale map try the official 1:25,000 scale Geospatial Information Authority of Japan (GSI) map sheets. They are readily available at large bookshops such as Kinokuniya, Maruzen and Junkudo along with many outdoor stores such as ICI Ishii Sports, L-Breath and Kamoshika Sports. The downside is the GSI survey maps are less geared towards recreational climbing as they lack course times, campsites, and water sources. A how-to guide to reading GSI maps is covered in this post.
Unfurling the Okutama Yama to Kogen Chizu, I tallied no less than seven approaches to Mt. Toridani! Most appeared to be long and challenging (25 km plus return) necessitating 9-11 hours. In other words, an overnight stay would be required near the Toridaniyama Refuge Hut. I omitted two trails which originated from the Chichibu side as they involved upwards of three hours hiking along dotted routes. This left me with either ascending via the Yokosuzu Ridge I used on the Mt. Tenmoku hike (some exposure) or the Ogawadani Forestry Road and Nanahane Ridge which would also make it the shortest. One other possible candidate was the Tawa Ridge, looping around clockwise.
Step 2. Head over to Yamareco, Yamap and Yamakei Online
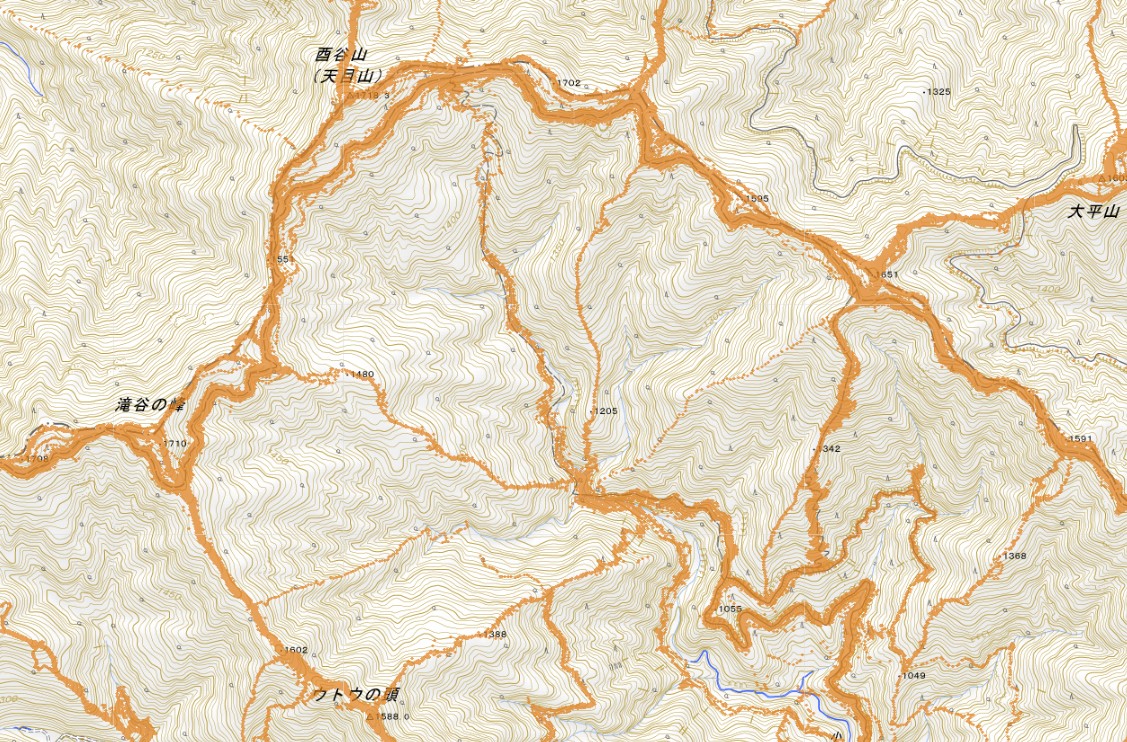
Yamareco heatmap showing trails around Mt.Toridani.
With the attack route decided, I now needed to make sure there weren’t going to be any nasty surprises or gotcha moments. In recent years the worst of these being a close call hiking Mt. Kurogane where I encountered a (tsukodome) trail closure sign after arriving at the Nishizawa Gorge. If it hadn’t been for some makeshift rope workers had affixed to get past a road collapse, I would have been in for three hours of backtracking. And this Golden Week hike made me seriously consider quitting hiking altogether.
Yamareco and Yamap are two excellent mountain-climbing community sites to find out the latest trail and snow conditions or whether a water hole is running. In the search box, input the mountain name in kanji i.e., Toridaniyama 酉谷山 which returns a list of trail reports in chronological order. With Yamareco, logged in users can scroll through the full inventory of hike reports while visitors are limited to the first page. The Yamareco routes are ranked S, A, B, C, D with S signifying those with 20 or more photos and most detailed route descriptions.
Even if you’re not planning to sign up to their premium versions it’s worth your time registering. Only paid-up members can download GPX track data, however. Have a look through the reports paying attention to photographs that may point hazards like landslides, dangerous drops, and exposure that may lead to falls along the routes you are considering. Beware photos don’t always accurately convey the real magnitude of the situation and thus best used as a guide.
A cracking feature with Yamareco is their heatmap or what it calls mina-no-ashitoko “footprints of everyone” that displays aggregated data from publicly recorded trips and highlights it on the map. The “heat” generated by these hikes shows you where people have hiked across Japan. More thickset the colour, the more heat or activity present at the location. The neat thing is you can zoom in and highlight areas to drill down on specific hiking trails.
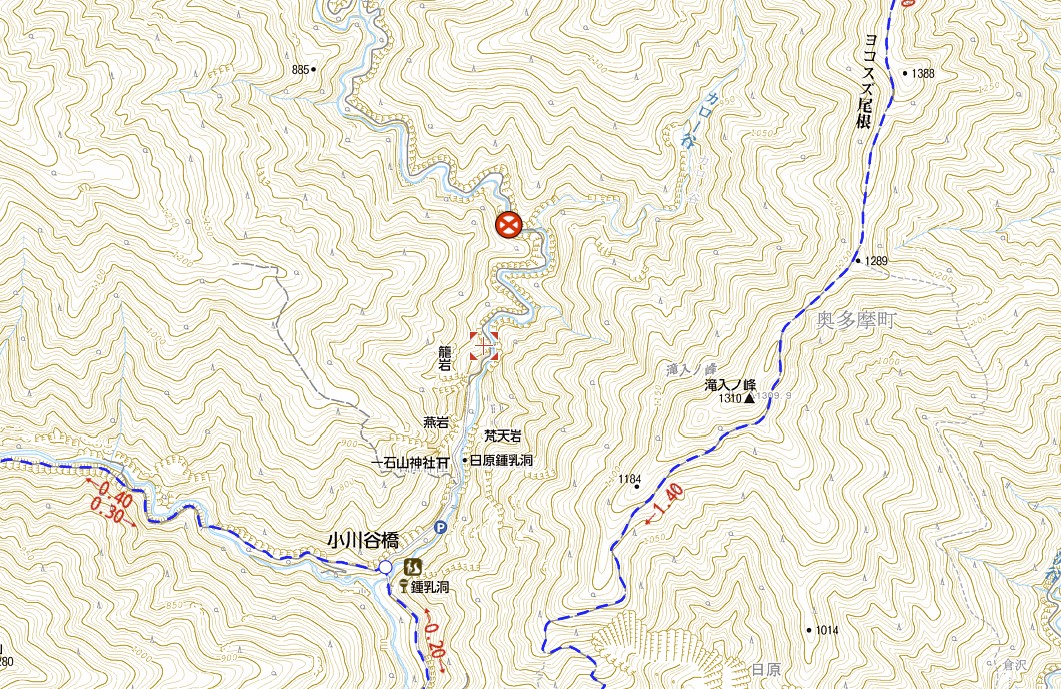
Yamakei Online map showing the Ogawadani Rindo closure.
One final site to draw attention to is Yamakei Online which similarly makes use of the Geospatial Information Authority of Japan (GIS) survey map. Unlike Yamareco and Yamap, Yamakei allows users to download their GPX route files for free. Along with trail course times it marks most but not all closed trails with a conspicuous cross accompanied by a notice about the closure. I say most because in the case of Mt. Toridani it fails to mention the route from the end of the Ogawadani Forestry Road to the Toridaniyama Refuge Hut is impassable. While it maintains the Ogawadani Rindo is closed to vehicles and pedestrians’ due to risk of falling rocks I decided to hike up anyhow based on the favourable impression I got from other hikers.
For Mt. Toridani two areas concerned me. These included a landslip coming across from the Tawa Ridge which made me shy from that approach along with a narrow “pinch point” that verged on dangerous in concert with a half rotted wooden walkway. As a result, I investigated a different route that would have me stick on the Nagasawa Ridgeline. Having found what, I though was the most suitable hiking route on Yamareco I downloaded the GPX track and uploaded it to my Garmin Oregon 600t.
As someone who mostly hikes solo, I tend to be quite risk adverse thus try and stay away from landslips and steep drop-offs even if it means a longer way around. It’s worth reiterating, but know your limits, when to pull the pin and to never feel ashamed of changing plans on the fly, if it means getting yourself off the mountain in one piece. This mindset was realised on my Mt. Kinpu hike late last year after it became apparent, I hadn’t made adequate preparations for the snowy conditions.

Image: Yamareco.
Step 3. Seek out your Japanese Compatriots
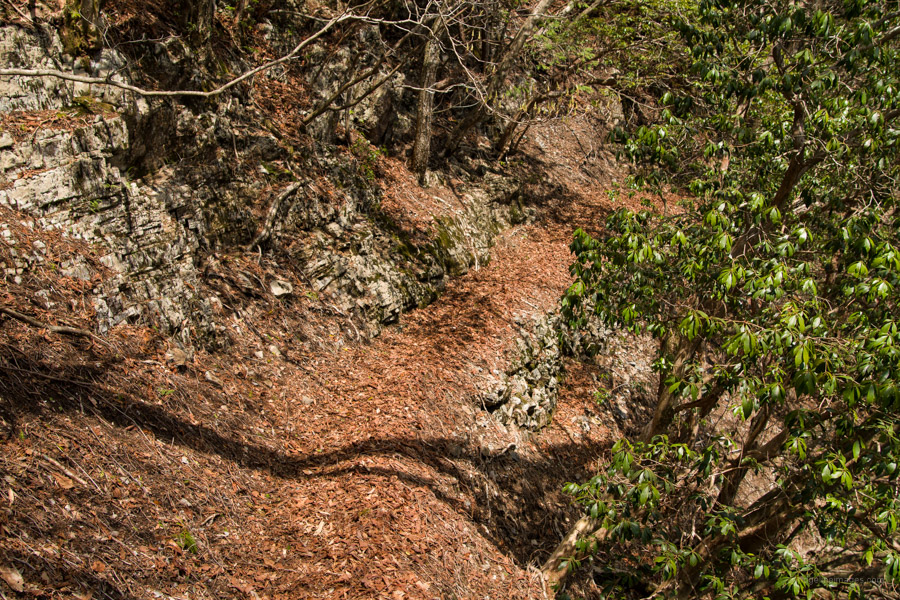
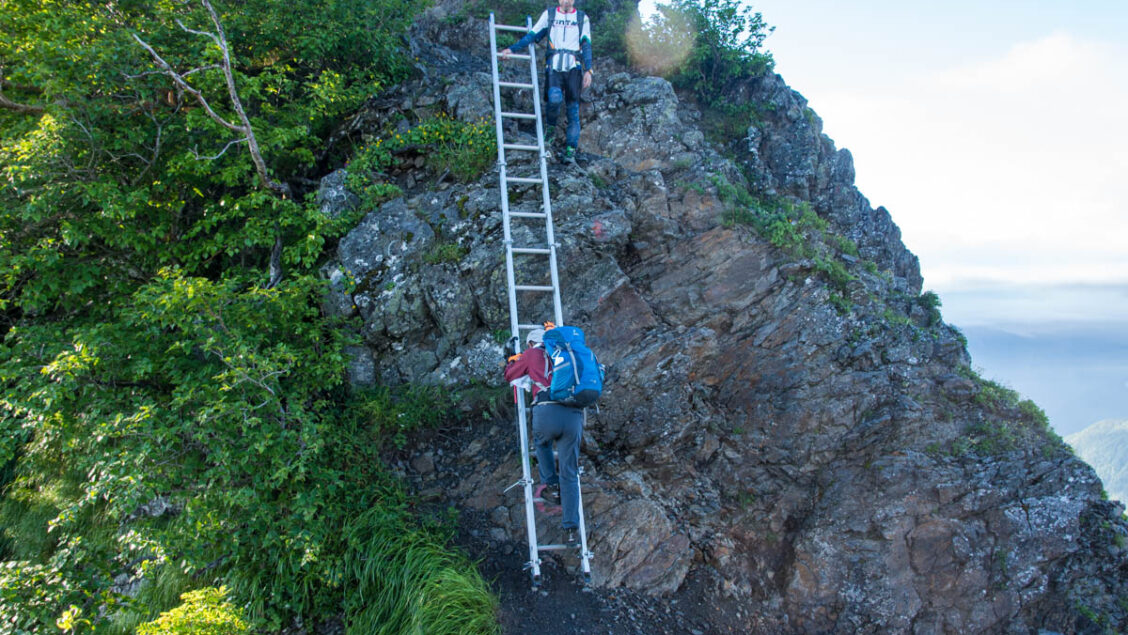
Trail narrows towards a pinch point.
The final step to help glean information about your impending hike is to search the Japanese interwebs especially if the mountain isn’t particularly well known. The best way to do this is to input the mountain name plus mountain-climbing i.e., Toridaniyama tozan 酉谷山登山 this will hopefully return some Japanese blogs and trail reports which you can then put through Google Translate. The unfortunate reality is for many mountains like Mt. Toridani searching in English won’t likely unearth much information.

Some ideas for articles:
Used gear: what to consider buying used + where to buy it (Mercari, Maunga etc)
100 yen shops for super cheap gear
New gear on a budget: Aliexpress (free shipping), Decathlon, Webtogs etc
Water treatment: tablets, drops, filters
Footcare: blister treatment, pre-rain soles cream etc., footwear fitting, socks etc
Footwear: boots vs trail runners etc
Tape: types & uses (andrewskurka.com for this one; read his bio — what a beast)
How to tie knots for your shelter
All good ideas and some food for thought so thanks. I’m a huge fan of repairing, buying used, and reselling my old gear either through friends or Yahoo auc. Concerning repairs props to Montbell for repairing my 7-year-old U.L. Trekking Umbrella with two broken parts including the sliding pole for a little over 1,000 yen! Support outdoor brands who make every effort to combat planned obsolescence. Yes 100-yen shops are an unsung hero for outdoor enthusiasts. Did an article on sourcing water from the trail a few years ago where I recommended Taharmayim tablets but also some info about filters would be helpful.
Another valuable article David, thank you.
How things have change since most of the 90s, when the foreigners (me including) with less than stellar Japanese were tearing around the Japanese mountains with nothing to guide us but the Paul Hunt book and blow ups of the English maps in there!
My additional thoughts to add to your guidance on preparing for the mountains is to remind newcomers that the most important preparation they can make is to be physically ready for the activity – don’t bite off more than you are ready for; keep careful notes on what you have done and tailor your hike selections to gradually build capability. This will minimize the risk of getting into trouble in the mountains and maximize your capacity to enjoy the experience. And, no question in my mind, the Japanese mountains offer hiking experiences the equal of almost anything on the planet.
That’s right, before Lonely Planet released their guidebook in the early 2000s there was little other than Paul Hunt’s seminal guidebook. And like I touched on, up until relatively recently there wasn’t much online either. Thanks, Stewart, for your helpful suggestions particularly about starting with more achievable hikes before progressing towards more demanding ones.
Thanks David! This really gives me a road map to follow to slowly start planning some of my own hikes safely. I’ve noted when I’ve gone out with others how we all have different risk appetites and abilities, so this will help me plan within my comfort zone and minimize sticky situations.
Please to hear that, Jackie. Planning a hike takes time but should provide you with additional peace of mind when you finally hit the trail and like you say, help ease any tricky situations you may find yourself.
A few safety tips:
1. Water treatment: water filter = critical. So many animals (mostly unseen as night movers) drink and poop in water that looks clear and safe. YouTube has explanation videos on these filters (differences, backflushing etc) : Sawyer Mini and Sawyer Squeeze; Katadyn BeFree. Tablets are good as a backup (filters can occasionally malfunction) and weigh almost nothing. Sawyers screw onto most pet bottles; Katadyn won’t
2. Daiso 100 yen store sells a long-handled circular dental mirror. Snap off the handle, and you have for one gram in weight: a signaling mirror, an emergency firestarter, and a mirror to help get tiny black flies out of your eye in summer (I’ve used it twice for this)