.
Murodo 室堂 to Shin-Hotaka Ropeway 新穂高ロープウェイ
56.9 km
1836 metres
Highest point: 2926 metres
Start: Murodo
Finish: Shin-Hotaka Ropeway bus stop
Difficulty: ▅▅▅▅▅▅▅▅▅▅ ❹
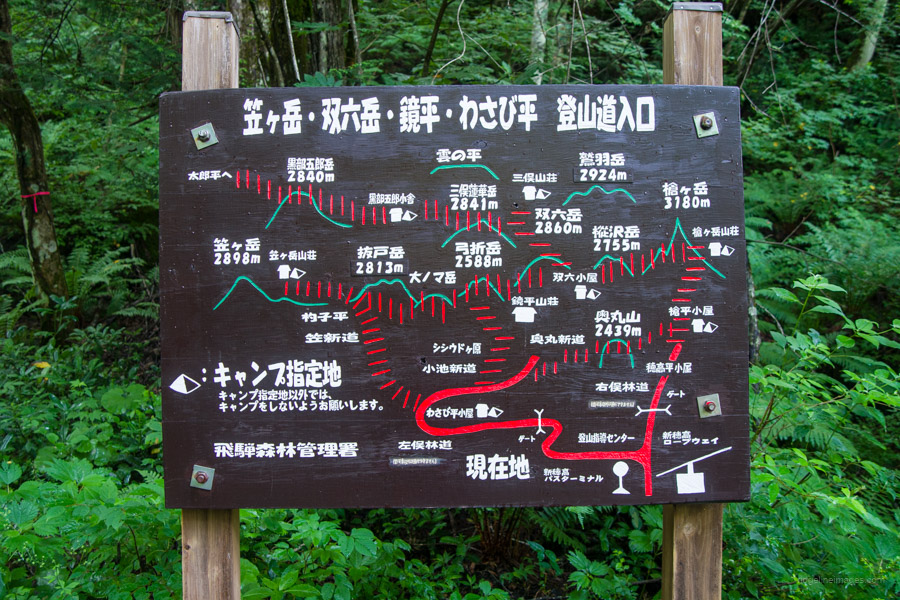
Map: Yama to Kogen Chizu 山と高原地図 [No.39 剱・立山 TSURUGI·TATEYAMA][No.40 槍ヶ岳・穂高岳 YARIGA-TAKE·HOTAKA-DAKE]
GPX TrackKML TrackGSI MAPPDF Topo Map
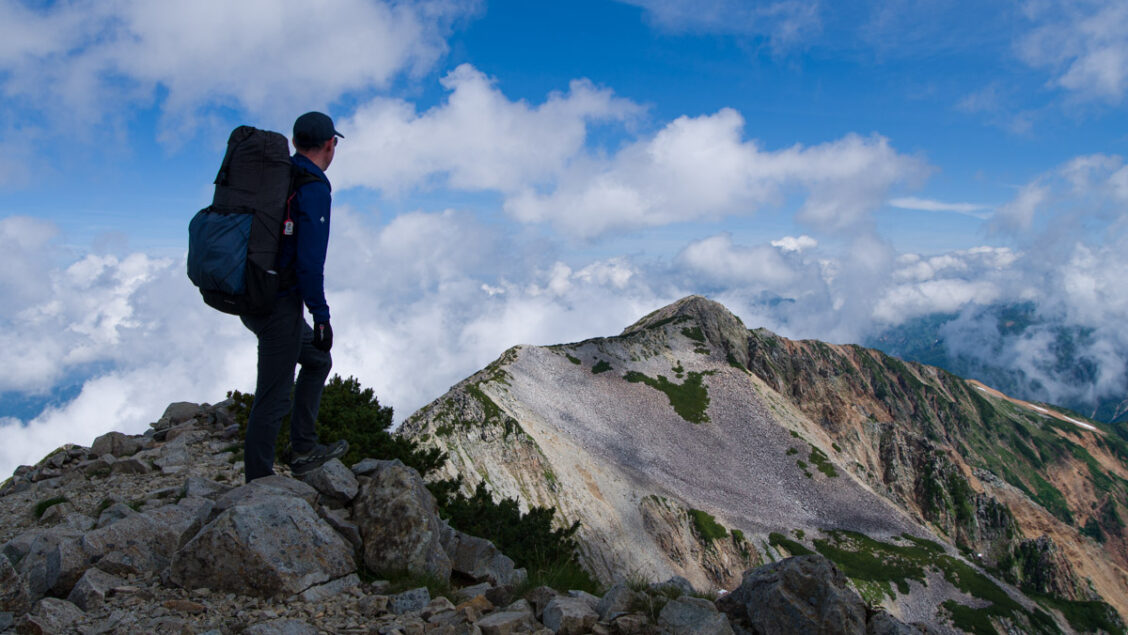
From July 21 to 27, 2024, I completed a one-week traverse of the Northern Alps (Hida Mountains), spanning Toyama and Nagano Prefectures. Having battled my way across the Southern Alps last year, this time around I turn my attention to its northern neighbour. The hike began at the bustling tourist centre of Murodo in the north and finished at the Shin-Hotaka Ropeway in the south. It included climbing two Hyakumeizan and one Sanbyakumeizan (100 and 300 famous Japanese mountains). The initial plan included Yarigatake and finishing at Kamikochi, but due to a couple of days of inclement weather, I decided instead to finish at the Shin-Hotaka Ropeway.
Rather than a ball-by-ball trail description for each of the seven days, I have provided a brief overview of each day’s route, including water sources, along with daily diary entries, as was done on the Southern Alps Traverse. For a more detailed account of the hike, I highly recommend picking up a copy of Cicerone Press Hiking and Trekking: The Japan Alps and Mount Fuji by Tom Fay and Wes Lang.
Northern Alps Traverse July 21st to July 27th, 2024
Murodo to Shin-Hotaka Ropeway (7 days approx. 57 km)
Day 1: Murodo 室堂 (water available) ➩ Jodo-san 浄土山 ➩ Goshiki-ga-hara sanso 五色ヶ原山荘 (tent 2,000 yen) (water available) 6hrs / 7.5km
https://goshikigahara.com/wp/
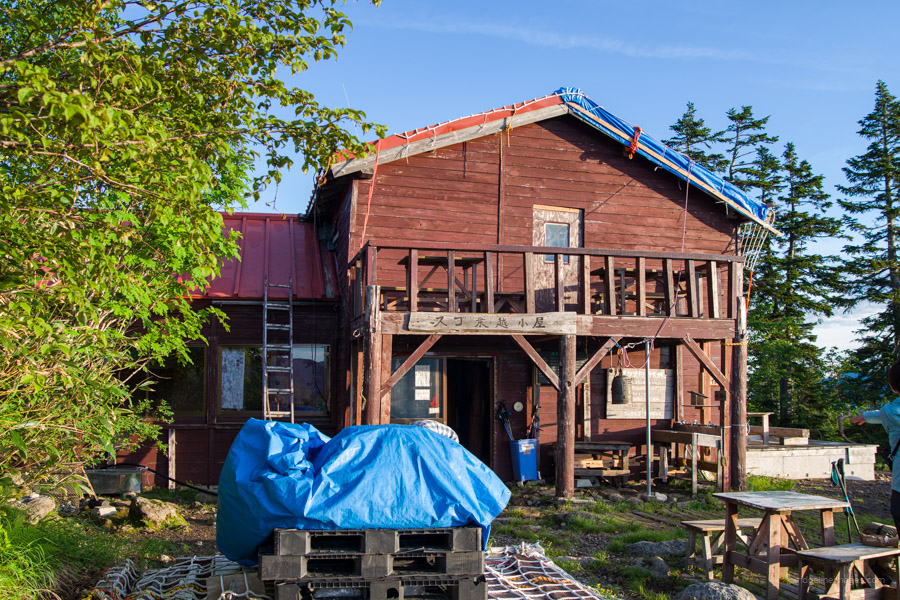
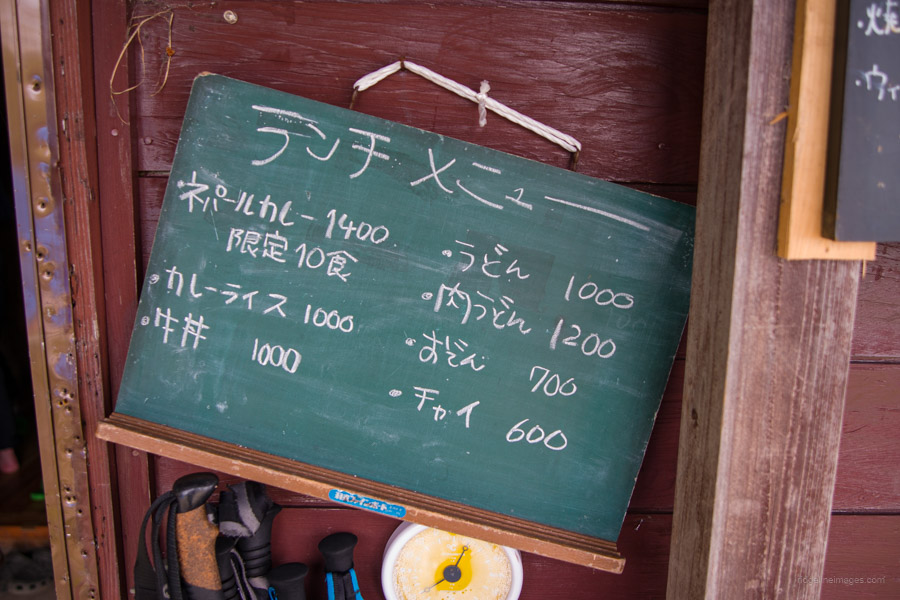
Day 2: Goshiki-ga-hara sanso 五色ヶ原山荘 ➩ Sugo-no-koshi-goya スゴ乗越小屋 (tent 1,500 yen) (lunch served from 11:00-15:00) (water available) 6hrs 30mins / 7.5km
https://ltaro.com/lodge/sugonokkoshi-goya/
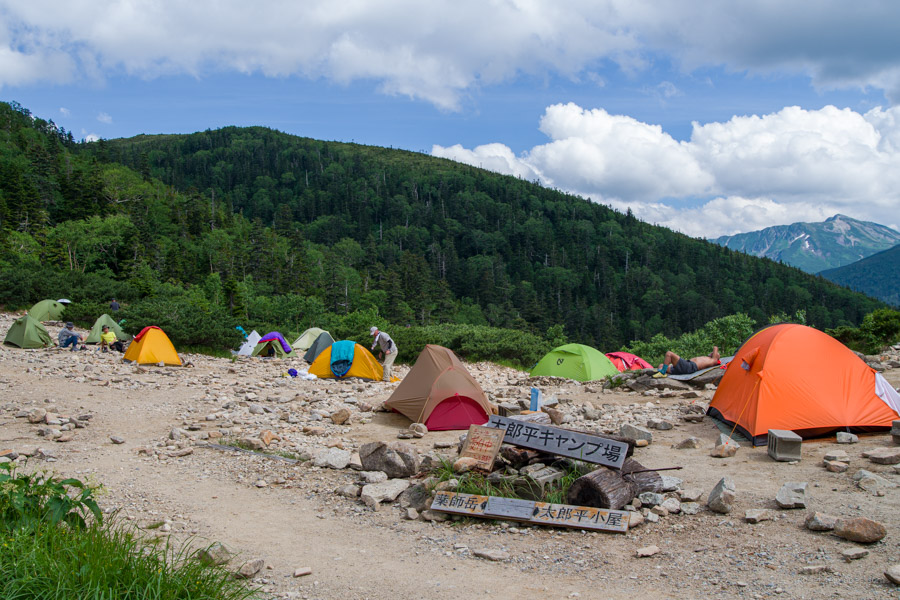
Day 3: Sugo-no-koshi-goya スゴ乗越小屋 ➩ Yakushi-dake 薬師岳 ➩ 薬師岳山荘 Yakushi-dake sanso (lunch served from 11:00:13:30) ➩ Yakushi-toge 薬師峠 (Tarodaira 太郎平) (tent 1,500 yen) 6hrs 30mins / 8.2km
https://ltaro.com/lodge/tarodaira-goya/
Day 4: Yakushi-toge 薬師峠 ➩ Tarodaira-goya 太郎平小屋 ➩ Yakushi-toge 薬師峠 Inclement weather (rest day)
Day 5: Yakushi-toge 薬師峠 ➩ Tarodaira-goya 太郎平小屋 ➩ Kurobegoro-dake 黒部五郎岳 ➩ Kurobegoro-goya 黒部五郎小屋 (tent 2,000 yen advanced reservation required at peak times) (lunch served from 11:00-15:00) (water available) 7hrs / 13.6km
https://www.sugorokugoya.com/tent-field/
Day 6: Kurobegoro-goya 黒部五郎小舎 ➩ Mitsumatarenge-dake 三俣蓮華岳 ➩ Wasabidaira sanso わさび平山荘 (tent 2,000 yen) (water available) 8hrs 30mins / 15.6km https://www.sugorokugoya.com/wasabi/
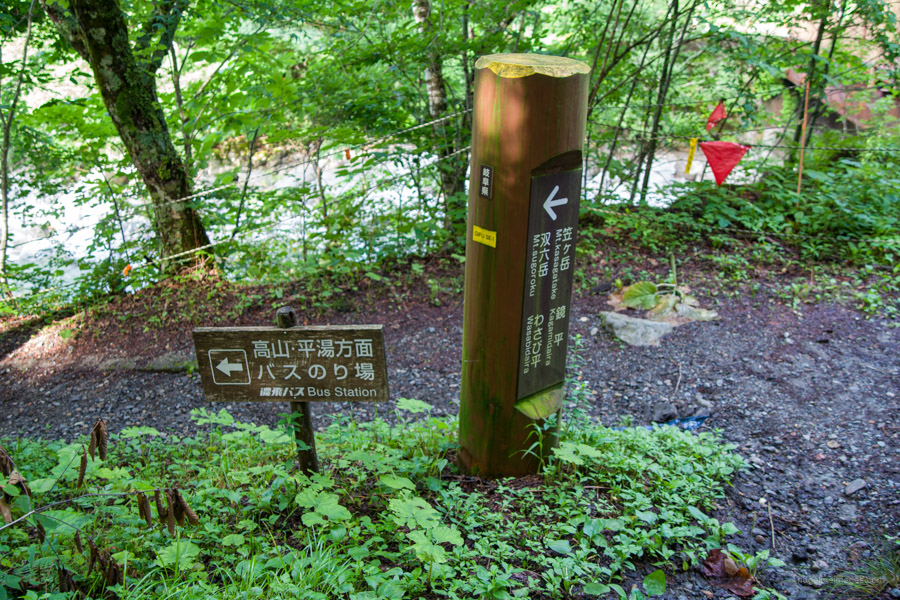
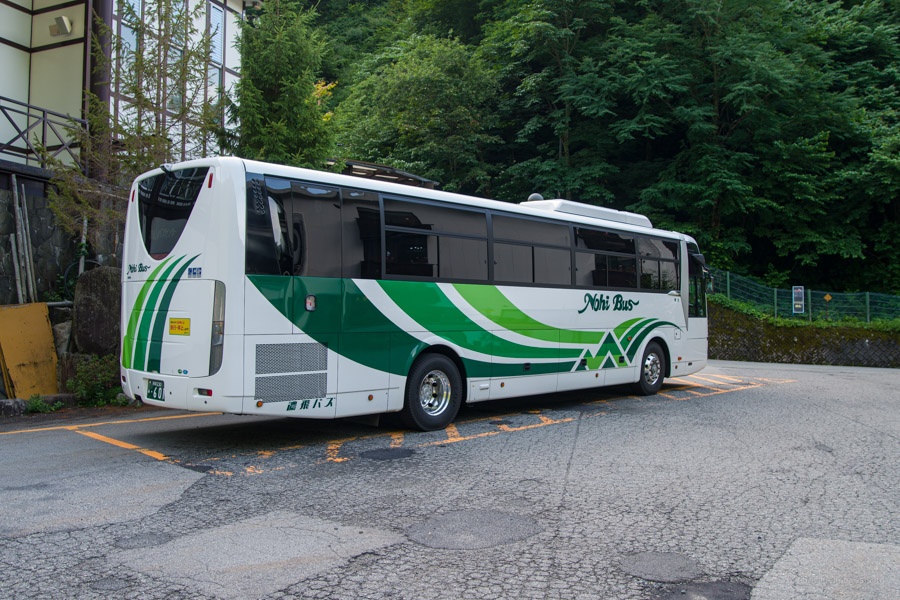
Day 7: Wasabidaira sanso わさび平山荘 ➩ Shin-Hotaka Ropeway 新穂高ロープウェイ 1hr / 4.5km
https://www.nouhibus.co.jp/route_bus/shinhotaka-line-en/
When to Go
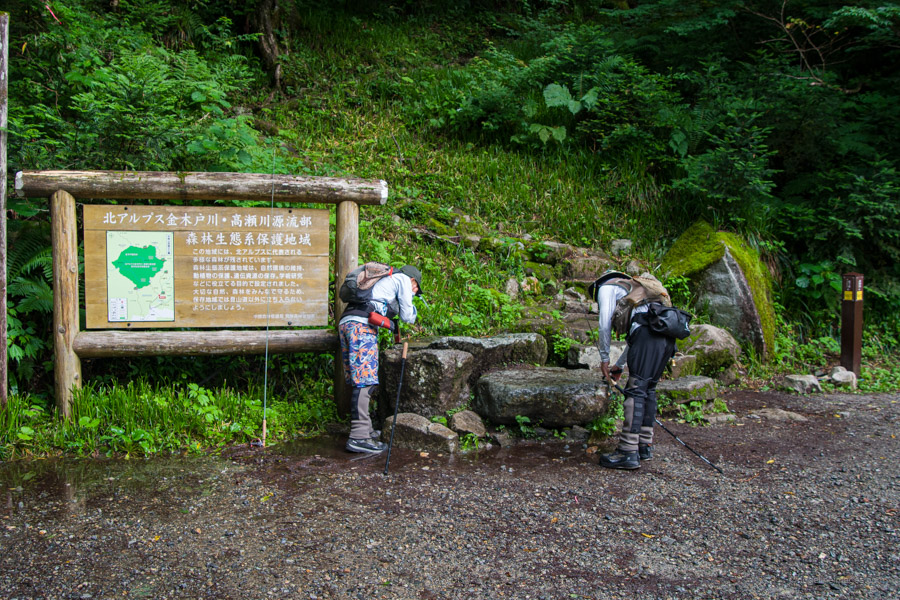
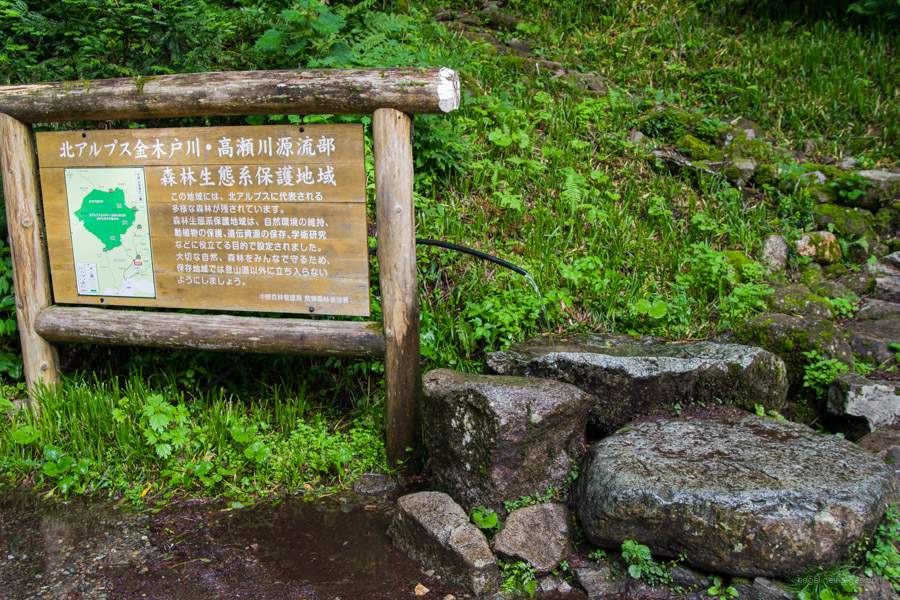
The best time to do this hike is from mid-July (or as soon as the rainy season ends) until early-October, while most mountain huts remain open. Note that some huts, like Sugo-no-koshi-goya, close in late September. From late-October onward, snow is likely in many areas, especially around Murodo. If you hike before mid-July, pack light crampons for the three snowfield crossings beyond Oni-dake on the first day.
Can it be Done in Fewer Days?
In short, yes, it can be done. The Cicerone guidebook suggests a five-day itinerary, although most people would benefit from breaking up day 2. My original plan was to complete the full traverse from Murodo to Kamikochi in seven days, but due to inclement weather, I decided to skip the climb to Yarigatake and finish instead at the Shin-Hotaka Ropeway. I also added a rest day and stayed at a campsite near the Shin-Hotaka Ropeway on the final night, which could otherwise be eliminated to return to Tokyo the same day.
Access
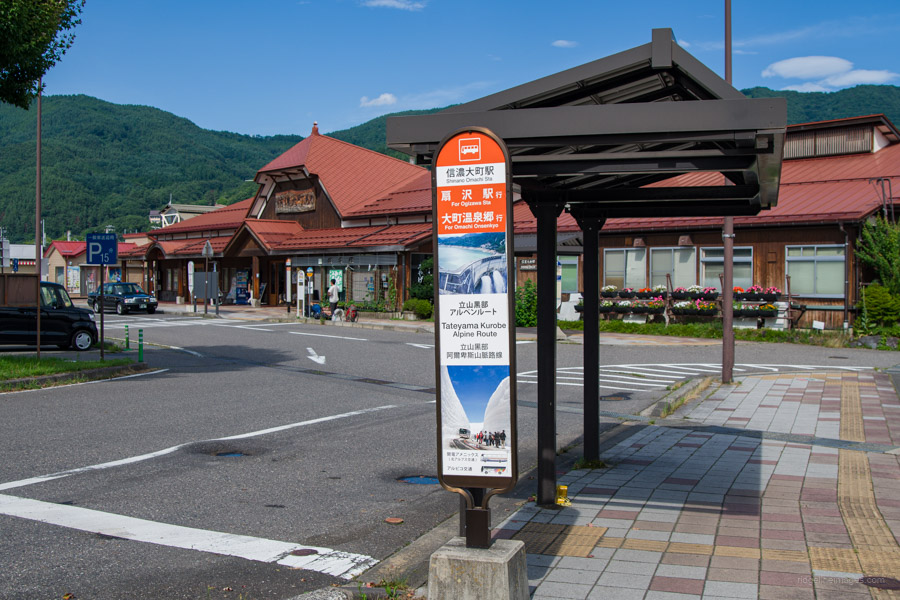
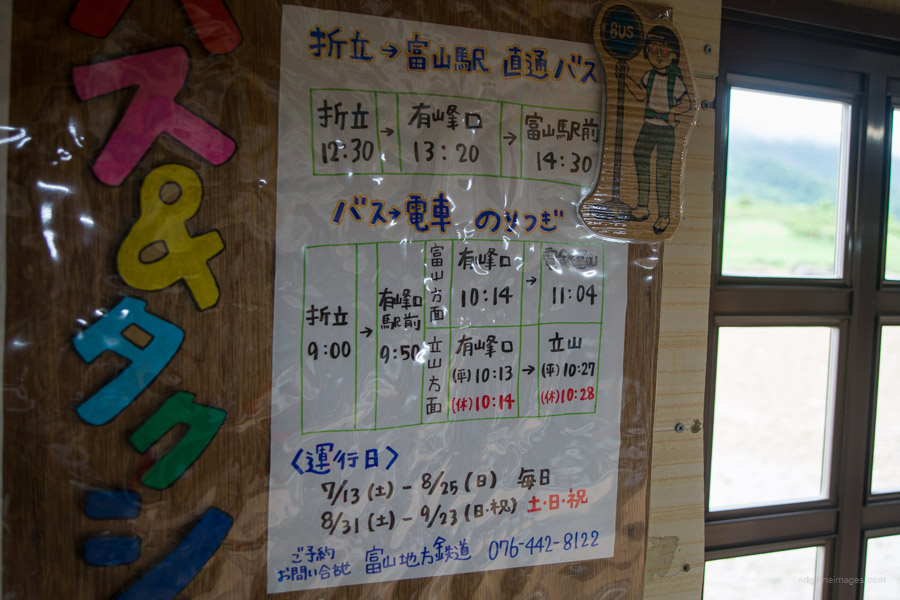
There are a number of ways to get to Murodo 室堂 , the starting point of the hike. From Tokyo, a common route is to take the JR Azusa limited express from Shinjuku Station to Matsumoto (2.5 hours) and then transfer to the JR Oito Line to Shinano-Omachi Station (1 hour). However, this option has a downside: the earliest arrival time at Murodo is 2:30 pm, which is too late to complete the first day’s hiking. A better approach is to arrive in Shinano-Omachi the previous evening, find a cheap hotel for the night, and aim to catch the 7:10 am bus the next morning, which will have you at Murodo around 10:00 am.
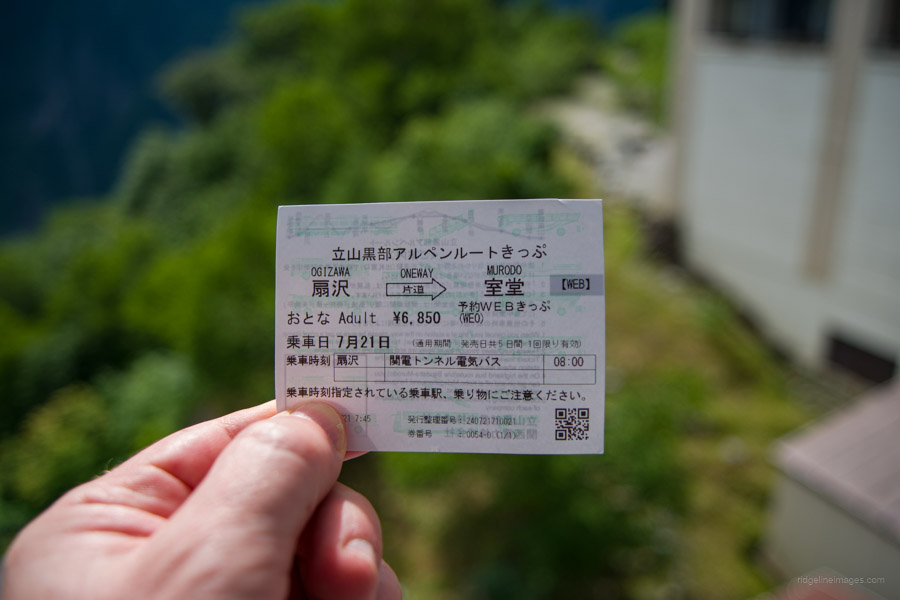
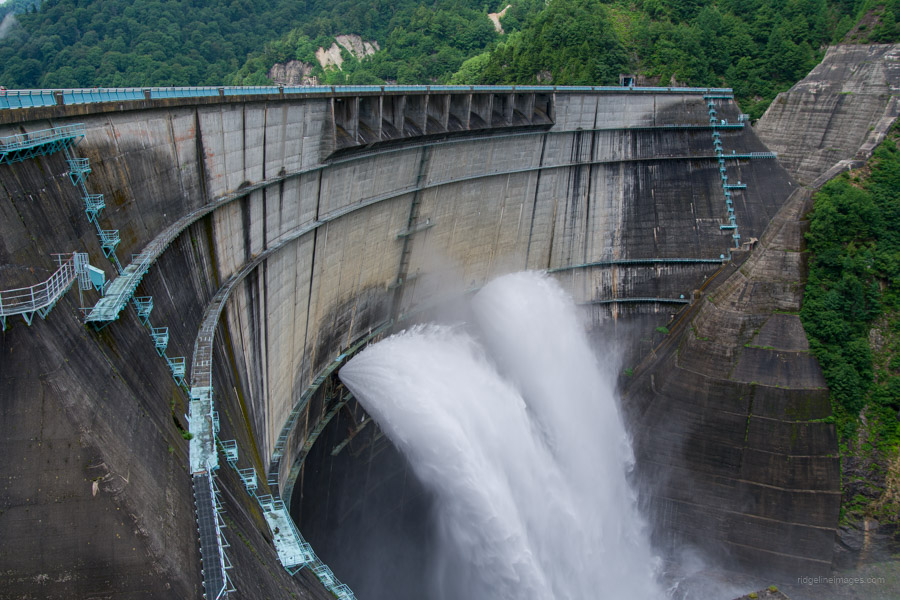
From Shinano-Omachi, take a bus to Ogizawa 扇沢 (40 minutes, 1,650 yen). Tickets can be purchased at a small booth next to the bus stop. At Ogizawa, queue up at the ticket office and buy a return ticket for the Tateyama Kurobe Alpine Route 立山黒部アルペンルート from Ogizawa to Murodo (6,850 yen one-way). To make life easier, purchase the Tateyama Kurobe Alpine Route WEB Ticket online in advance. At Ogizawa, take a trolley bus to the Kurobe Dam 黒部ダム (16 minutes, 1,800 yen) and walk across the top of the dam wall. This is followed by a cable car from the Kurobe Dam to Kurobedaira 黒部平 (5 minutes, 1,150 yen). From here, take the Tateyama Ropeway from Kurobedaira to Daikanbo 大観峰 (7 minutes, 1,700 yen), and finally, a trolley bus from Daikanbo to Murodo (10 minutes, 2,200 yen).
For the return journey from the Shin-Hotaka Ropeway bus stop 新穂高ロープウェイ, first take a bus to Hirayu Onsen 平湯温泉 (30 minutes, 910 yen). If you are travelling to Matsumoto (2.5 hours, 2,800 yen), you will need to either have booked a ticket in advance or line up and hope to buy one at the ticket office. As a point of reference, there were only two tickets left for the first Saturday morning bus when I travelled. If, instead, you are headed to Tateyama, consider yourself lucky, as you can simply jump onto a connecting bus.
Huts, Campsites and Costs
Camping meant the costs were kept to a minimum. Post-COVID, however, most huts have doubled their campsite fees and are now charging 2,000 yen a night. Needless to say, if you plan to stay in huts, it will be significantly more expensive, as the huts have also increased the cost of accommodation, with the average hovering around 14,000 yen per person per night, including dinner and breakfast, and 9,500 yen for sudomari 素泊まり (stay without meals). Here’s the cost breakdown (excluding getting to Shinano-Omachi Station and the first night’s accommodation):
• Transport to and from the trailheads: 8,500 yen (Shinano-Omachi to Murodo) plus 3,710 yen (Shin-Hotaka Ropeway to Matsumoto)
• Campsite fees: 10,500 yen
• Miscellaneous: Water, toilet, drinks, and snacks, approx. 4,000 yen
Total: 26,710 yen vs. (staying in huts) 93,210 yen
Cut and Run
If, for any reason, I felt I couldn’t continue with the hike, it was necessary to figure out where to cut and run. For this hike, I identified two such locations. The first was on day three near Tarodaira-goya, where there are daily buses from Oritate to Toyama and to Arimineguchi Station on the Tateyama Line. On day six (as was done on this hike), descending off the ridgeline down to the Shin-Hotaka Ropeway provided another exit point.
Food and Gear
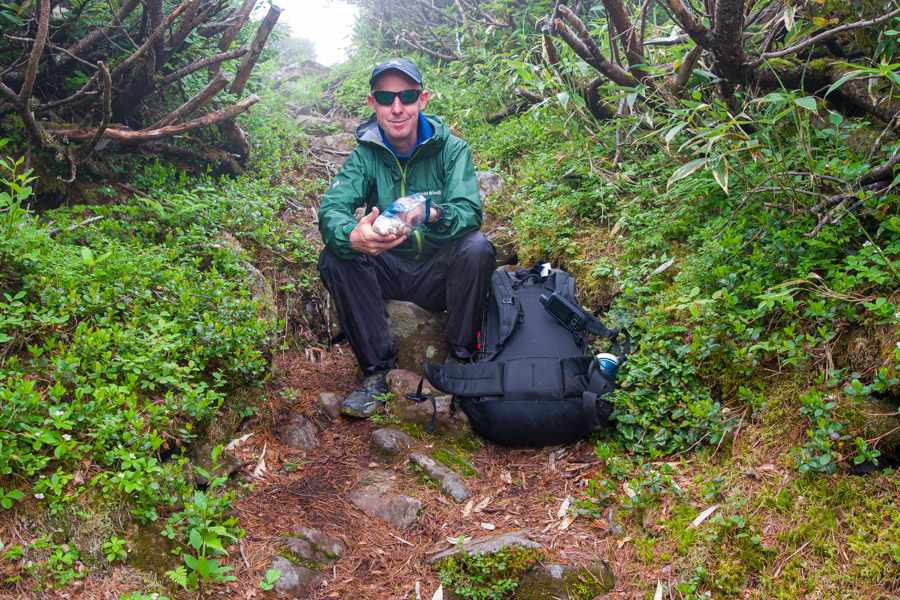
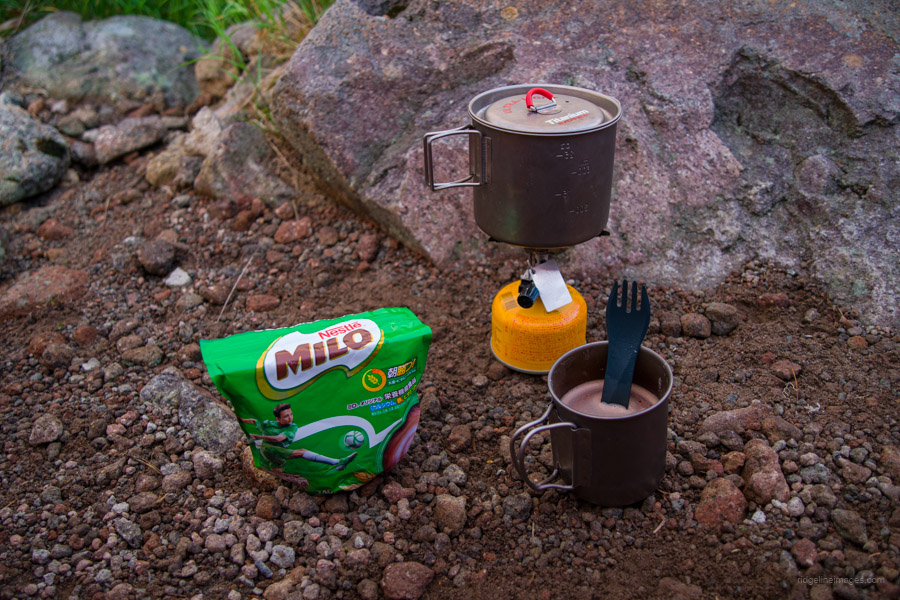
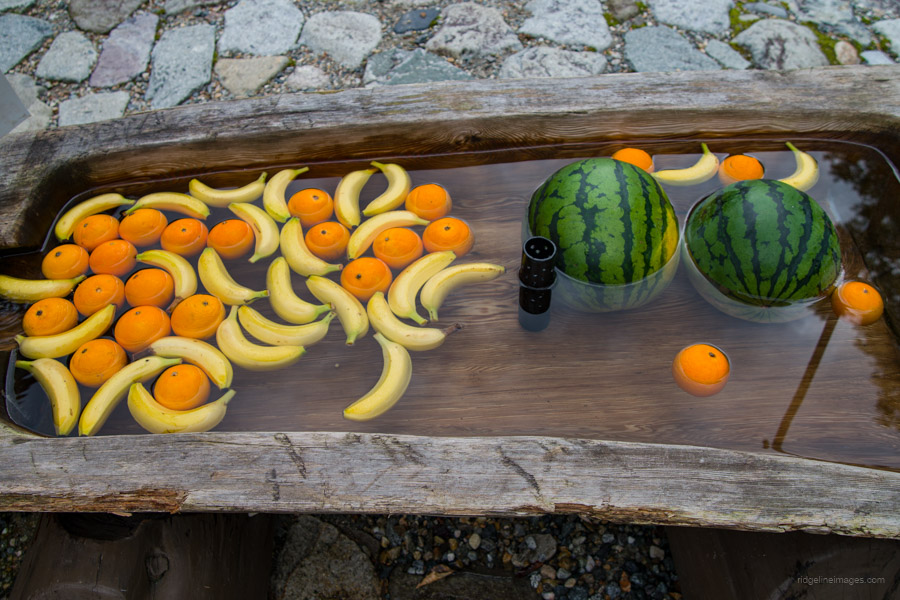
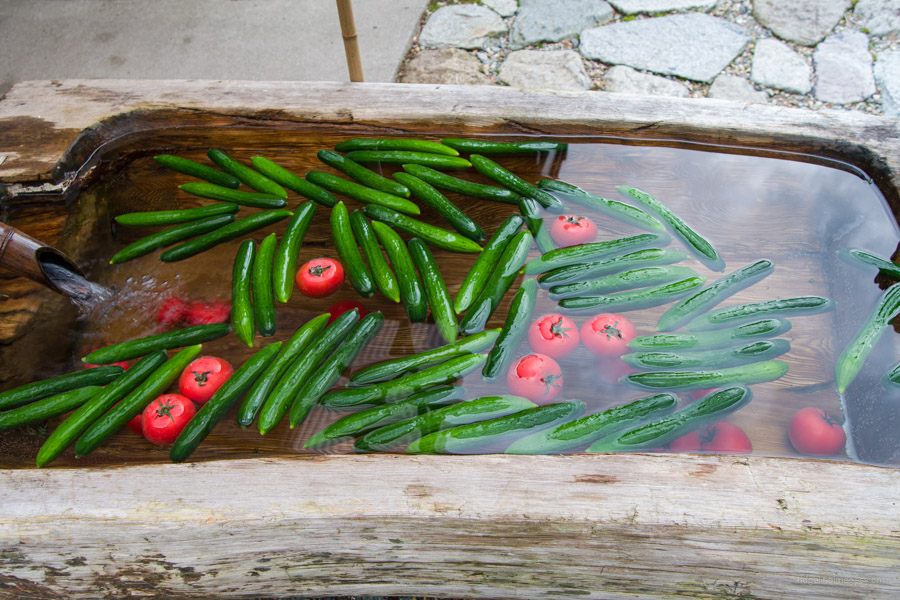
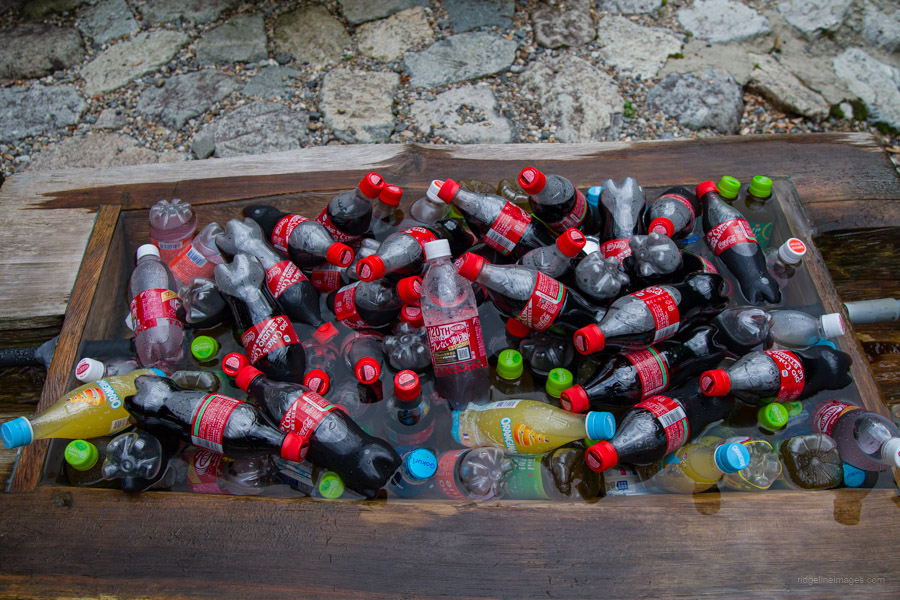
As with any multi-day hike, it’s essential to balance bringing the necessary gear and comfort items that, while increasing weight, enhance safety and the overall experience. If hiking during the shoulder seasons, pack sufficient warm clothing as temperatures can drop to near freezing overnight. My gear and food were similar to what I carried on the Southern Alps Traverse. Mountain huts along the traverse only serve meals to paying guests, though most sell basic snacks like instant noodles. Lunchtime meals like ramen, udon, or curry rice are often available for around 1,200 yen. My pack, including food, weighed just over 13 kg. Adding water made it moderately heavy, especially initially.
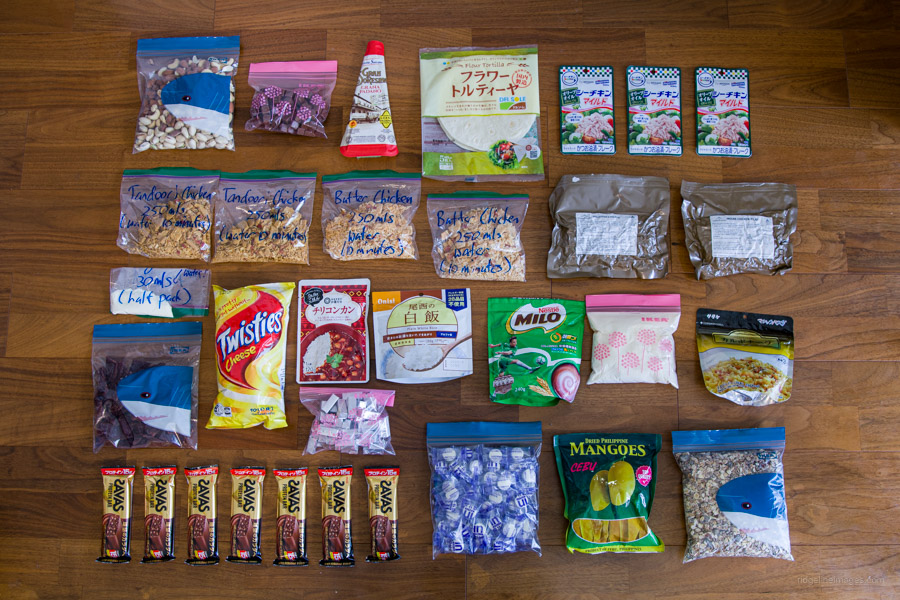
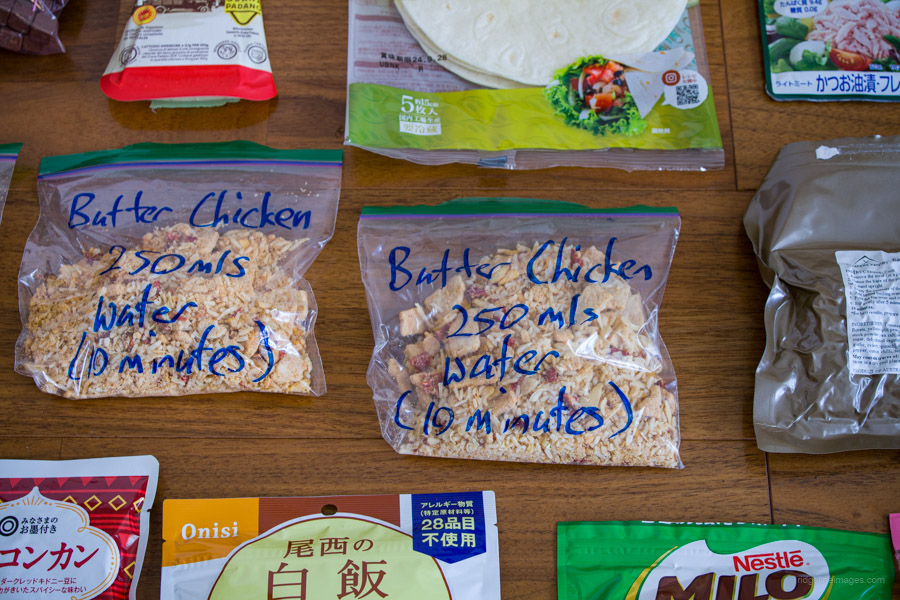 Food carried on the Northern Alps Traverse.
Northern Alps Traverse
Day 1: Murodo to Goshiki-ga-hara sanso
Day 2: Goshiki-ga-hara sanso to Sugo-no-koshi-goya
Day 3: Sugo-no-koshi-goya to Yakushi-toge
Day 4: Inclement weather (rest day)
Day 5: Yakushi-toge to Kurobegoro-goya
Day 6: Kurobegoro-goya to Wasabidaira sanso
Day 7: Wasabidaira sanso to Shin-Hotaka Ropeway
Day 1: Murodo 室堂 to Goshiki-ga-hara sanso 五色ヶ原山荘
6hr 7.5 km 657 m 672 m Jul 21, 2024
Route:
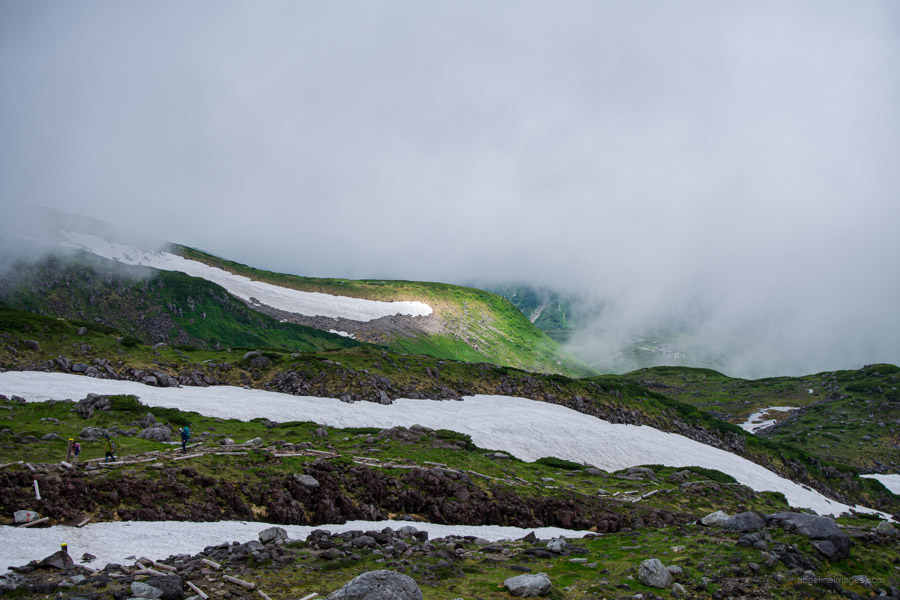
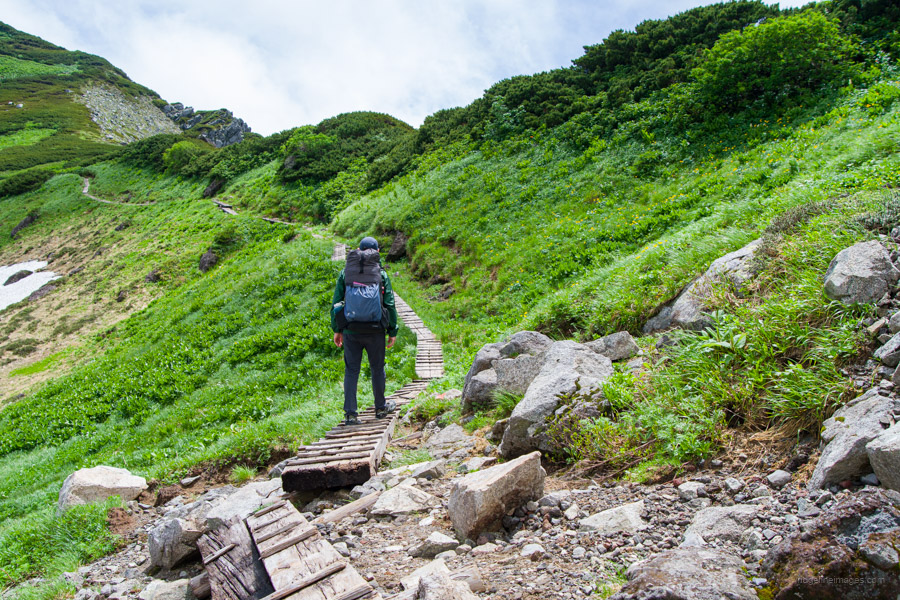
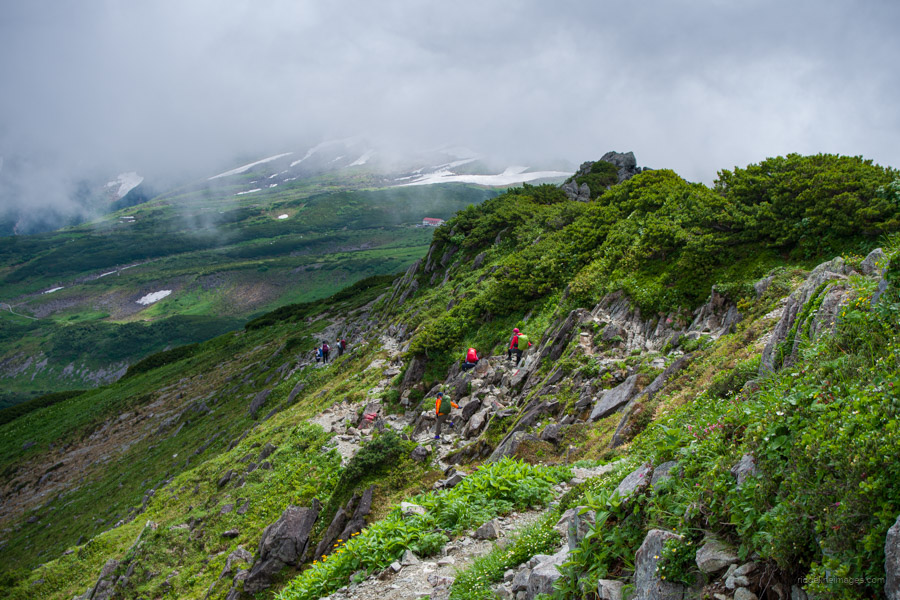
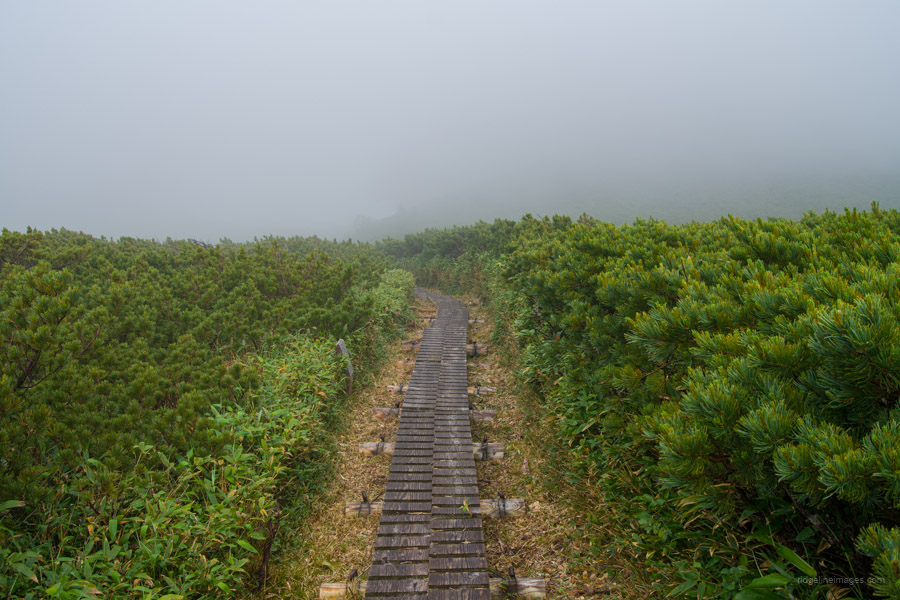
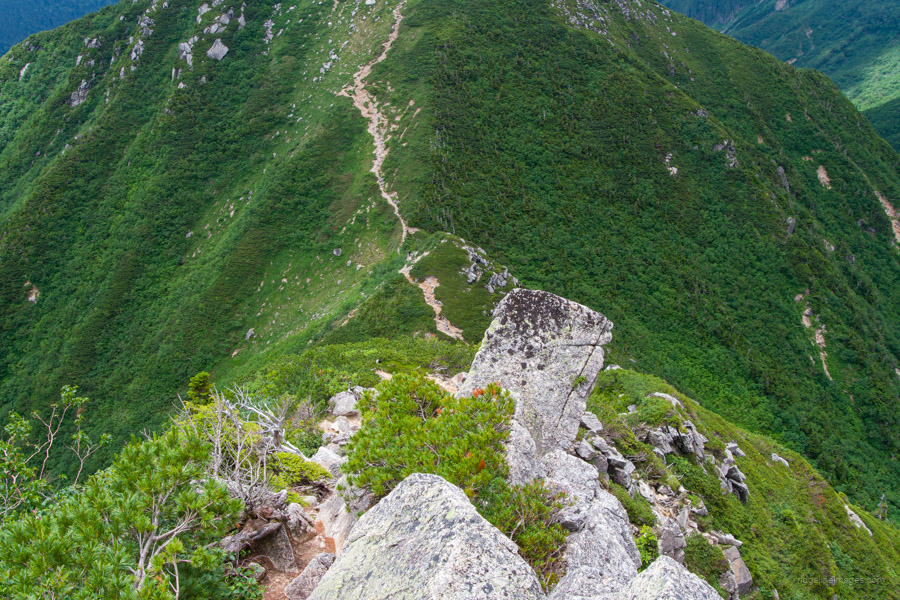
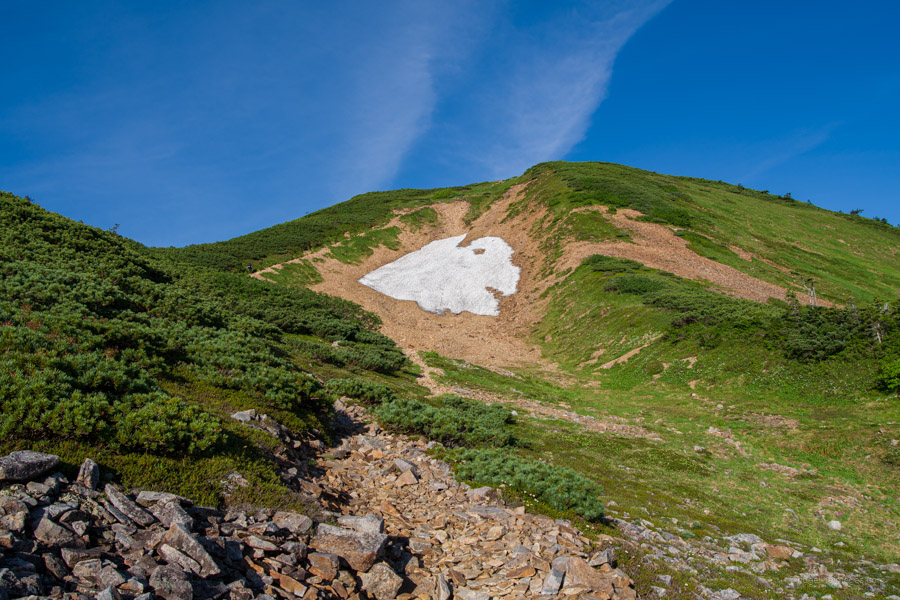
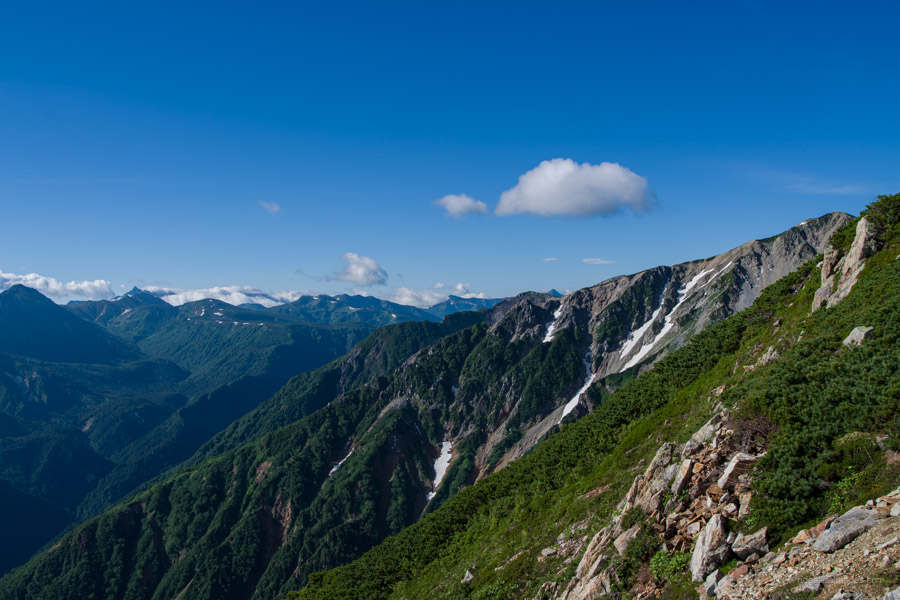
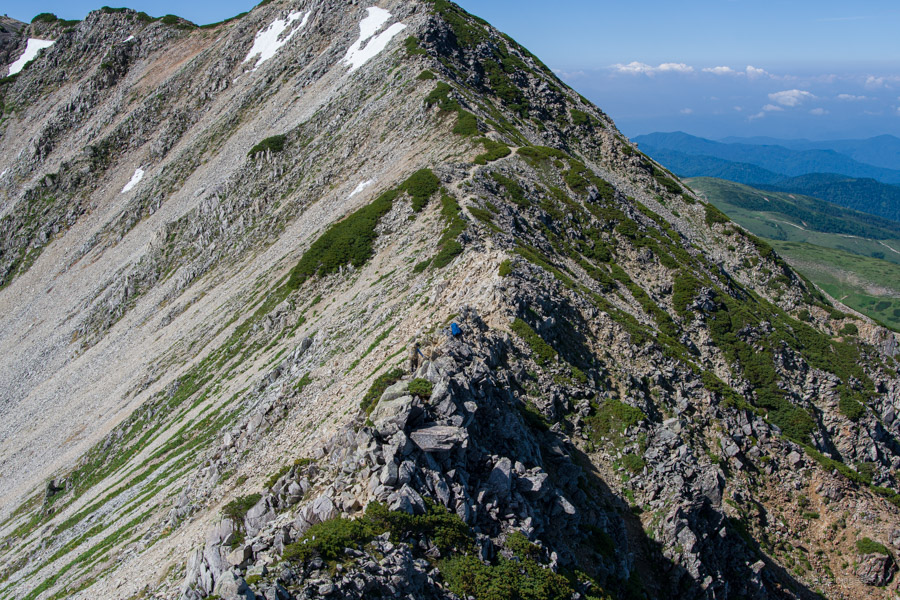
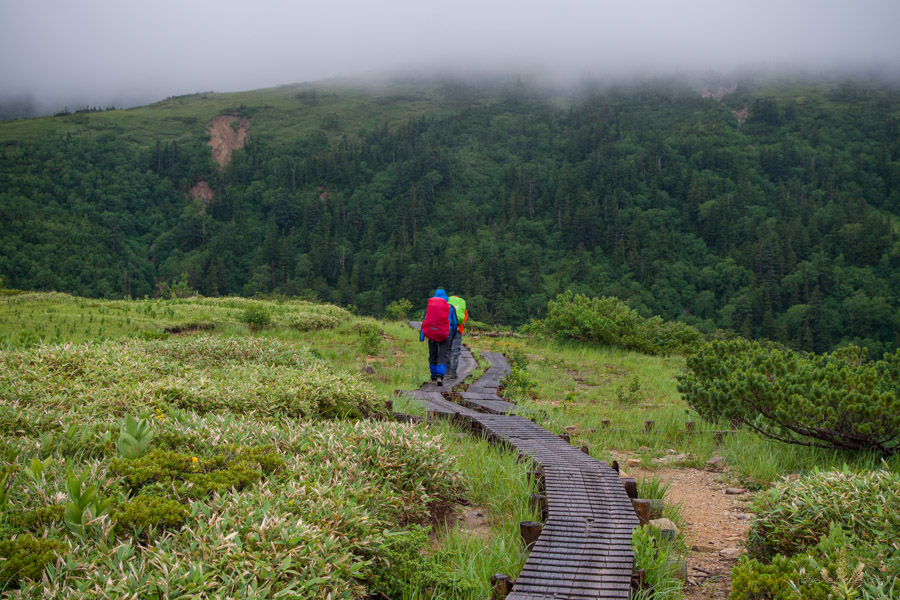
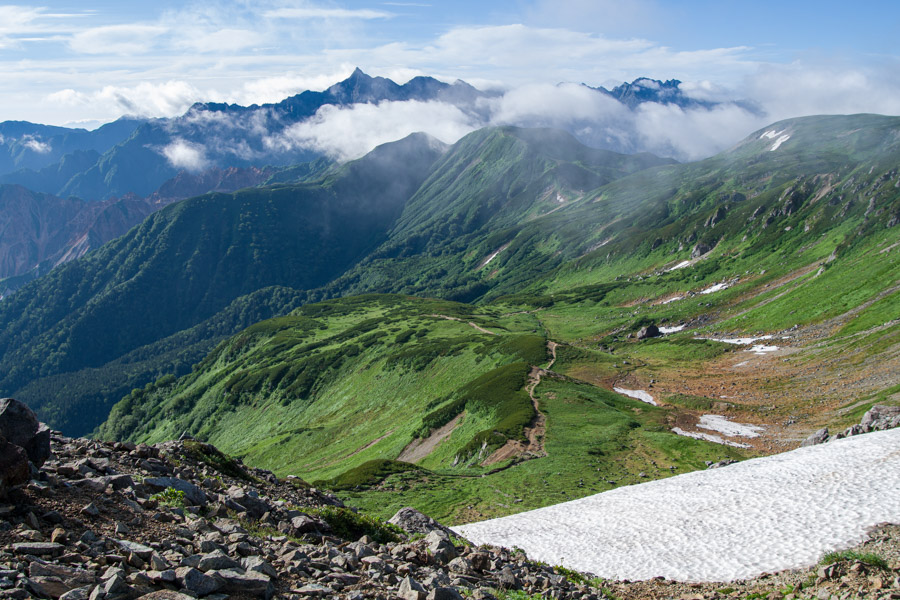
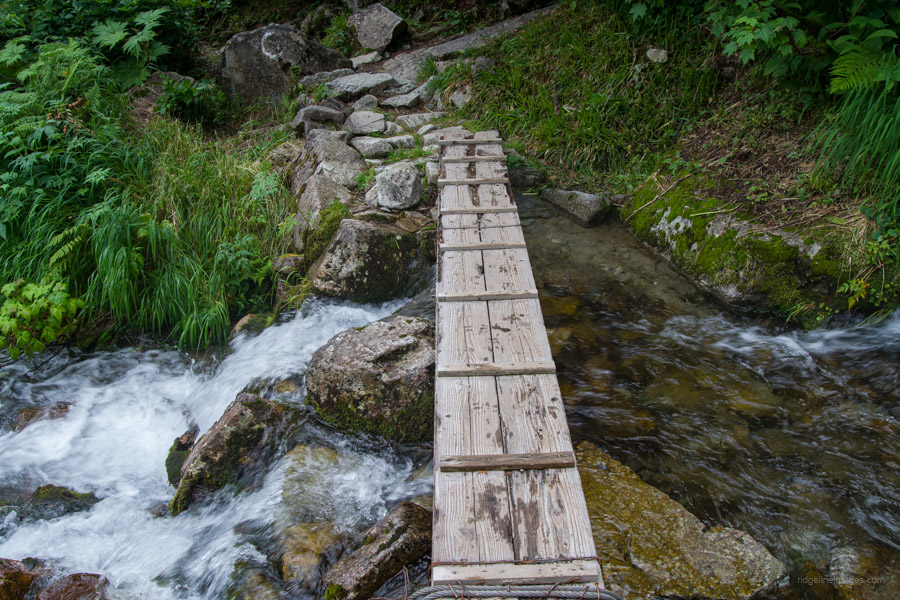
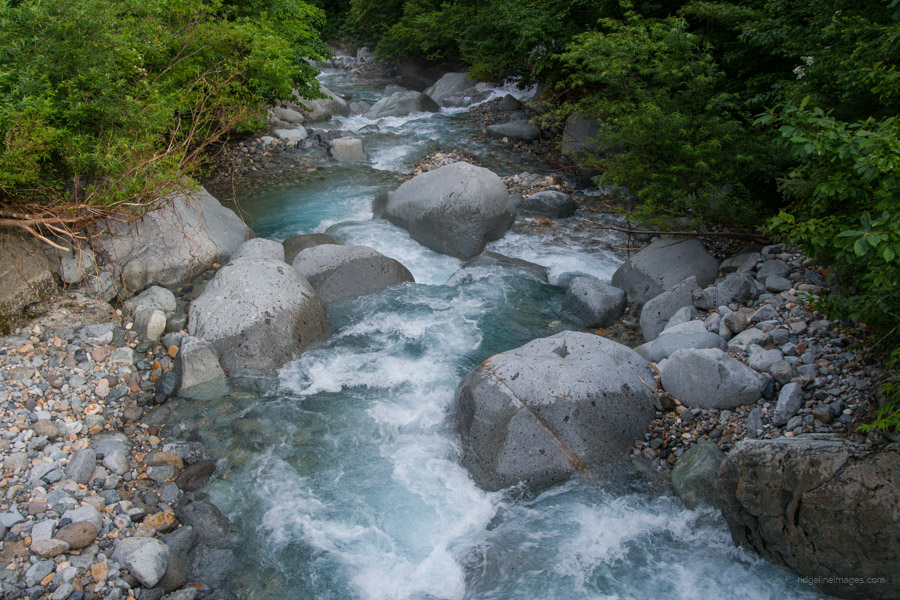
Leaving Murodo, the hike begins at a leisurely pace on a well-worn stone path. The trail gradually steepens and becomes rougher as you approach Jodo-san. After passing Oni-dake, you’ll encounter three short snowfield crossings. The day concludes with a walk on a boardwalk leading to Goshiki-ga-hara sanso and its nearby campsite.
Diary:
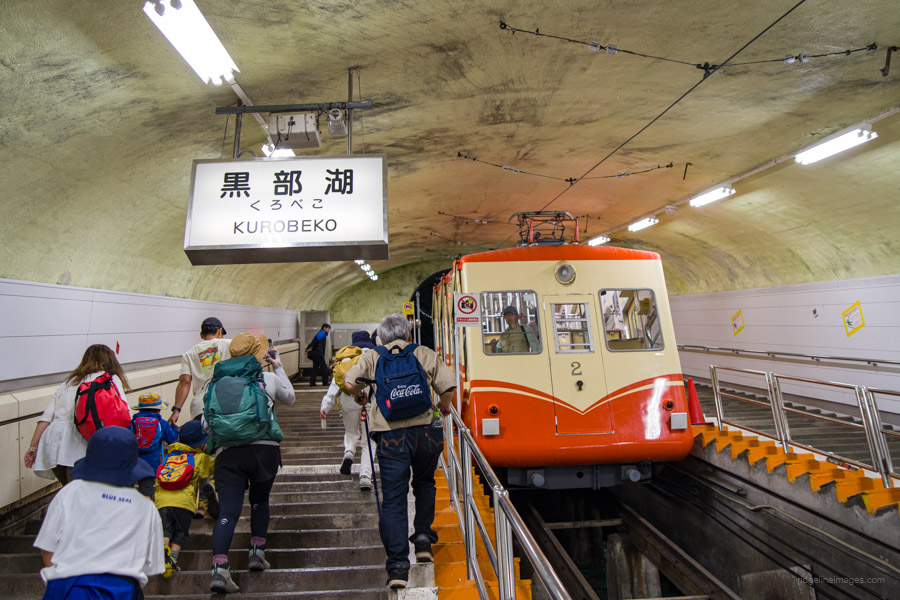
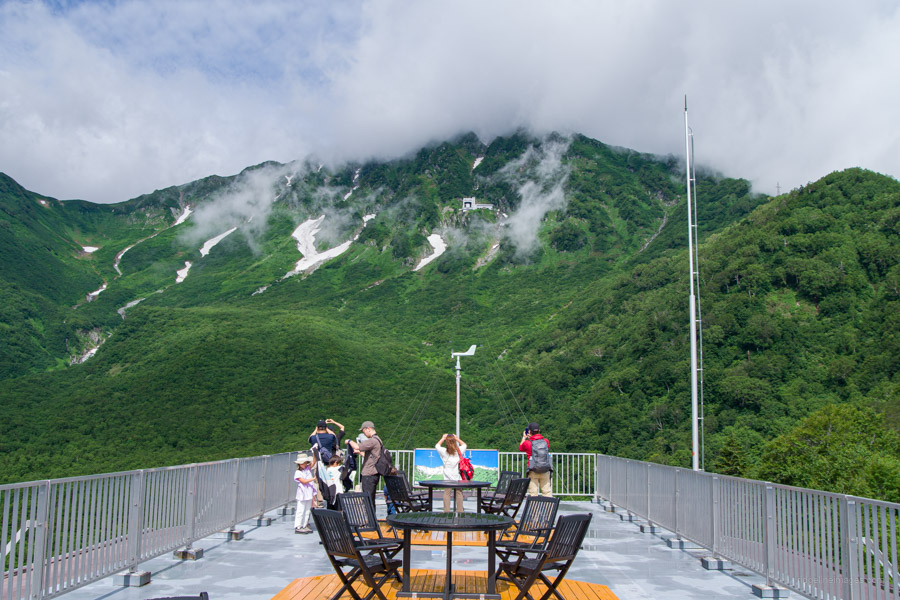
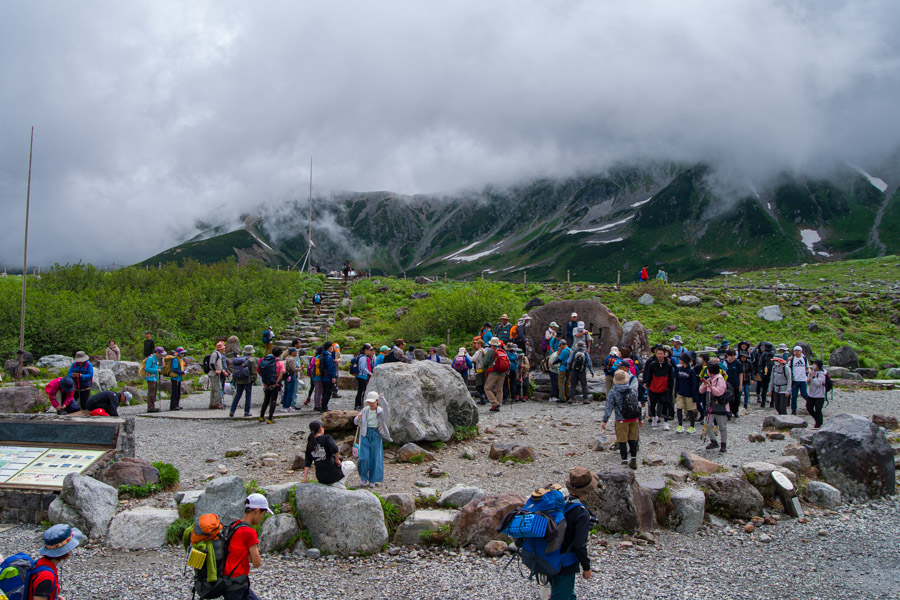
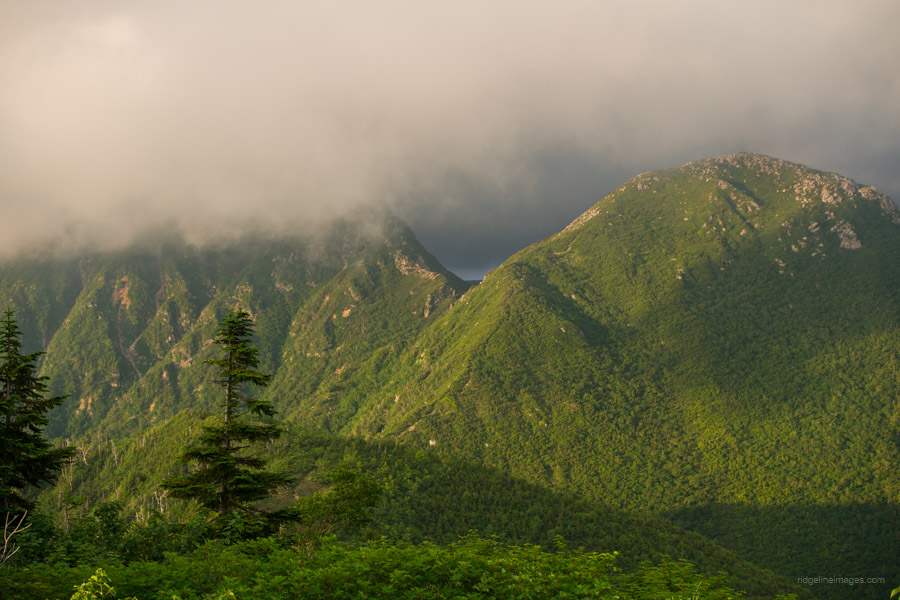
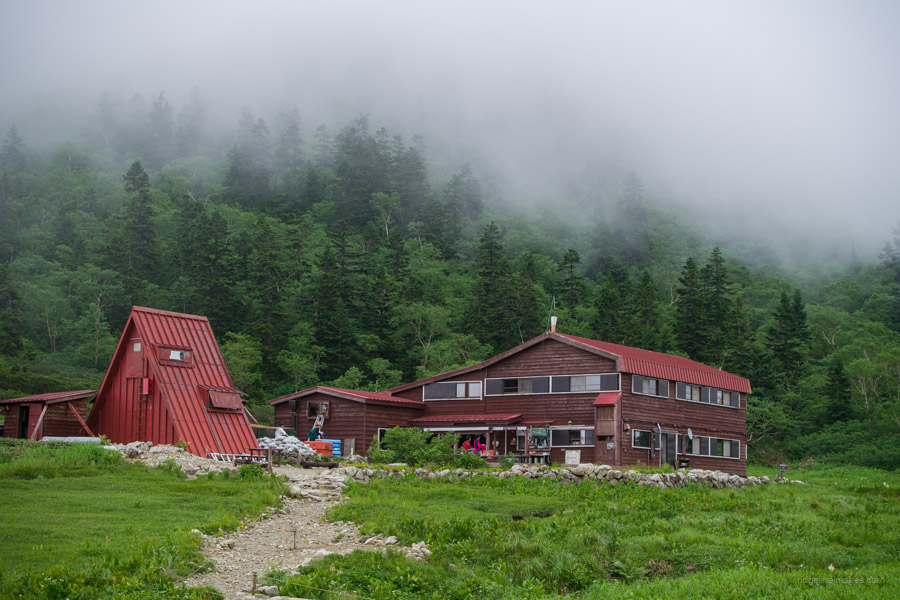
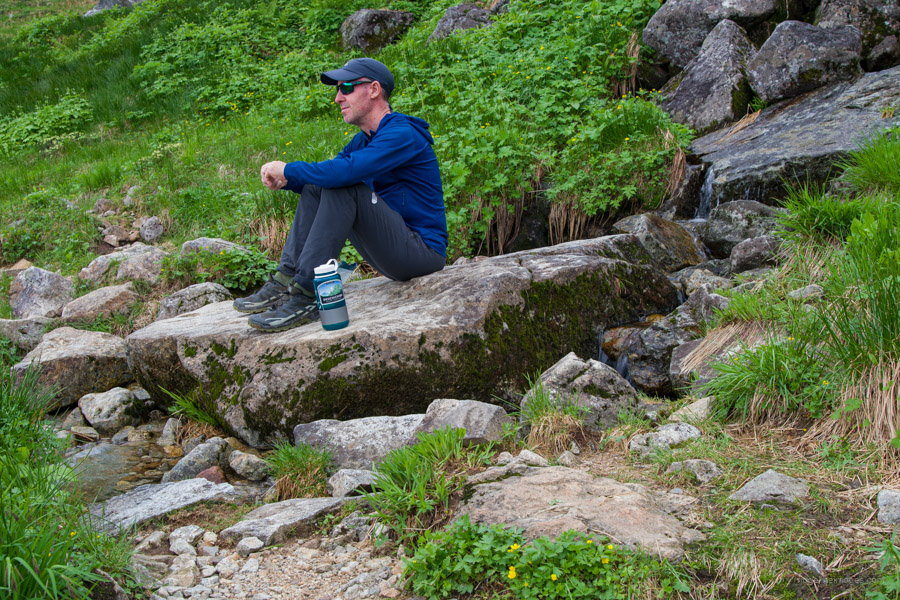
After weeks of preparation and planning, I finally arrived at Murodo, the bustling tourist complex nestled beneath Tateyama’s watchful gaze. Starting my hike at a lofty 2,400 metres felt like cheating, a stark contrast to my usual aversion to easy routes – ropeways and cable cars have never been my companions. A full day’s journey from Tokyo had brought me to this high-altitude starting point, and despite the off-peak season and less-than-ideal weather, the energy was palpable. Seasoned hikers and casual tourists alike mingled, all drawn to the promise of the plateau’s renowned vistas.
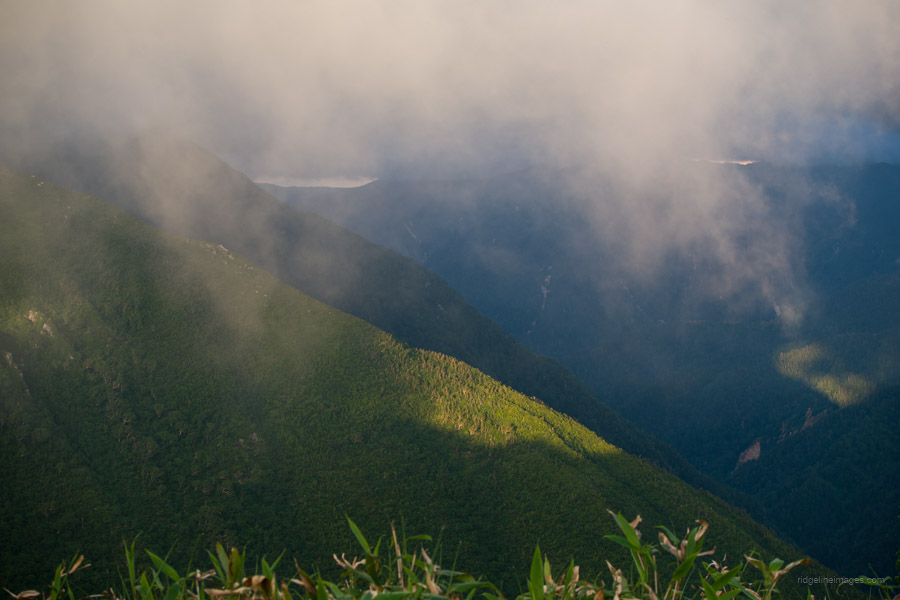
Thankfully, the crowds thinned as the path grew steeper and more rugged, disappearing into the clouds. It was alarming to see so many people in casual attire tackling Jodo-san’s rocky terrain. The persistent mist was a disappointment, but not entirely unexpected. The week leading up to the hike had been a blur of misty live camera feeds from Tateyama-Murodo; it seemed to be a permanent fixture there.
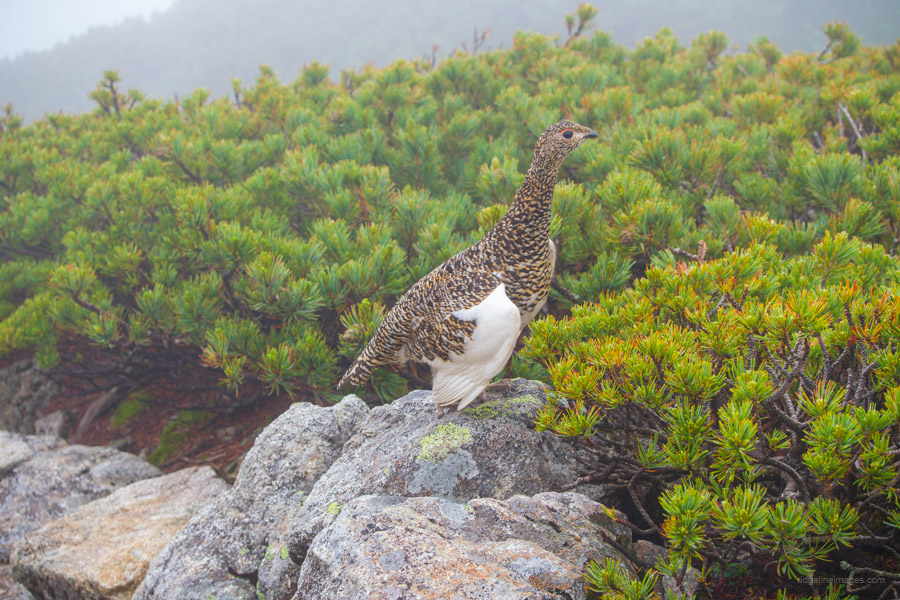
Just past Ichinokoshi 一ノ越, I stumbled upon a group capturing photos of a Raicho family – Japanese Rock Ptarmigan. Early summer is prime spotting season, as they’re more active in poor weather; the name “thunder bird” certainly fits their reputation. Soon after, I found myself trailing another mother and her brood.
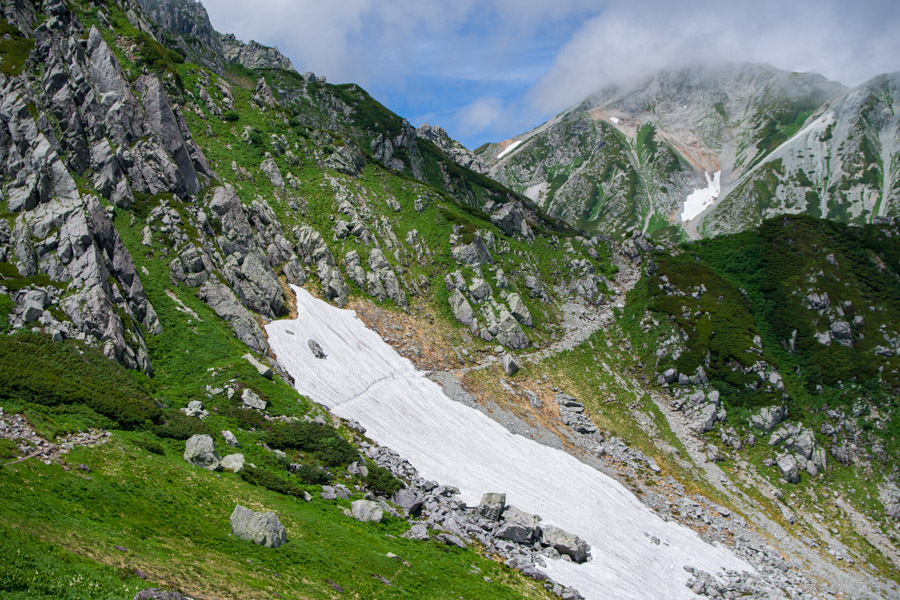
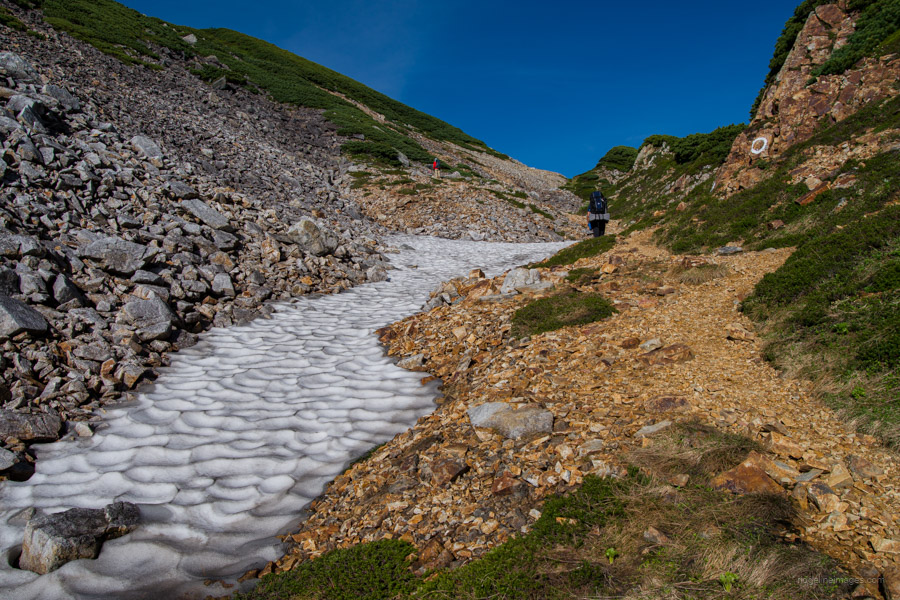
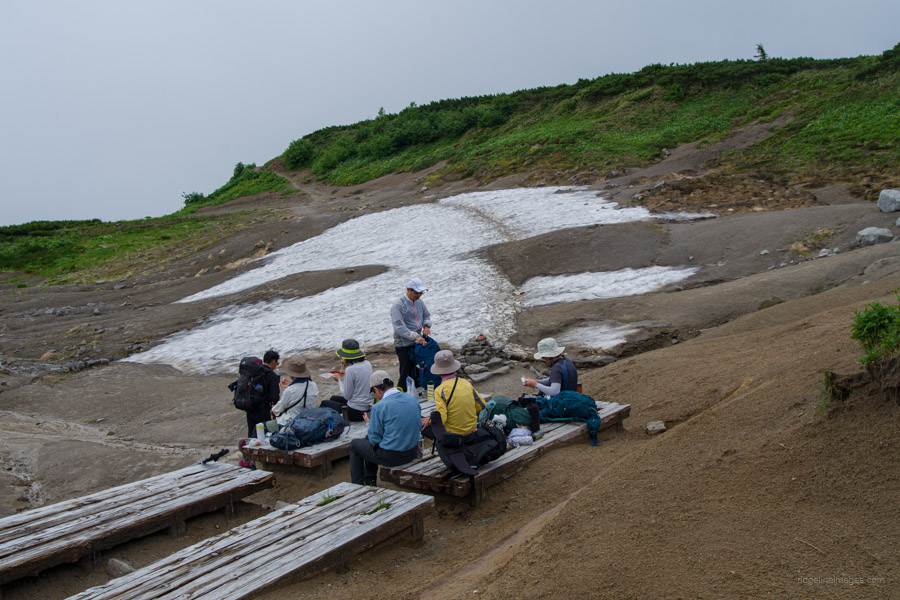
With lunchtime fast approaching, I was eager to tackle the three snowfield crossings beyond Oni-dake 鬼岳. The first was short, the second longer but manageable with the help of a rope, and the final one was the most demanding. The Goshiki-ga-hara sanso staff had thoughtfully carved steps into the snow, making it significantly easier. Snow lingers here until early September, so light crampons are recommended for hikes before mid-July. Like magic, after a leisurely lunch break, the sunrays finally pierced the fog, revealing the magnificent high mountain scenery.
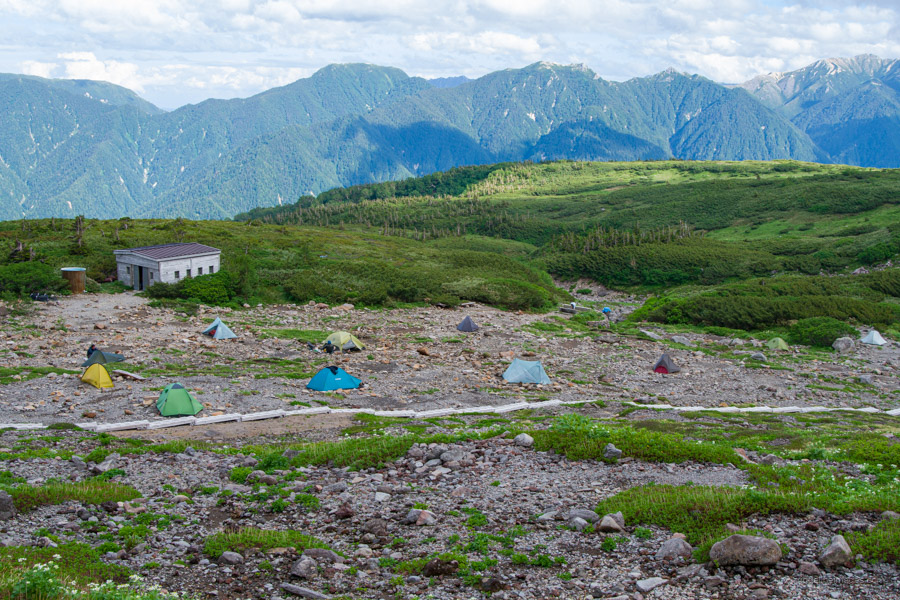
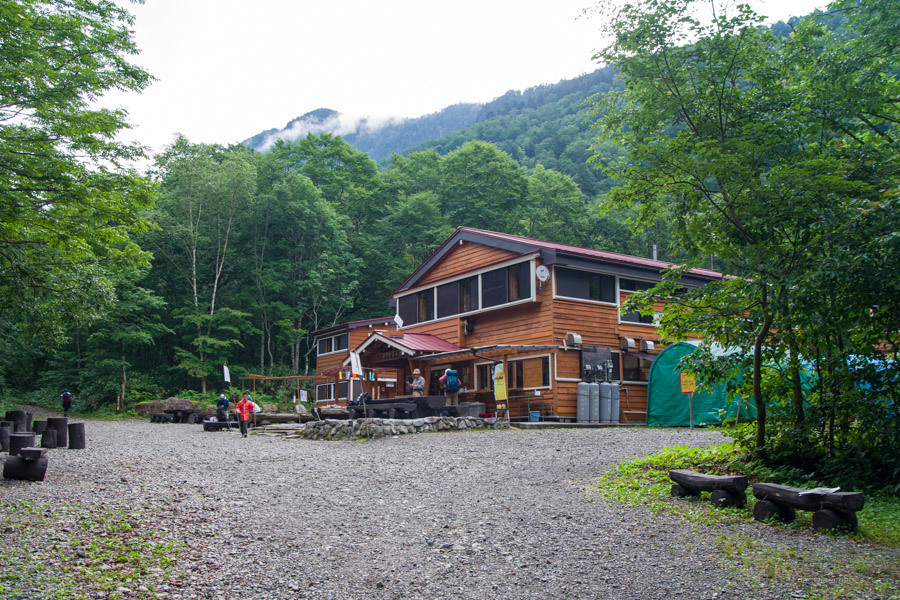
A steep, rocky path wound its way around the flank of an explosion crater and uphill to the day’s final destination: Goshiki-ga-hara sanso. This hut could best be described as utilitarian – a beige, shed-like structure lacking the typical charm of a mountain lodge. The campsite was also tucked away from prying eyes, a good 15-minute walk from the hut.
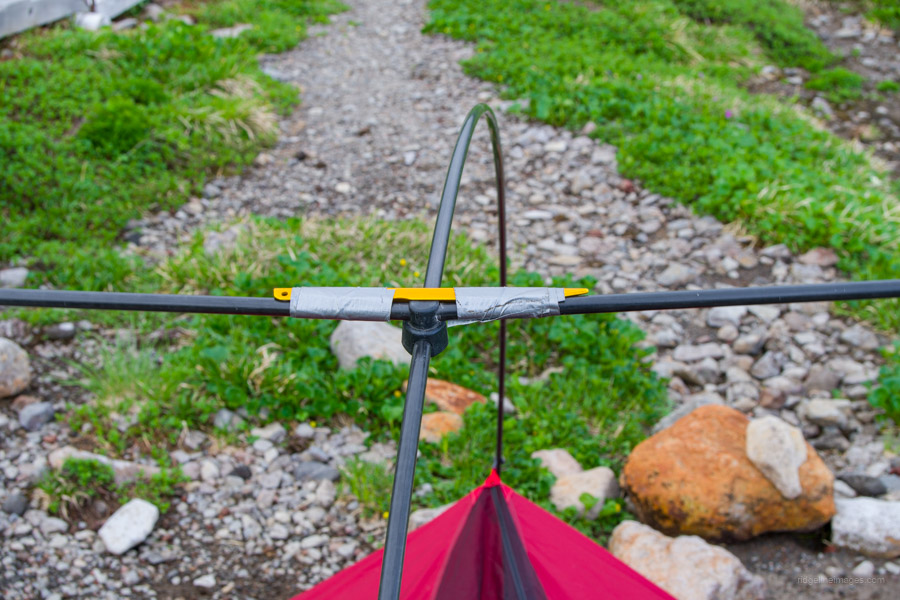
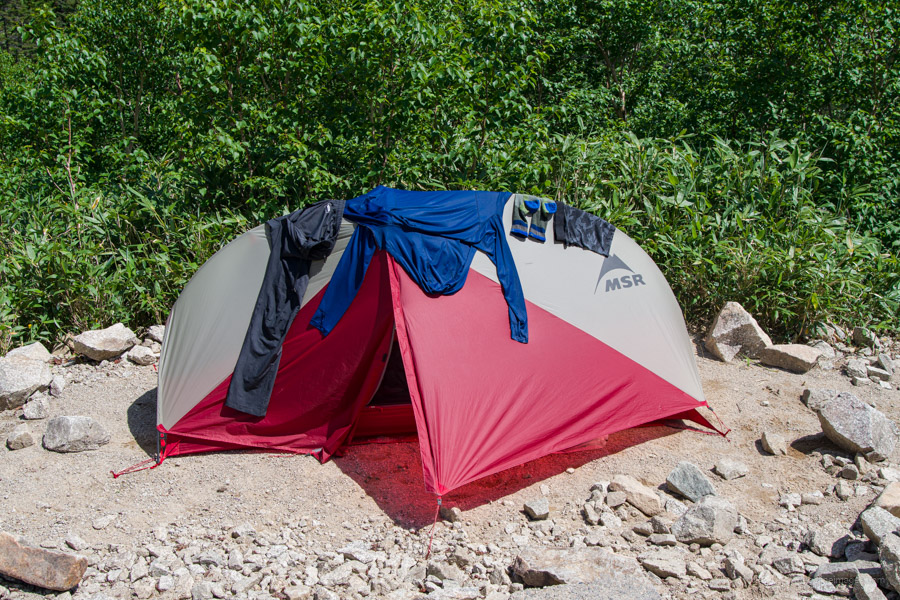
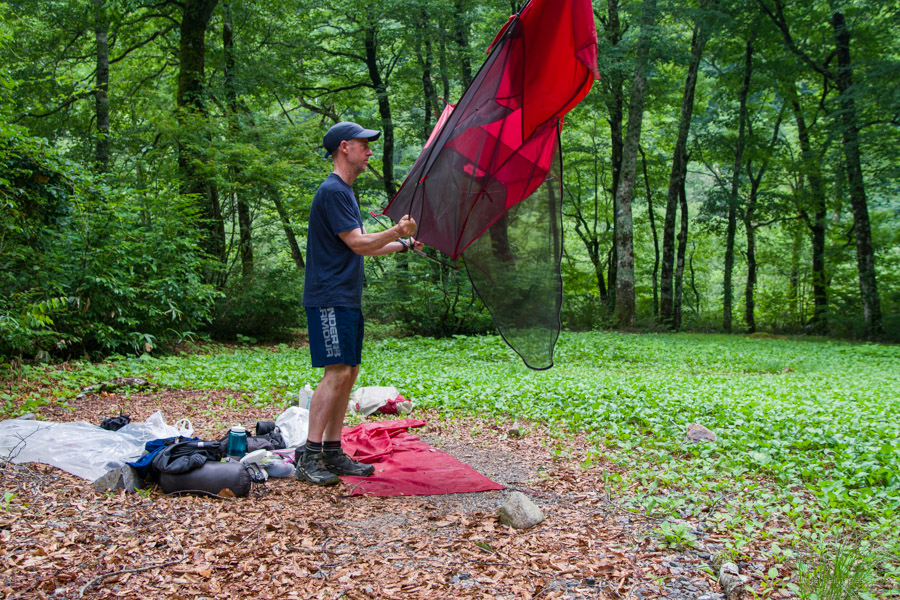
There, my evening’s ordeal began. My Easton Syclone tent poles proved to be the first challenge. A slipped metal insert had damaged the carbon fibre on the adjoining top support pole. With a tent peg and some duct tape, I managed a makeshift repair. But this was just the start of my tent-related troubles.
.

Day 2: Goshiki-ga-hara sanso 五色ヶ原山荘 to Sugo-no-koshi-goya スゴ乗越小屋
6hr 30 min 7.5 km 652 m 788 m Jul 22, 2024
Route:
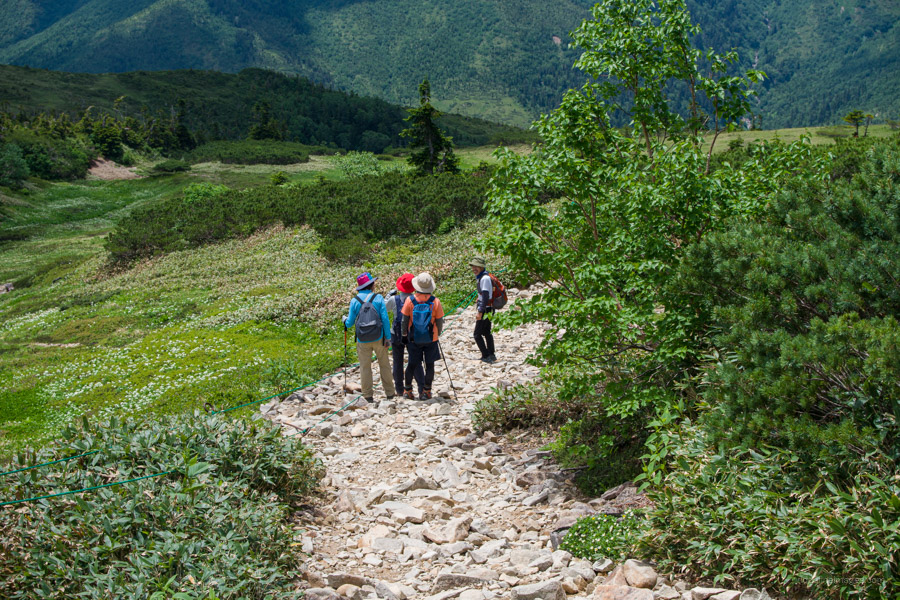
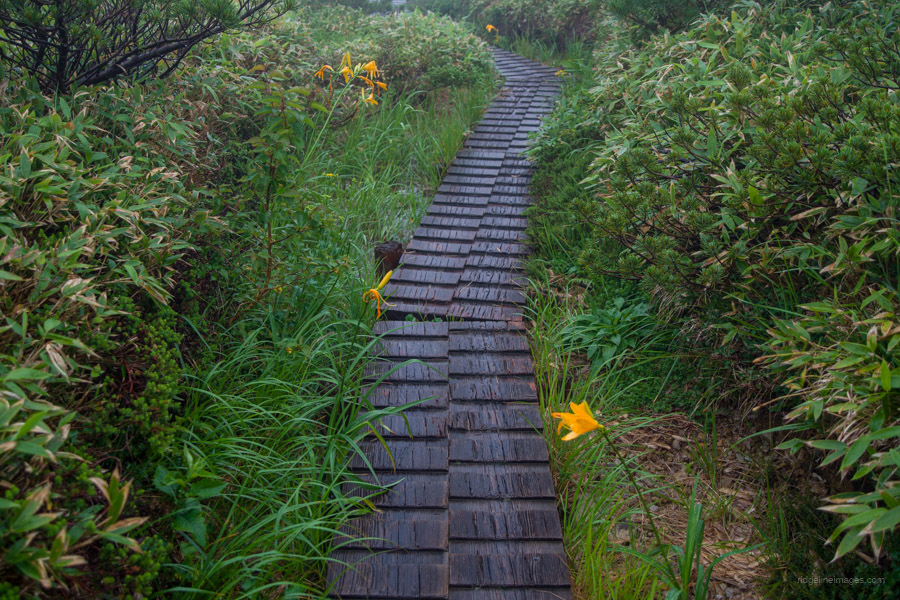
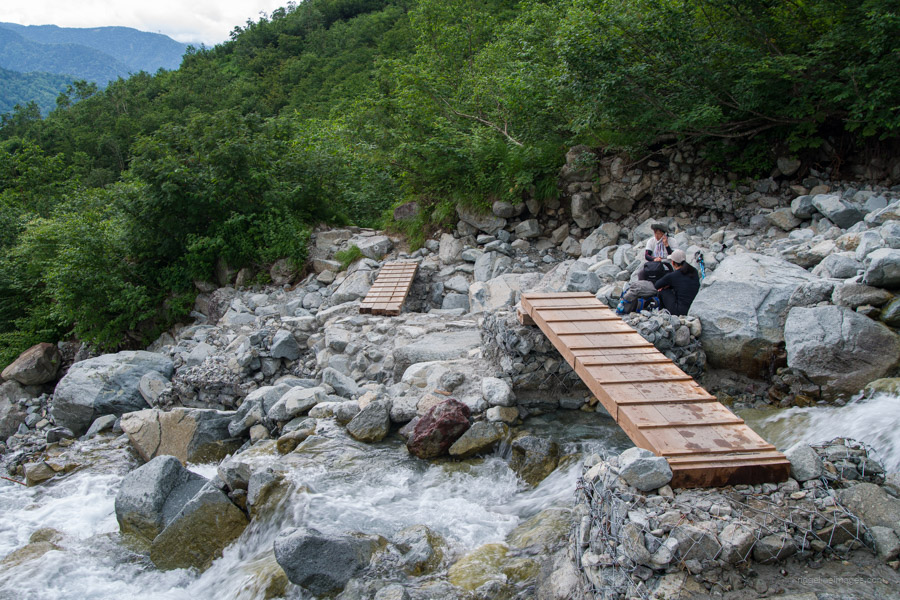
Although this section may appear short on the map, the terrain is steep and, at times, difficult to maintain traction underfoot. The day begins with boardwalks winding through alpine meadows filled with flowers, followed by several ups and downs. Since this part of the hike is quite remote, you’ll likely encounter far fewer hikers compared to the first day.
Diary:
The first sign of what was to come was some light rain accompanied by a gentle wind. Gradually, the wind intensified, and it became clear I was in for a rough night. At its peak, the tent frame nearly collapsed onto my face, and even at its calmest, it was too turbulent for sleep. Thankfully, my MacGyver-like solution of bracing the broken tent pole sections with a tent peg and duct tape held strong. Without it, I would have been in serious trouble.
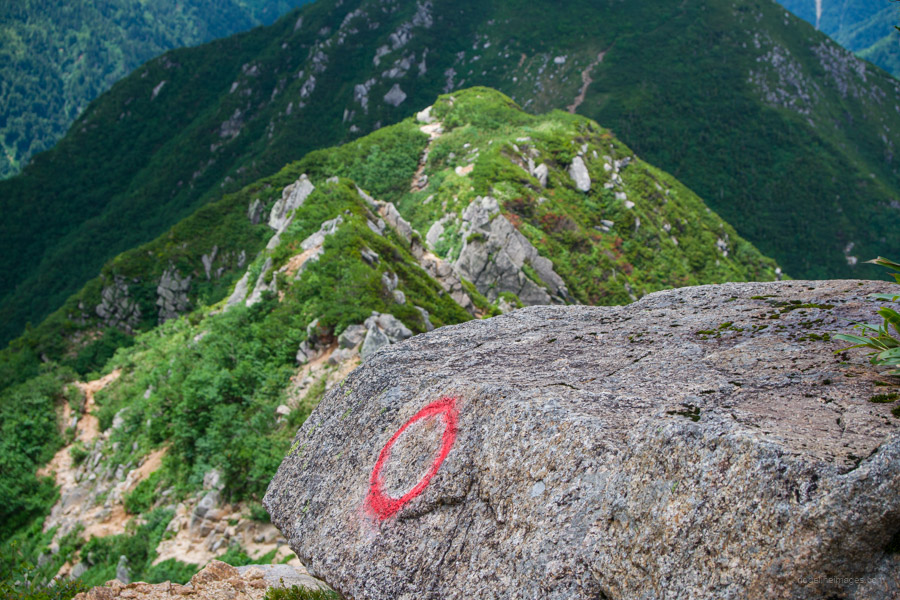
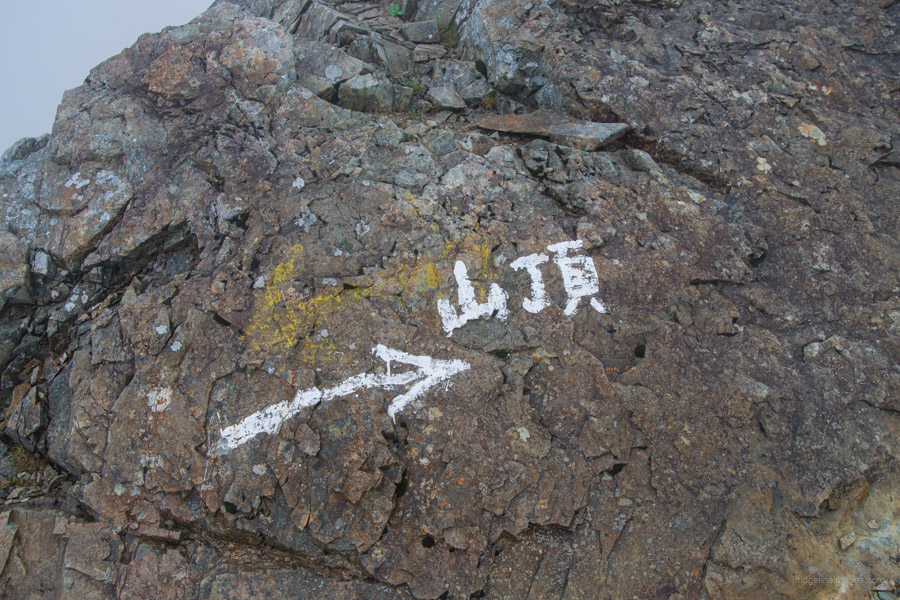
By the time morning arrived, I quickly tucked into my staple breakfast of muesli, powdered milk, and dried mango before hitting the trail. After carefully dismantling the tent – ensuring it wouldn’t fly away – and donning my weather gear, I ventured back into the mist. Following some boardwalks, which luckily incorporated anti-slip tread, I navigated a rocky escarpment. While the signage could be improved, the most helpful markers were the red and sometimes white painted circles and lines indicating the correct path, along with crosses marking the wrong way, which helped keep me on track.
Around mid-morning, the mist began to lift, and with it, my spirits rose as I was treated to a bird’s-eye view of the surrounding mountains. It was also around this time that I caught up with one of my hiking buddies from the previous day. This became a recurring theme throughout the hike, as most of us were following the same itinerary and camping in the same spots. Inevitably, we would gather together at various times along the way. It should be said, that the vast majority of Japanese hikers are very friendly. Even after a short chat, if you happen to see that person again in the distance, they will often respond with a jovial wave.
The unstable terrain underfoot slowed my progress more than expected, and I was glad I had decided to break up the section between Goshiki-ga-hara sanso and Yakushi-toge. By the time I arrived at the quaint Sugo-no-koshi-goya, the clouds had rolled in once more. Somewhat hesitantly, I asked a staff member about the weather, who reassured me that there wasn’t an “ame” (rain) mark for the next day and that it was likely to be clear. After taking a short nap and eating my dehydrated meal for dinner, the glowing orange sunset appeared to be a promising sign of good weather ahead.
.

Day 3: Sugo-no-koshi-goya スゴ乗越小屋 to Yakushi-toge 薬師峠
6hr 30 min 8.2 km 695 m 671 m Jul 23, 2024

Route:
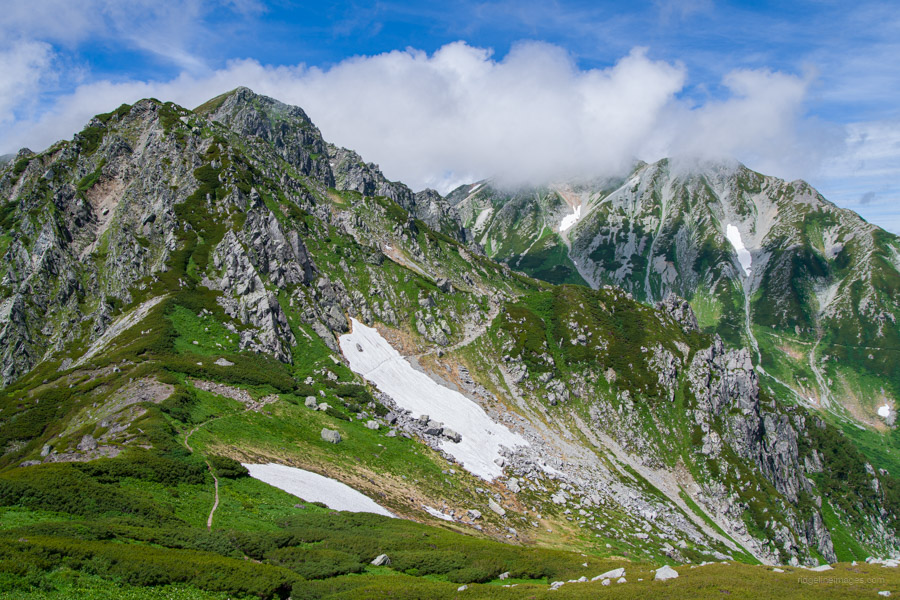
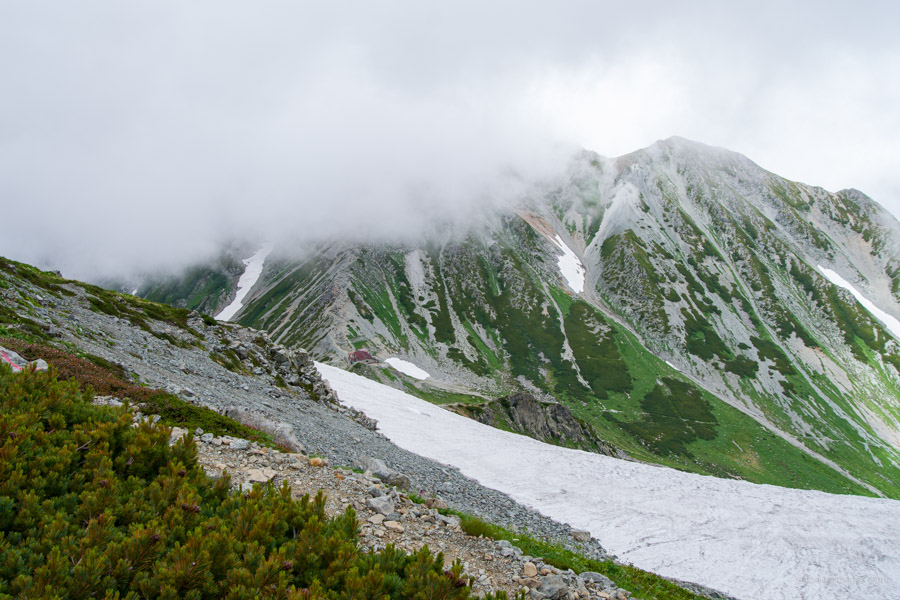
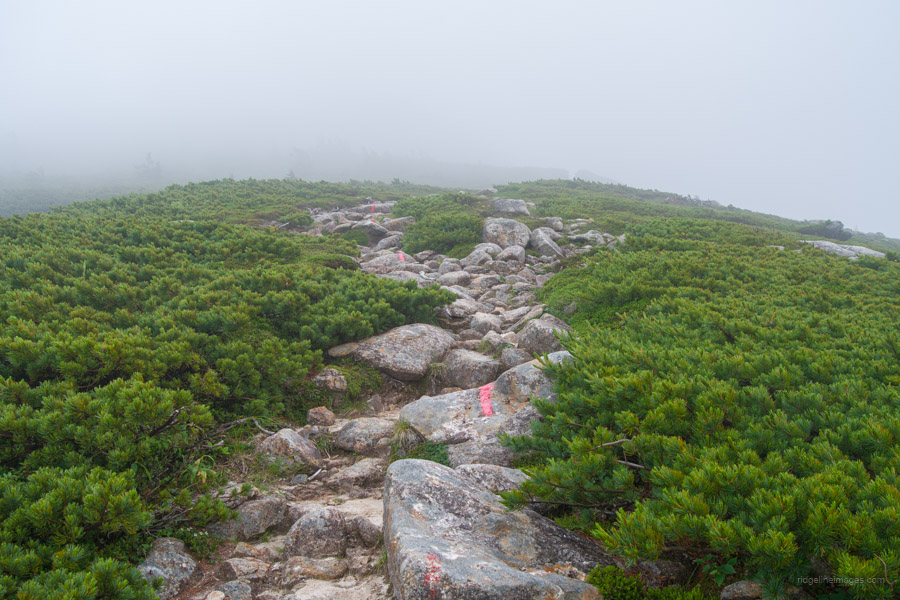
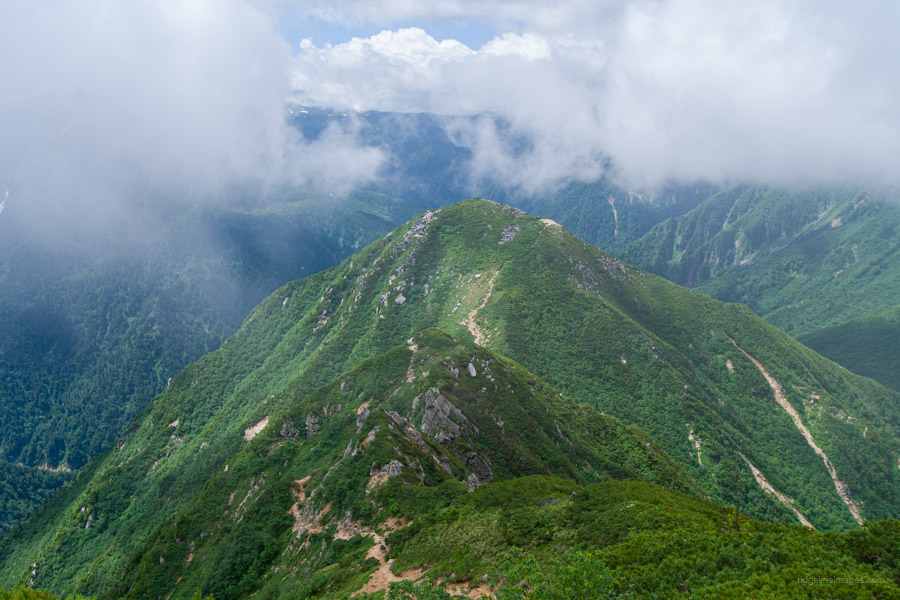
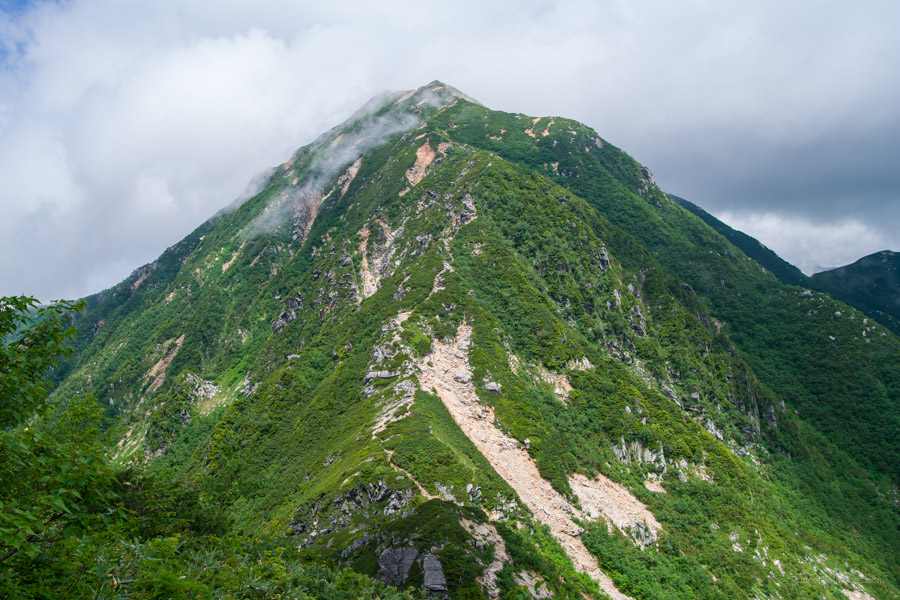
A gradual ascent past several false summits brings you very close to 3,000 metres at Yakushi-dake. If the weather is clear, you’ll be treated to some incredible views. You have the option to stay at either of the two mountain huts or at the sunbathed campsite at Yakushi-toge.
Diary:
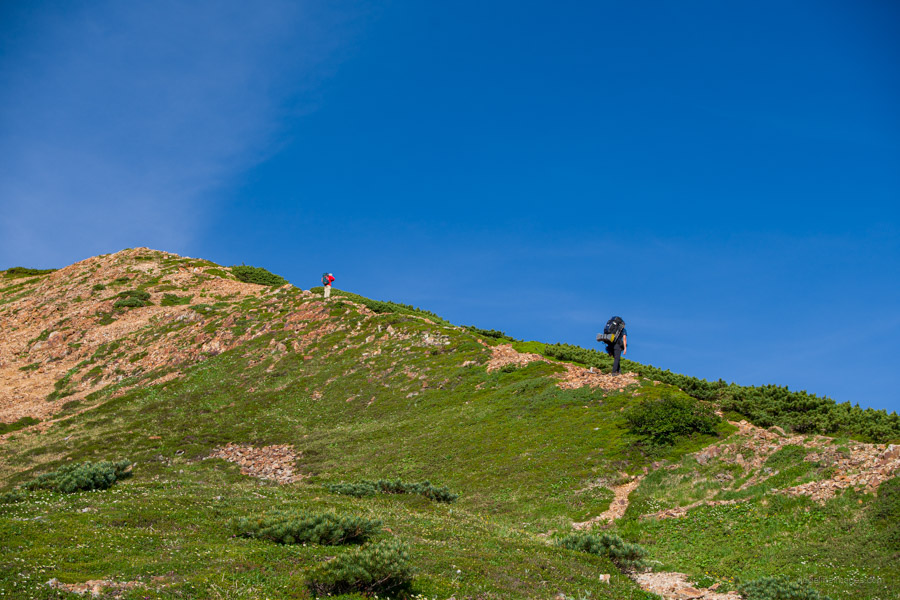
As it turns out, the hut staff member was spot on with their weather prediction. Finally, a day of clear blue skies had arrived, which was such a relief. Although the previous two days weren’t bad, hiking in gorgeous morning sunshine was a heartening change. The main task for the morning was to climb what would be my first Hyakumeizan of the trip, namely Yakushi-dake 薬師岳. Along the way, there were several false summits, starting with Mayama 間山, a minor digression from the trail. Soon thereafter, I caught up with a couple of guys from the previous campsite, including one who was carrying a full-sized tripod!
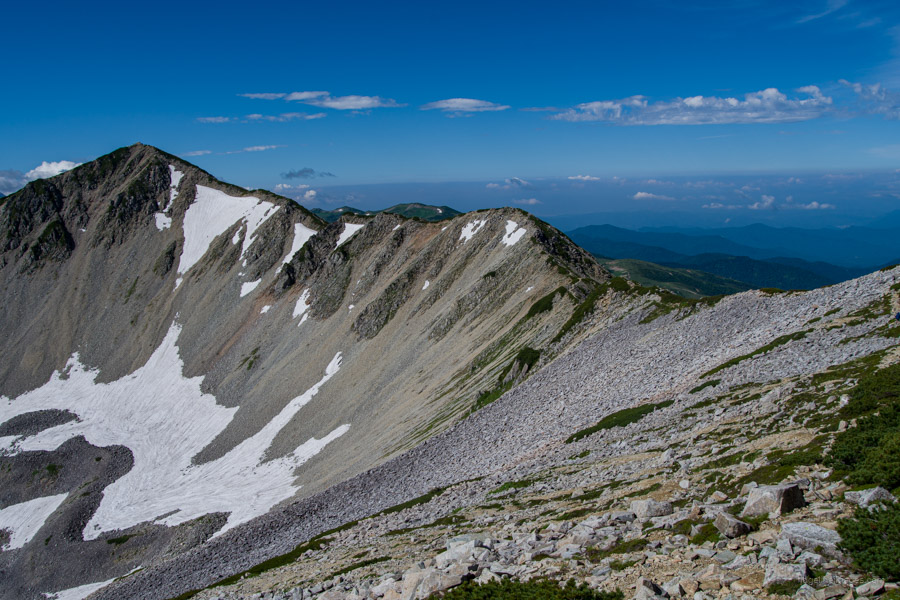
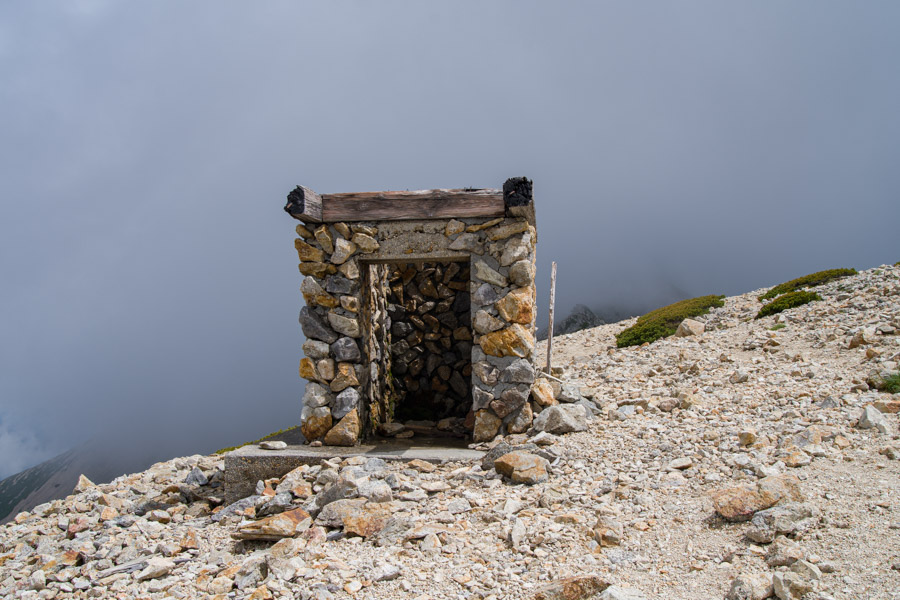
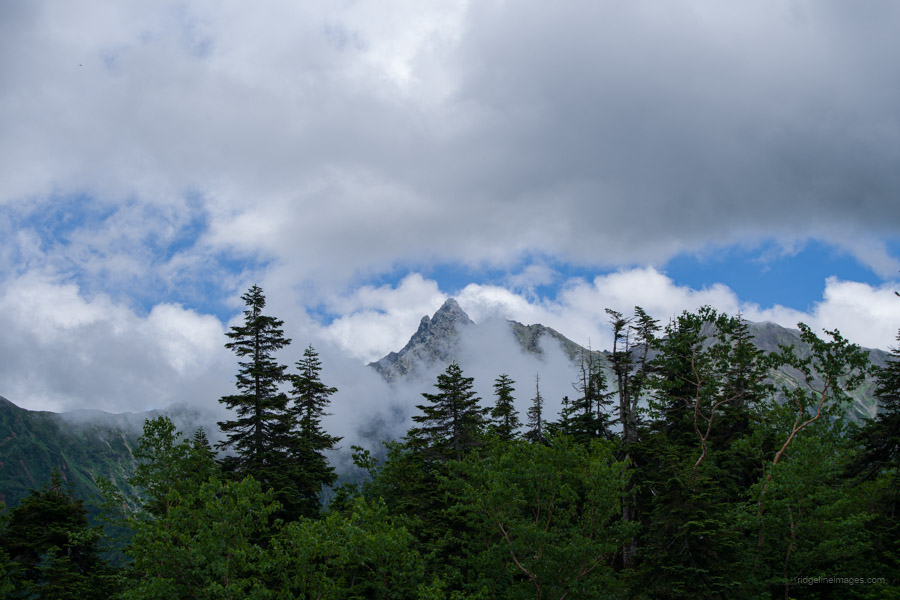
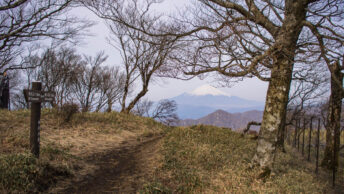
A highlight of the day was the final approach to Kita-Yakushi-dake 北薬師岳, which afforded a sweeping panorama across the Kanasaku Cirque, with the tip of Yarigatake jutting out in the far distance. From there, the route involved rock-hopping, made easier by the dry conditions. The ridge connecting to Yakushi-dake looked narrow and gnarly from a distance but, in fact, had little in the way of exposure. Shortly after leaving the breathtaking summit views and before I could reach the small emergency shelter fashioned from stone, the mist rolled in. I couldn’t have timed my departure better.
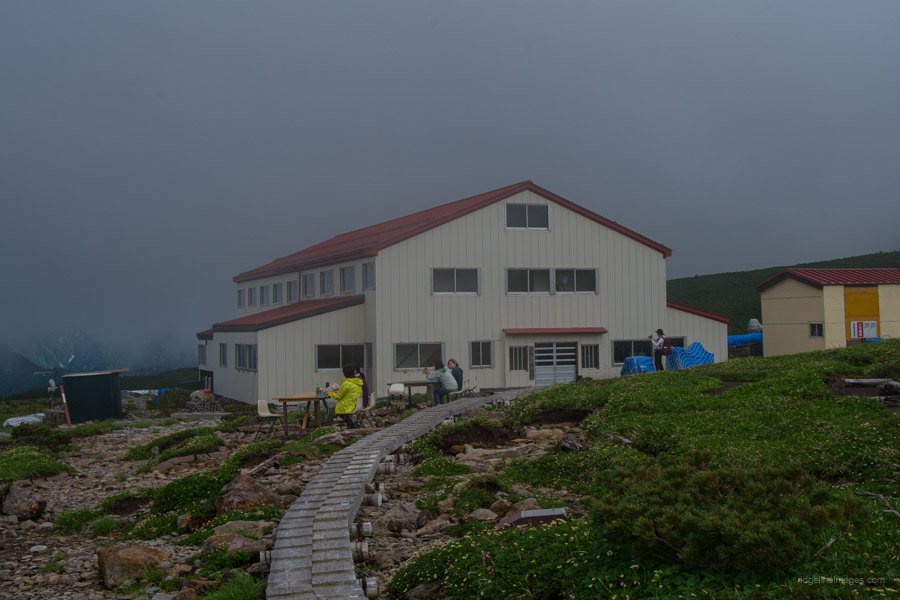
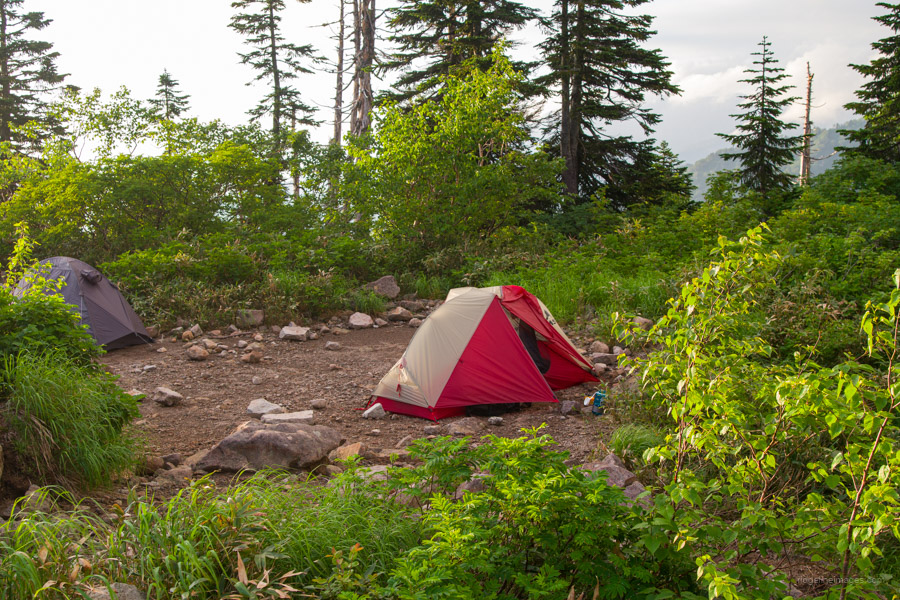
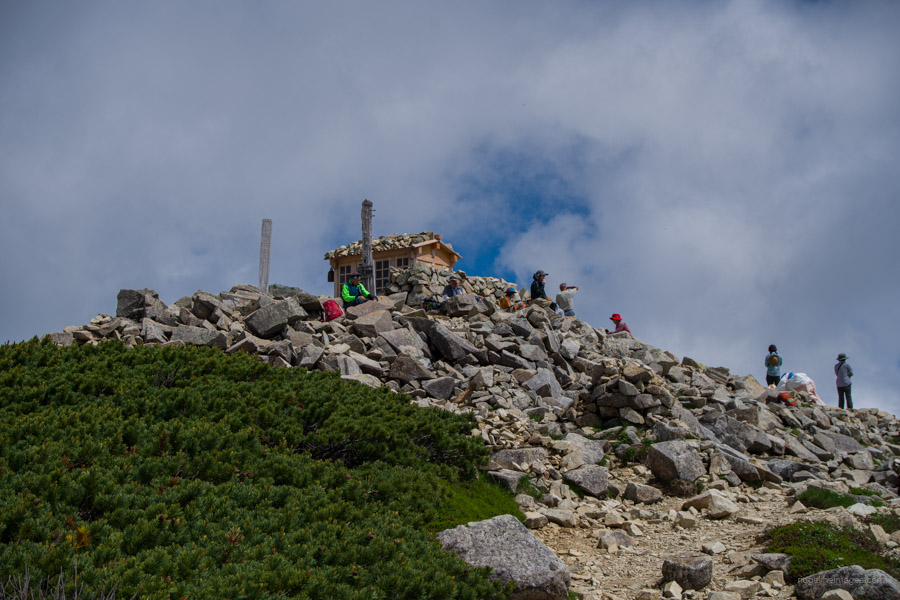
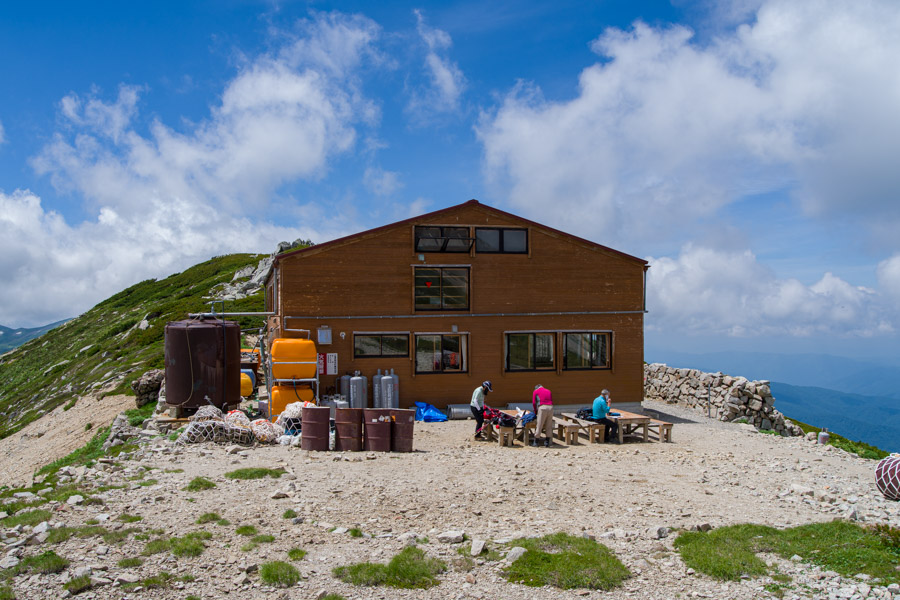
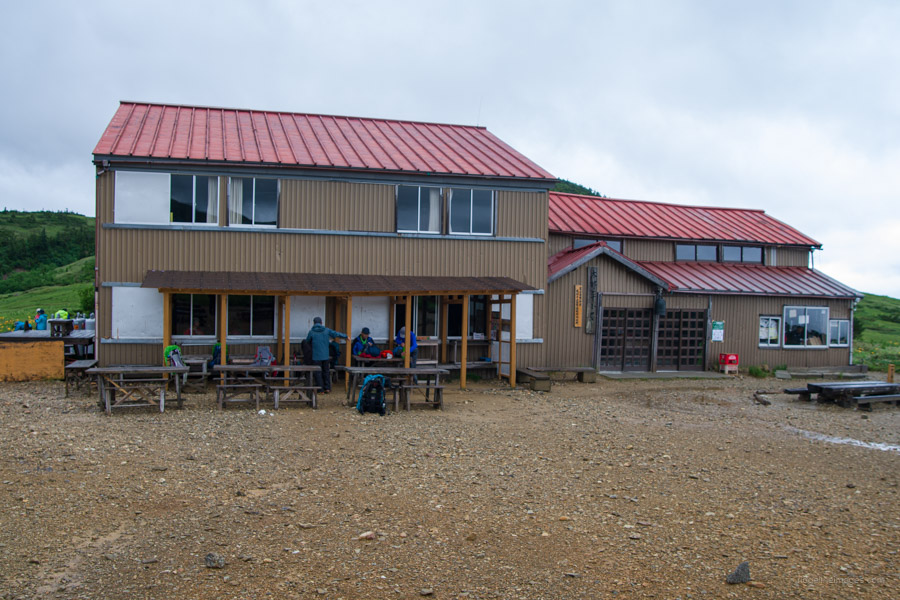
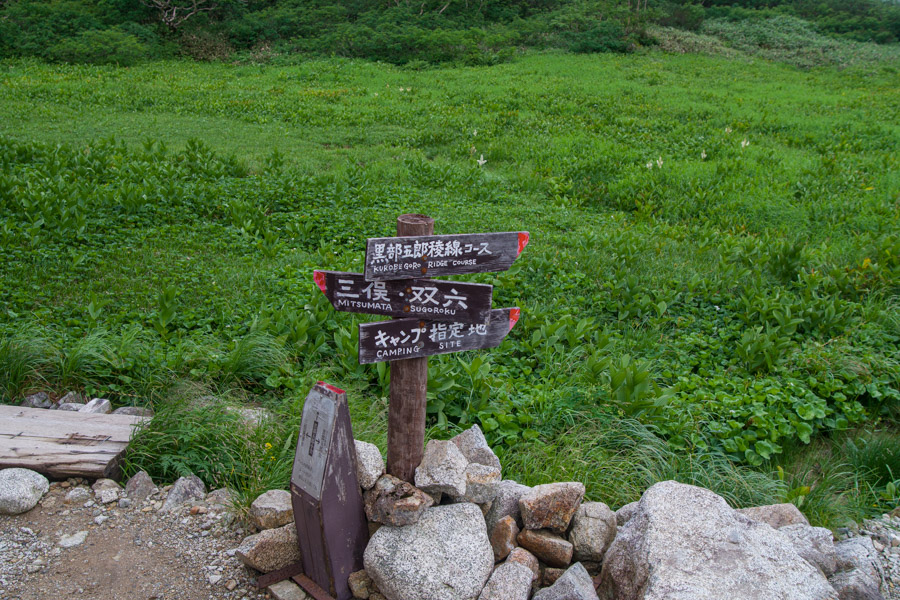
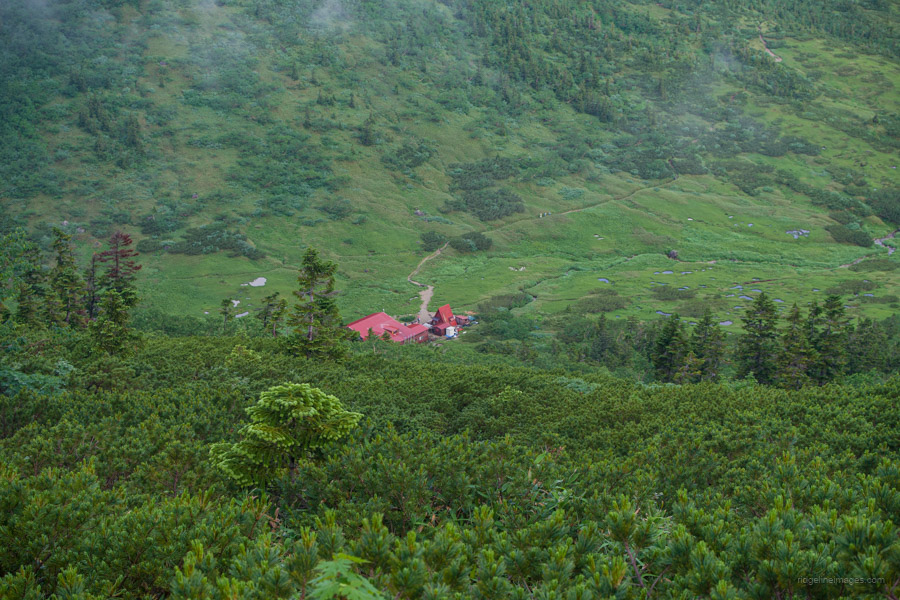
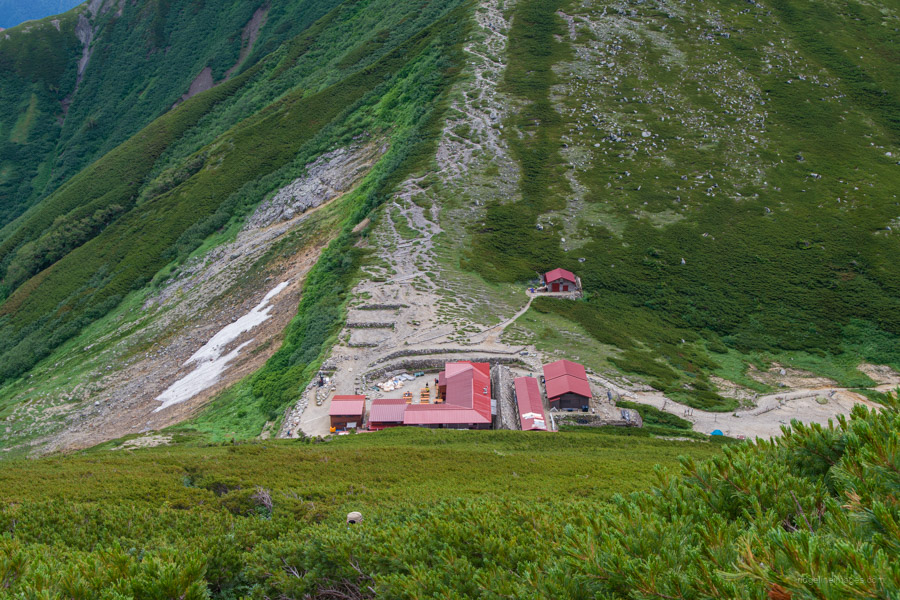
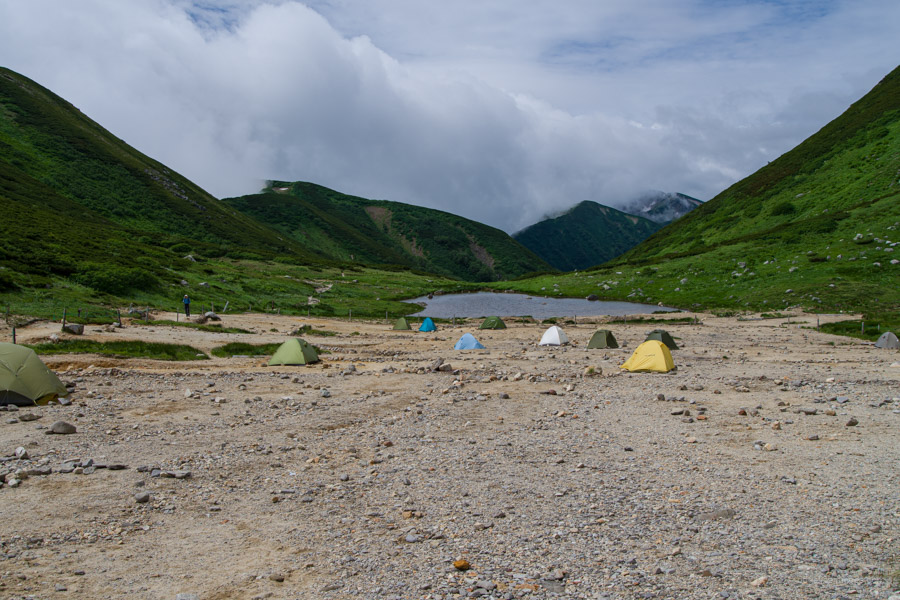
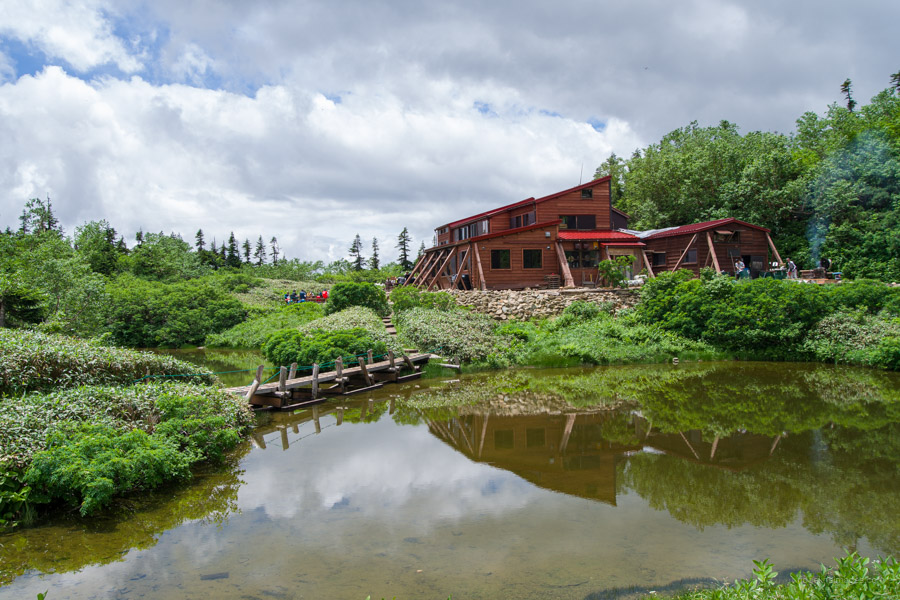
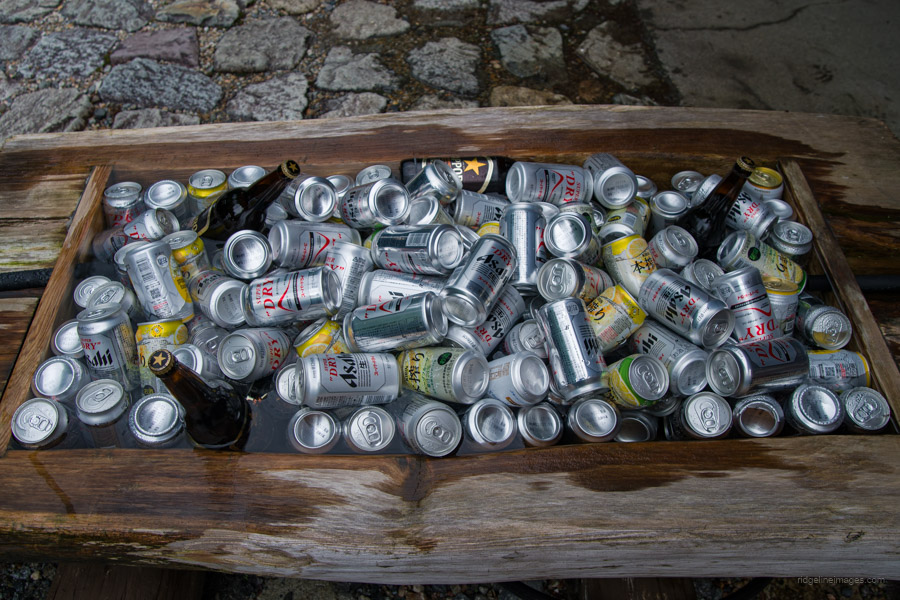
Earlier in the day, I could make out the two mountain huts, the first being Yakushi-dake sanso, which looked to have been more recently built. For those staying in a tent, the sprawling campsite is another hour’s walk away at Yakushi-toge 薬師峠, otherwise known as Tarodaira. The camp fee here is collected by a staff member who comes down from Tarodaira-goya, although arguably, his main purpose for being there is to stock the bins with cold beer and soft drinks for thirsty hikers.
Given the glorious sunny weather, I thought it would be a shame not to wash my clothes. I headed back up the trail to the watercourse, where I soaked them, and later draped them over the tent to dry. Within a couple of hours, my hiking pants, tops, and socks were all bone dry. Unfortunately, the day ended with me tripping and going head over heels while making my way to the restroom. I’m still not sure how I managed that, but it was probably because I was tired and tend to drop my guard once I’m off the trail. With a slightly bruised hip and minor abrasions, I consider myself lucky.
.
.


Day 4: Inclement weather (rest day)
Jul 24, 2024
Diary:
On the afternoon of the previous day, the bloke who was making a killing selling booze mentioned a 50% chance of rain the following day. I quickly forgot about it, given the sunshine and all that was going on. However, this forecast came to fruition just before 4:00 am. I had been up for a good hour by that stage, and while the night sky didn’t look particularly gloomy, I had noticed occasional flashes of light. I didn’t consider for a minute that it might have been an almighty electrical storm headed this way, so I continued to take my sweet time sorting and packing my gear. It wasn’t until the first signs of rain that I realised what was about to unfold.
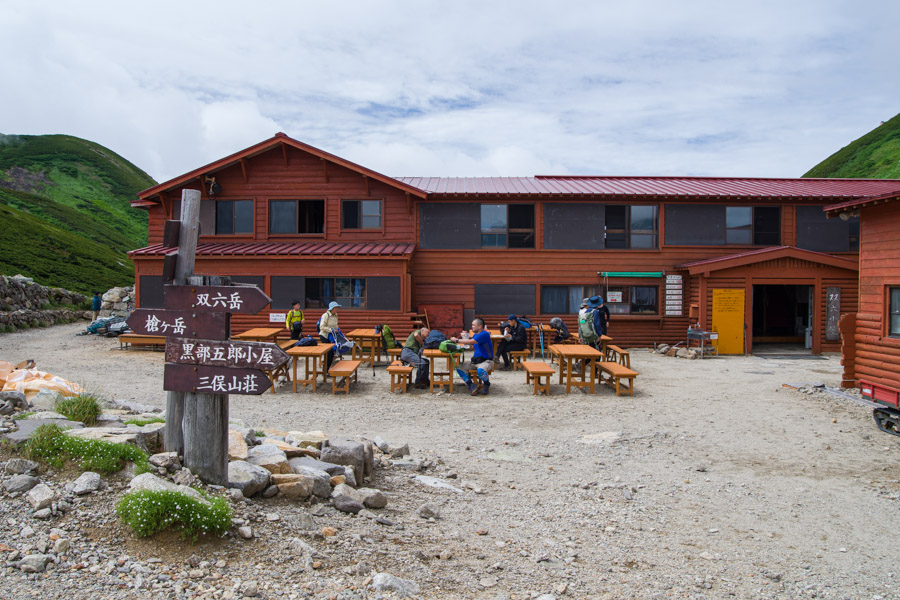
I quickly packed everything into my durable plastic bag that doubled as a pack liner and made a beeline for the toilet block just in time, as it started pouring rain. As the downpour continued, a few more campers arrived, and vigourous discussions ensued about the plan of attack for the rest of the day. Some decided to soldier on to their next destination in the driving rain, while a couple of others and I eventually made our way up to Tarodaira-goya to get a better grasp of the weather forecast. According to the hut staff, the following day’s weather was predicted to be much the same. I even considered heading down to Oritate and catching a bus, but the midday bus was already fully booked, and the price of taking a taxi, even to the nearest station, Arimineguchi, was going to be very expensive.
All in all, I spent over five hours in the mountain hut trying to decide what to do. One of the guys who joined me from Tarodaira campsite was adamant about moving on to Kurobegoro-goya after we ate our curry rice, which we had patiently waited until 11:00 am to be served. I wasn’t so confident and, in the end, decided to concede defeat and spend another night at Tarodaira rather than risk arriving at the next campsite in the dark or worse conditions.
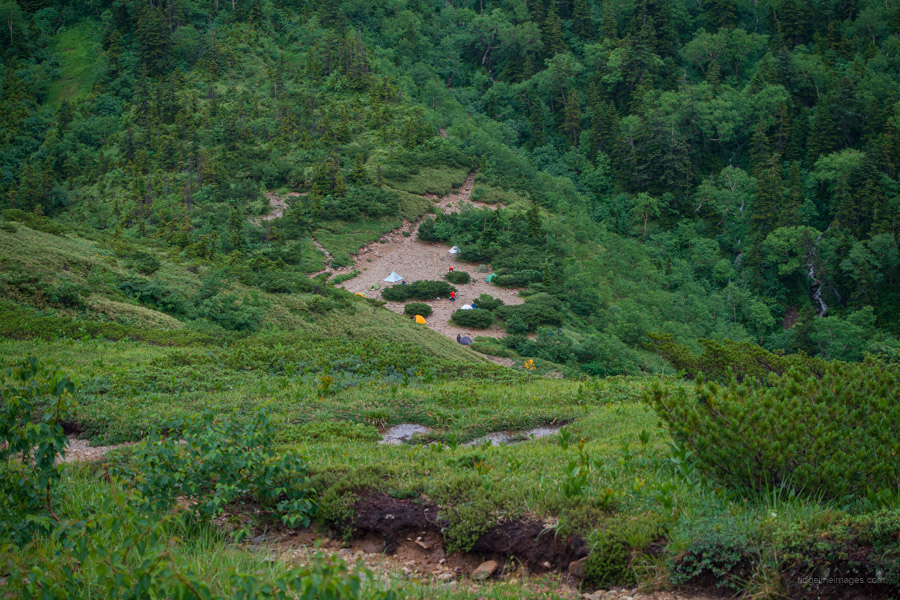
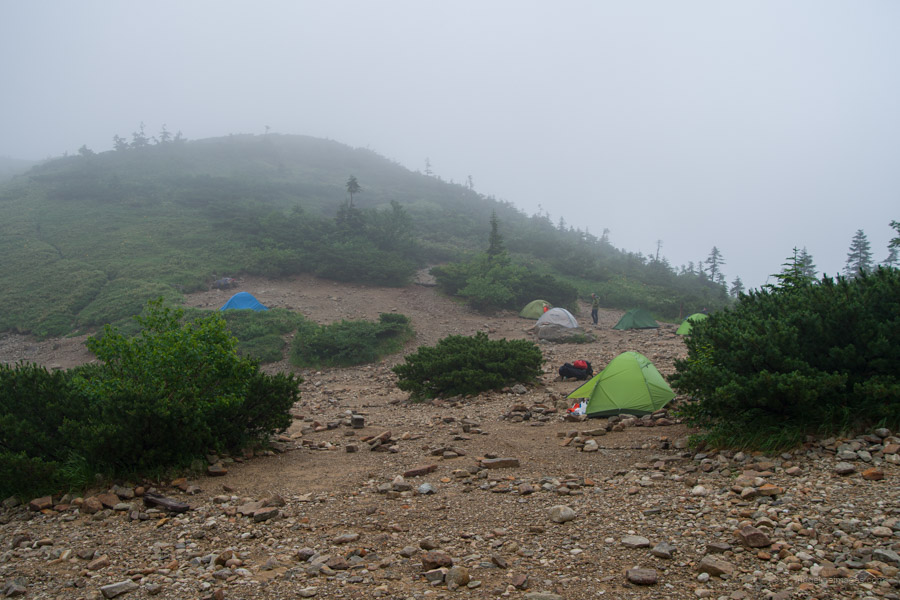
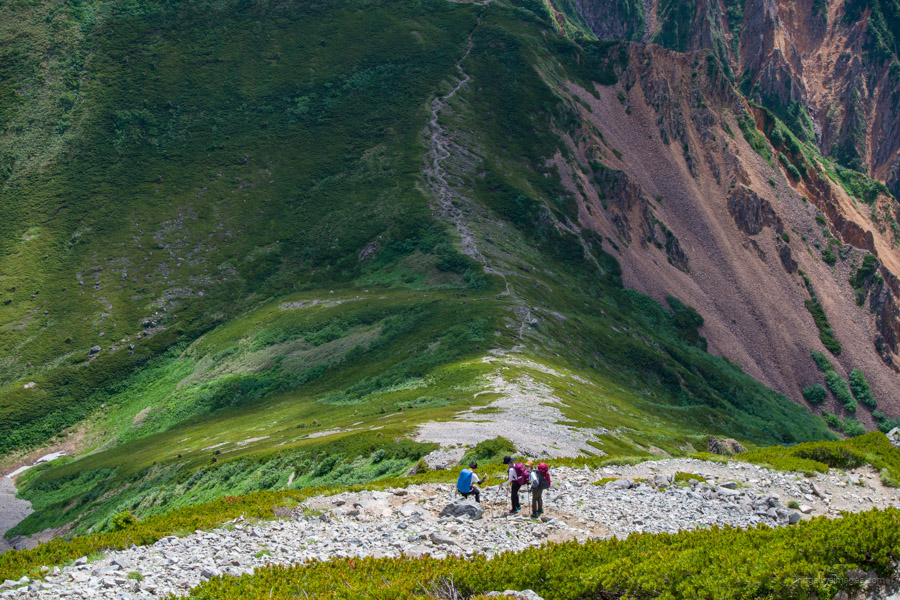
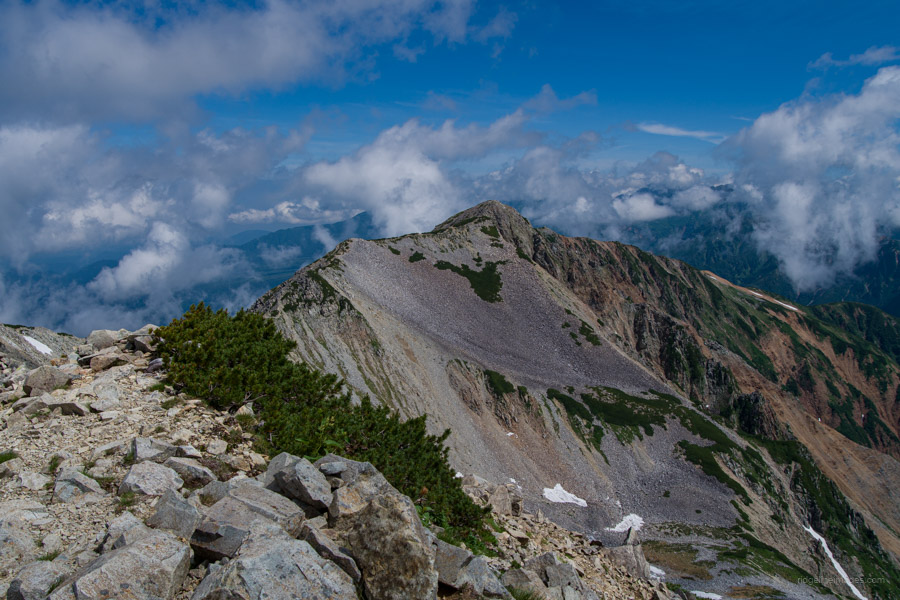
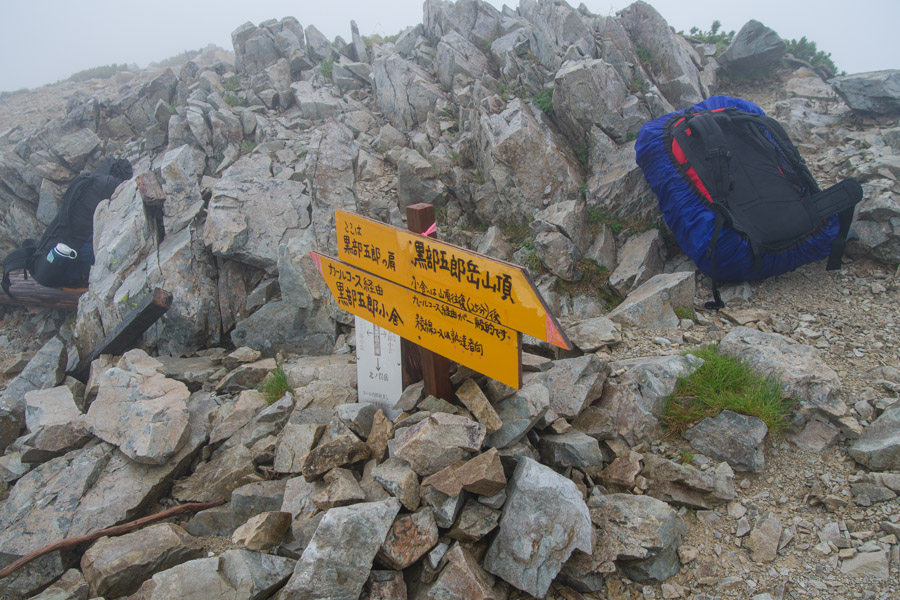
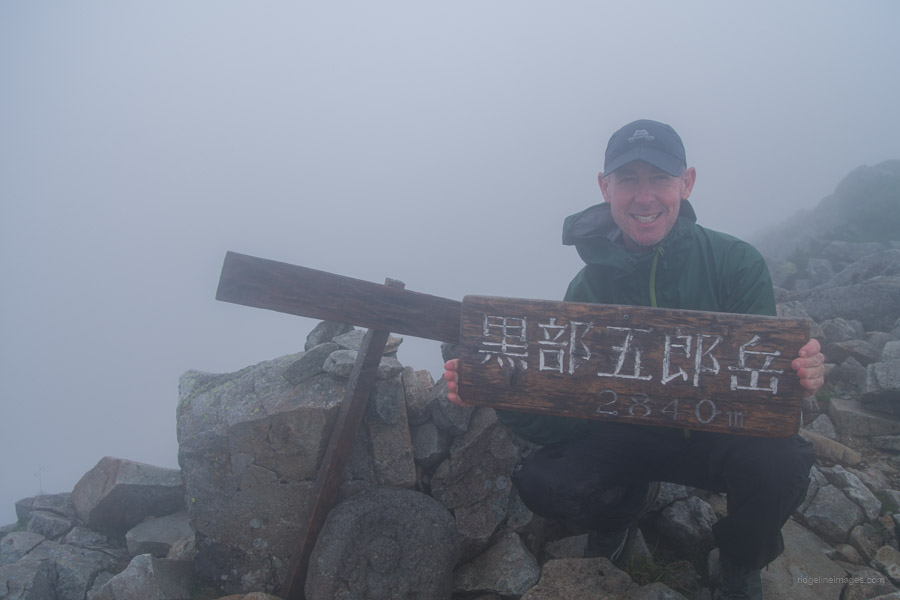
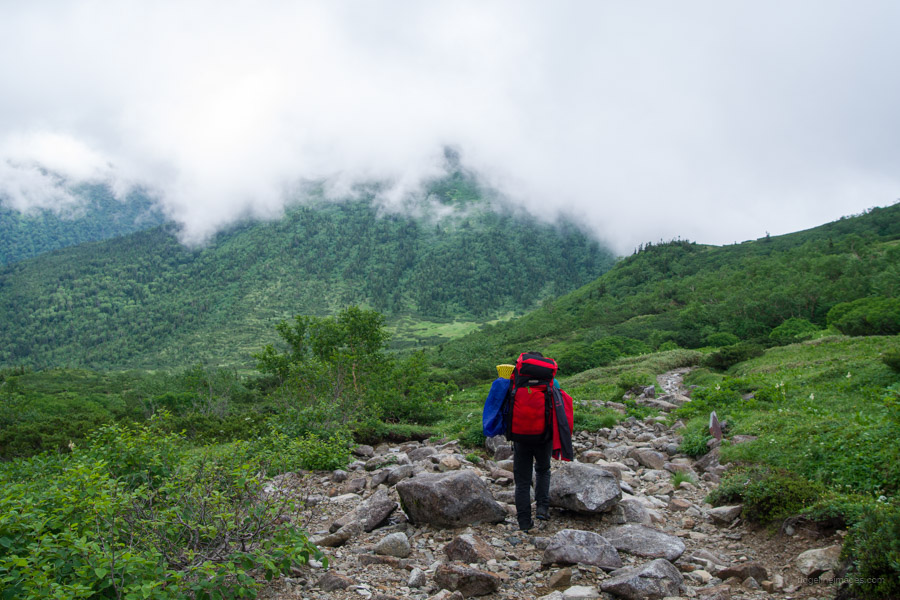
Day 5: Yakushi-toge 薬師峠 to Kurobegoro-goya 黒部五郎小屋
7hr 13.6 km 826 m 765 m Jul 25, 2024
Route:
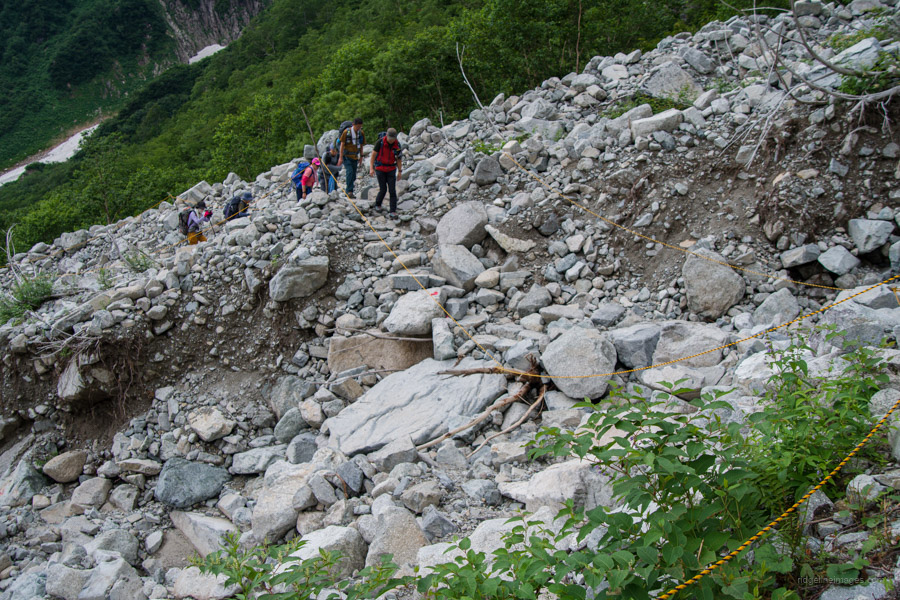
The trail begins behind Tarodaira-goya with a gradual climb featuring some minor ups and downs before descending to a saddle. From there, a steep ascent leads to Kurobegoro-dake. You can drop your pack at the trail junction before making the final push to the summit. Finally, descend through the picturesque landscape of the Kurobegoro Cirque, finishing at the namesake hut.
Diary:
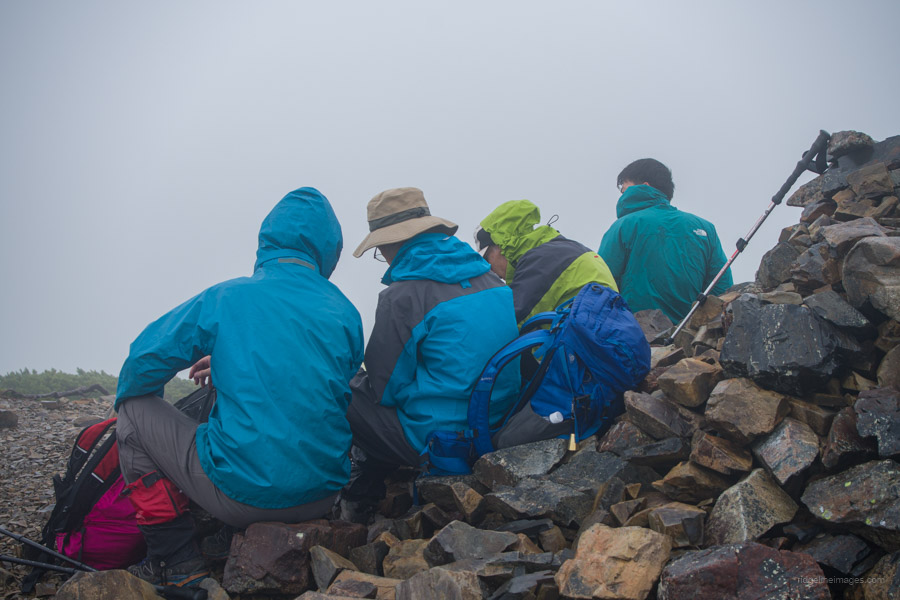
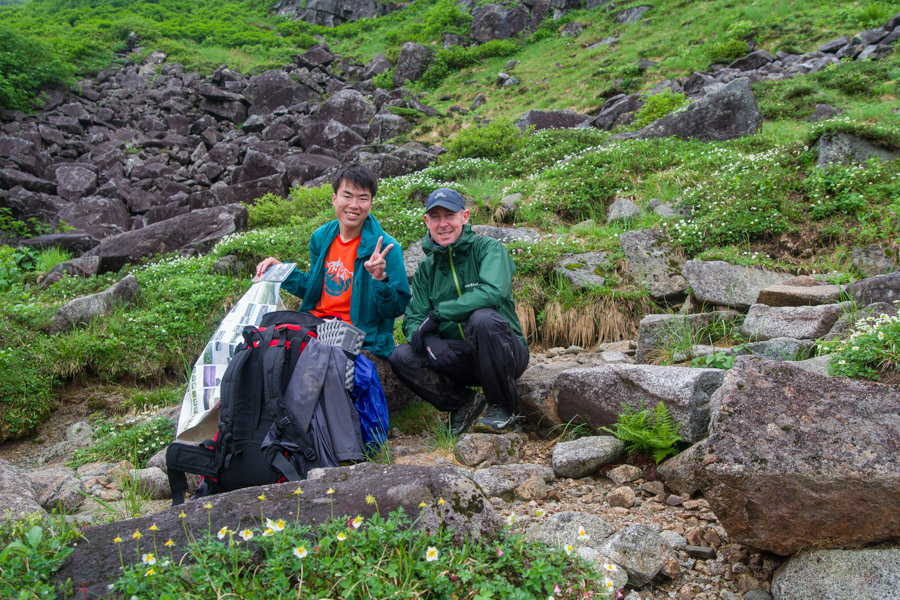
As I drifted off to sleep the previous evening, I really wondered if this trip was even a good idea. In the lead-up to the hike, the weather forecast indicated mostly partly cloudy days, and given the end of the rainy season, I thought my timing was about spot on. It was a stark contrast to last year’s Southern Alps Traverse, where over the course of nine days I never once reached for my rain jacket. Anyway, at least it wasn’t drizzling when I woke, although the surrounding plateau was shrouded in heavy mist. As I left the campsite at 4:30 am and slowly made my way up to Tarodaira-goya, I was honestly 50/50 about throwing in the towel.
Enter Hironori-san. As I was leaving the campsite, I noticed someone just behind me – a youngish-looking guy carrying a sherpa-sized rucksack. I would later discover it weighed an incredible 24 kg! After reaching Tarodaira-goya, I had a short chat with a guest milling about outside regarding my dilemma of whether to continue steadfastly into the pea soup mist or call it quits. This conversation, as it happens, caught the attention of Hironori-san, who suggested we press on together, and I quickly concurred. This fortuitous timing ensured I would continue on for another day.
Most of the time, I’m quite content with hiking alone, although it’s times like this when a hiking companion can make all the difference. While the pace was a bit slower than usual, it suited the steep terrain and abysmal weather that fluctuated between gale-force winds, rain, and, of course, mist. The only thing missing was the cold, although if we happened to stop for too long, that too was felt. To my surprise, we weren’t the only madmen hiking that day; upon reaching Kitanomata-dake 北ノ俣岳, we bumped into a trio of older guys who were probably wondering the same thing. If there was one small consolation, it was that my new Montbell Storm Cruiser jacket did an outstanding job of keeping me nice and dry.
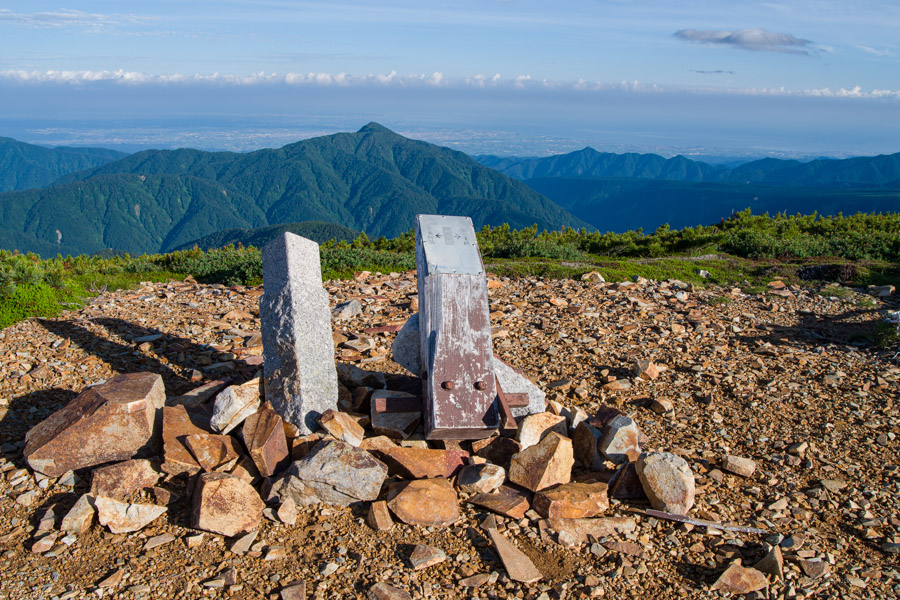
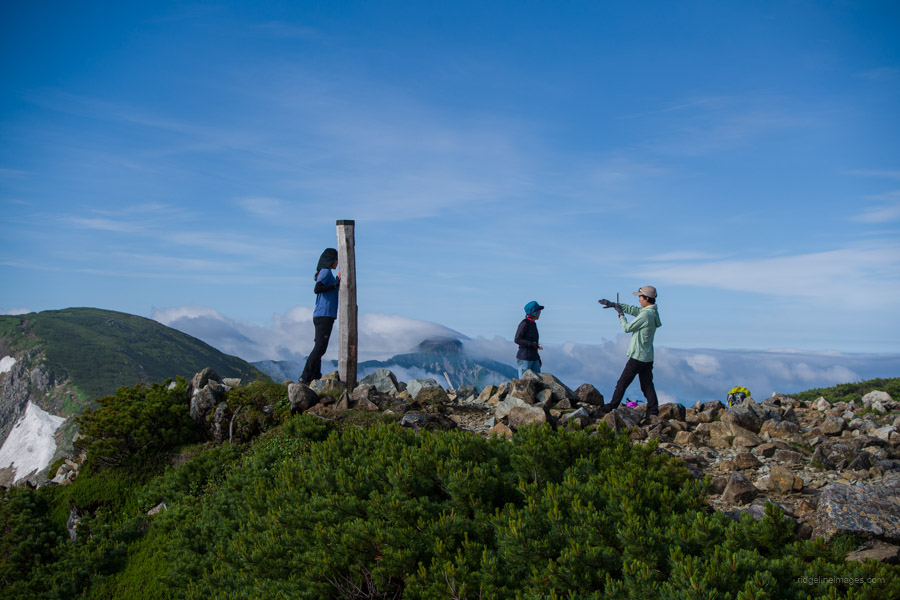
At around 9:30 am, almost 5 hours after leaving Tarodaira-goya, we finally reached the summit of Kurobegoro-dake 黒部五郎岳, another of the 100 famous Japanese mountains. No doubt, like Yakushi-dake, it offers a prodigious view from the summit, although given the zero visibility, it might as well have been a random pile of rocks if it weren’t for the wooden sign signifying its presence. Needless to say, we didn’t hang around long and soon made the steep descent along the numerous switchbacks to the Kurobegoro Cirque and our campsite for the night at Kurobegoro-goya.
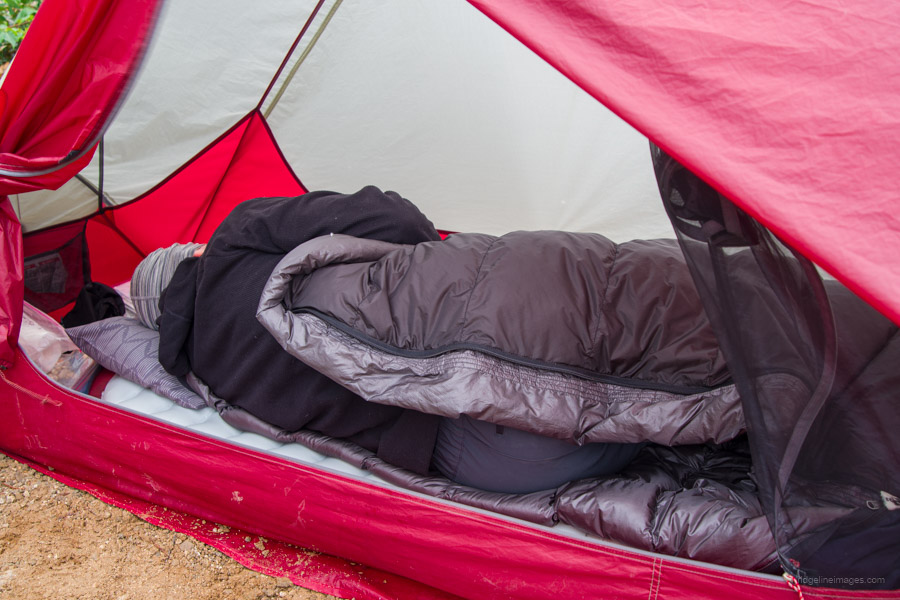
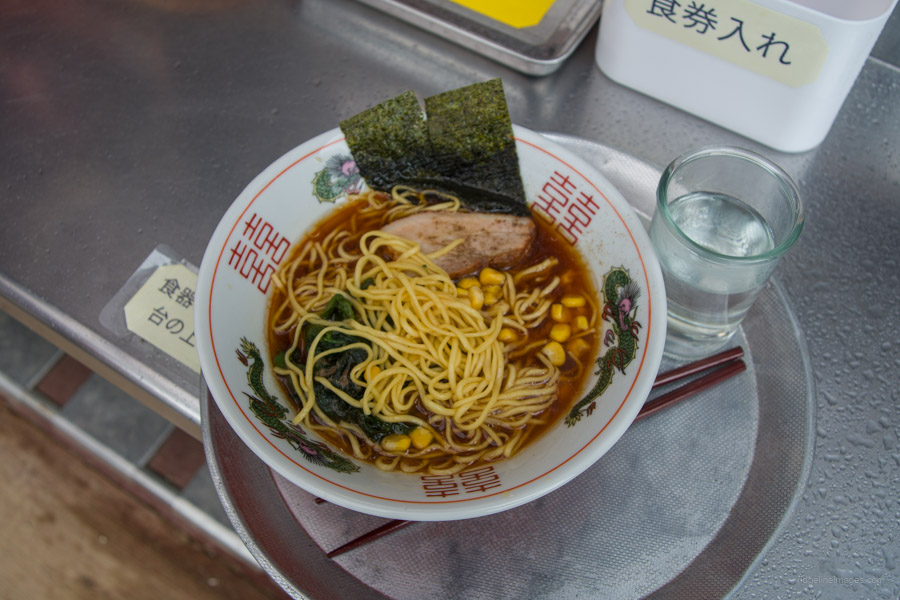
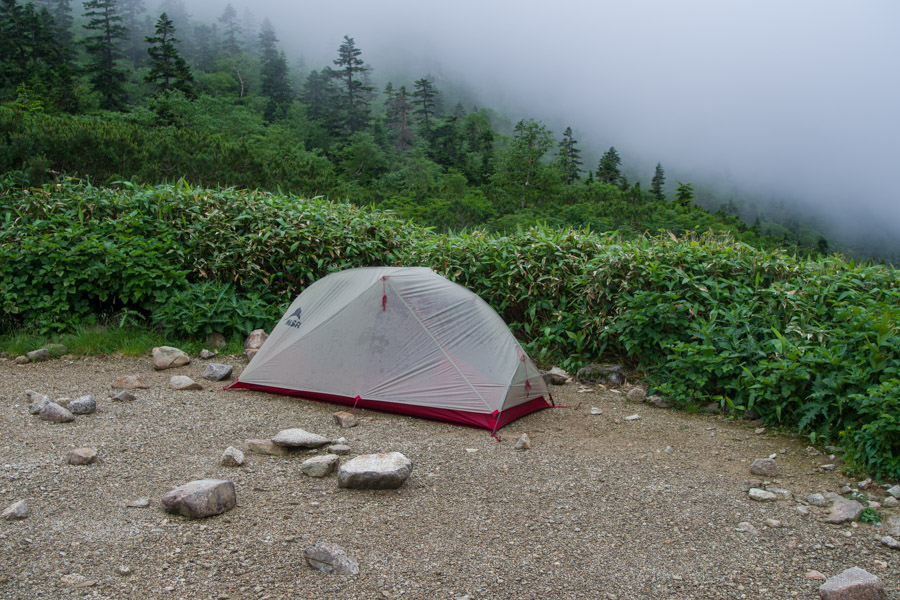
After setting up the tent during a brief moment of sunshine, I returned to the hut to enjoy a bowl of ramen, which really hit the spot. With grey skies brewing, I headed back to the tent to endure a seemingly never-ending procession of thunderstorms. I had a quick exchange with my tent neighbour, who, like me, had decided to stay put the previous day. From what I gathered, this campsite had been particularly hard-hit, with several campers abandoning the idea of camping and seeking refuge in the hut. In hindsight, I should have been one of them.
Typically, when a storm hits, it does its thing and then disappears. However, these thunderstorms were moving through like a well-oiled machine. After one passed, another would jostle for position. This rinse-and-repeat parade went on for most of the afternoon. Despite thinking I had picked a well-drained spot, it turned out not to be the case, as the tent’s bathtub floor literally turned into a bathtub.

.
Day 6: Kurobegoro-goya 黒部五郎小屋 to Wasabidaira sanso わさび平山荘
8hr 30min 15.6 km 616 m 1543 m Jul 26, 2024
Route:
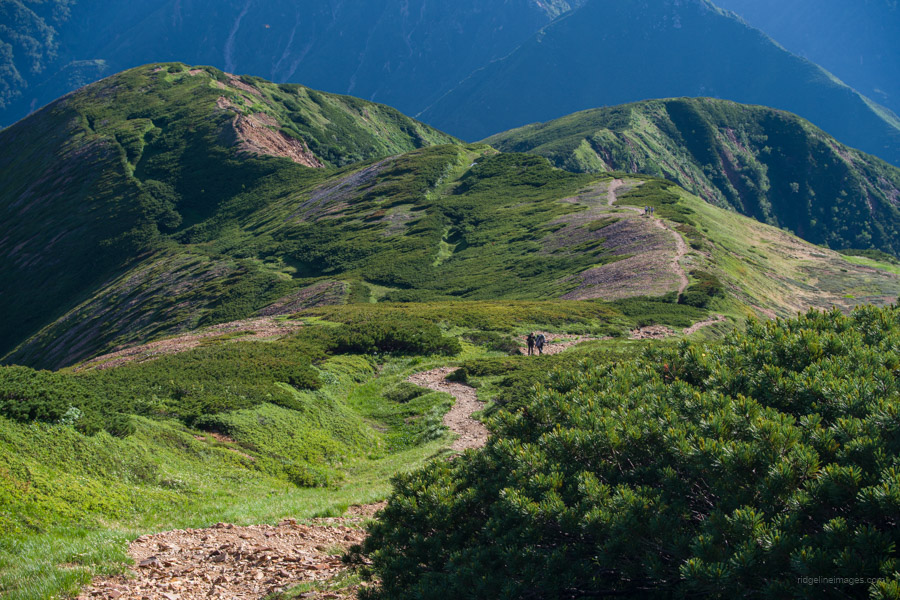
The hike ascends rapidly from Kurobegoro-goya, winding through forest and rocky terrain towards Mitsumatarenge-dake. From there, you have a choice: follow the upper ridgeline or explore the lower course through alpine meadows. Rest at Sugoroku-goya before attempting Yarigatake or descending to Wasabidaira sanso.
Diary:
The last thing you want to wake up to in the morning is water sloshing around at the foot of your tent. To add insult to injury, my sleeping bag was wettish, and it was a battle to get the cigarette lighter lit. Not to mention the ordeal of putting on saturated socks and hiking shoes. I definitely felt like I had reached my limit. The silver lining was that the rain had miraculously stopped, and the persistent fog and mist from the past couple of days had mostly dissipated. Dare I say, I could even glimpse some blue skies!
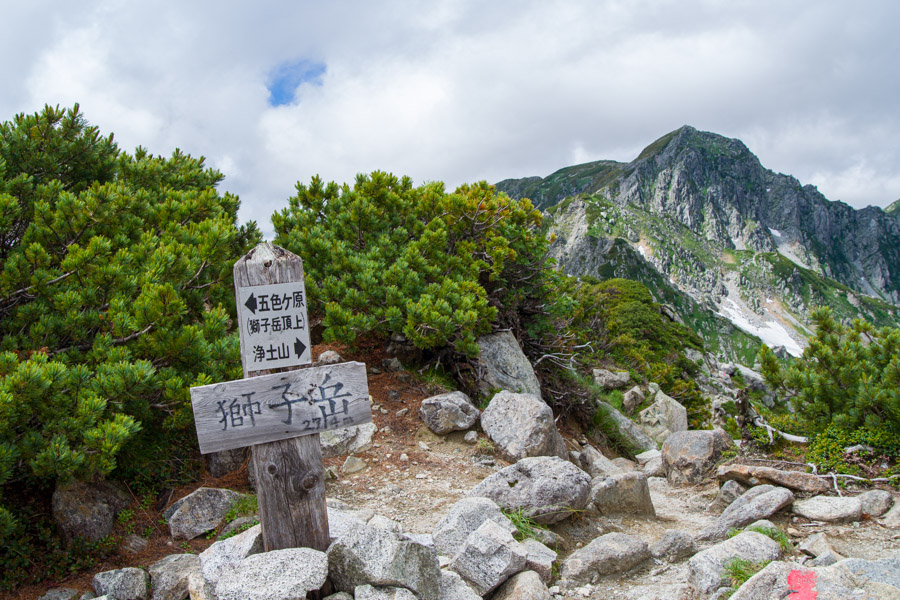
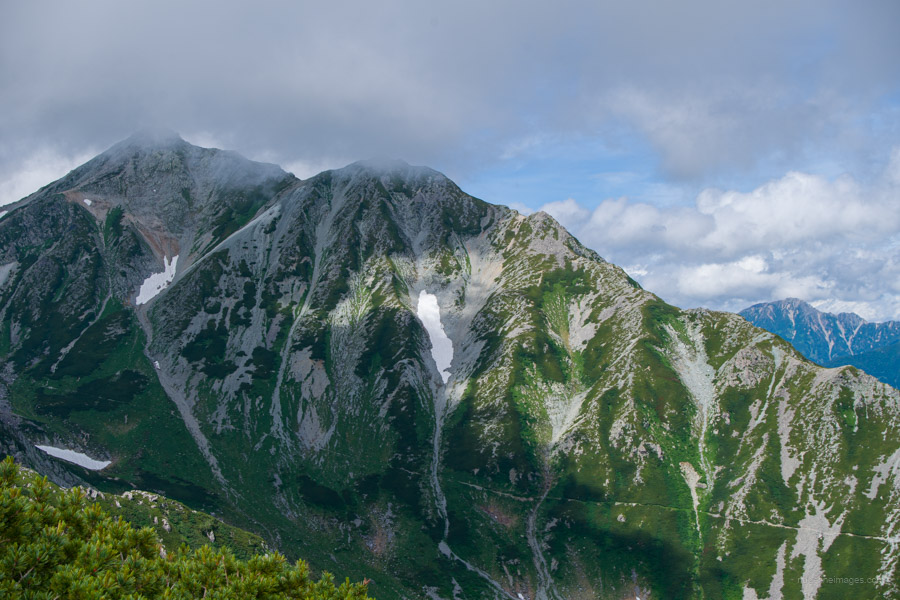
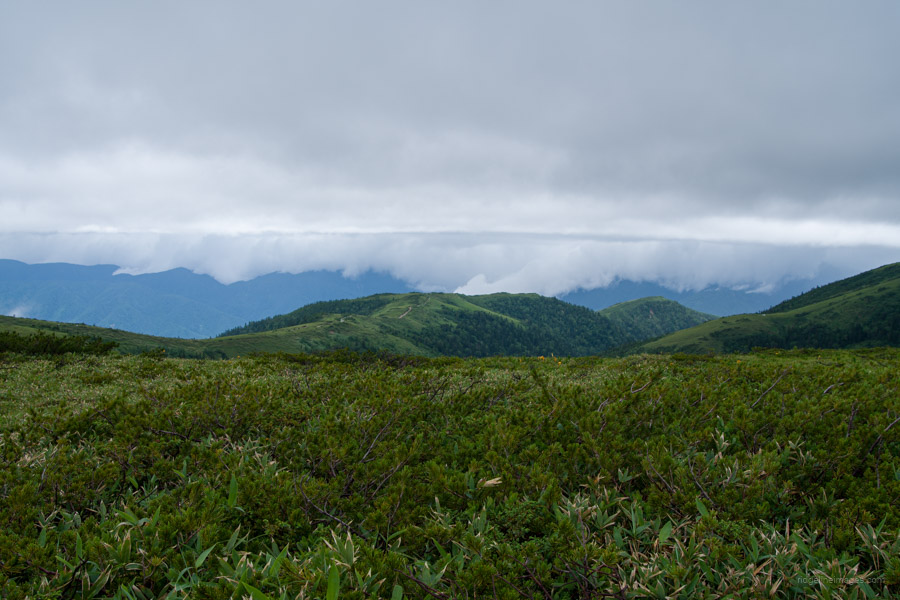
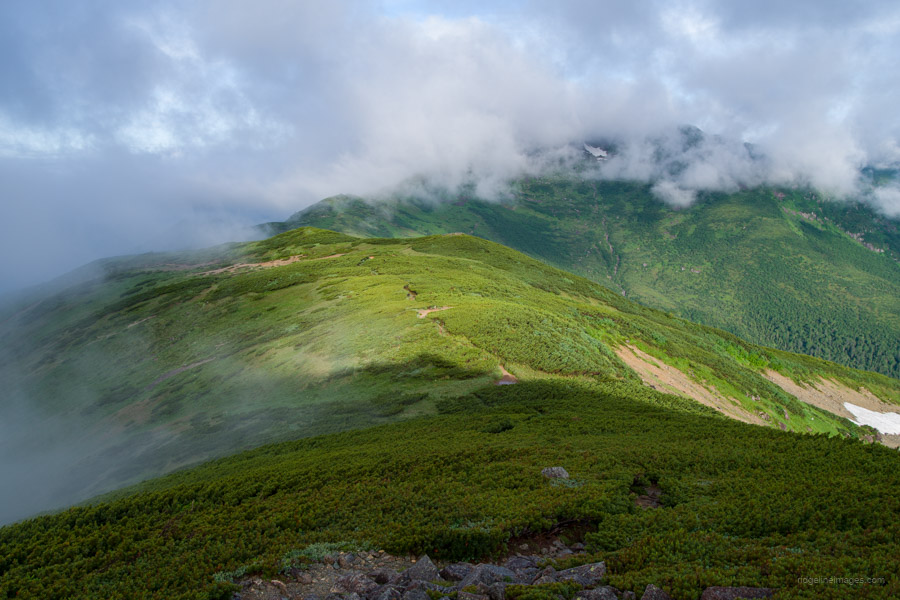
Having lost a crucial day, I gave up on the idea of pushing on for Yarigatake and Kamikochi and instead set my sights on Mitsumatarenge-dake 三俣蓮華岳 as my last big climb of the hike. I left the campsite around 5 am, said a quick goodbye to Hironori-san, who was still sound asleep, and made my way through a combination of forest and scree slopes up to Mitsumatarenge-dake, one of the 300 famous Japanese mountains. I luckily reached the summit before the day-trippers arrived from Sugoroku-goya and in advance of the morning ‘gas‘ (haze). The chiselled ridgeline connecting Yarigatake and Hotaka-yama looked striking in the background, and a good amount of snow remained directly below on the southern slopes.
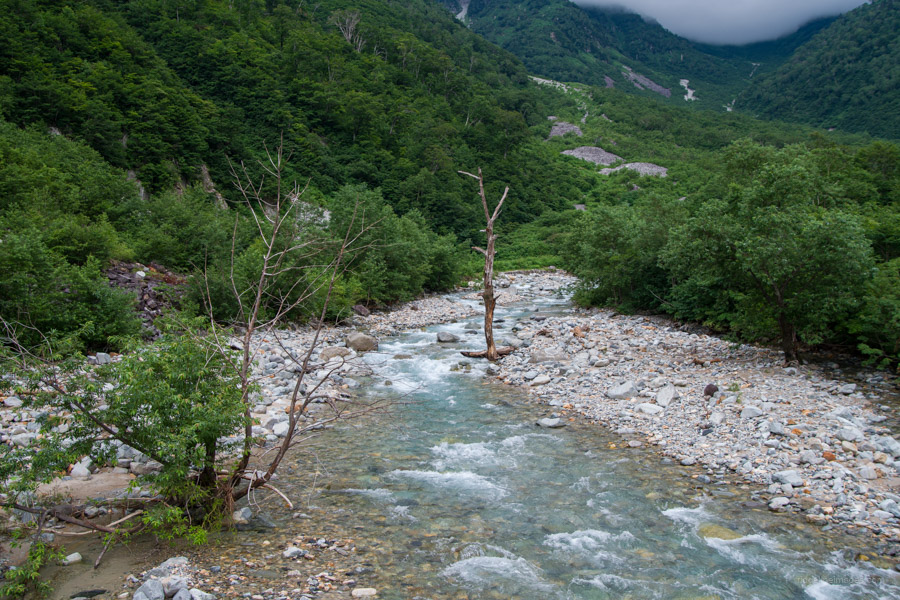
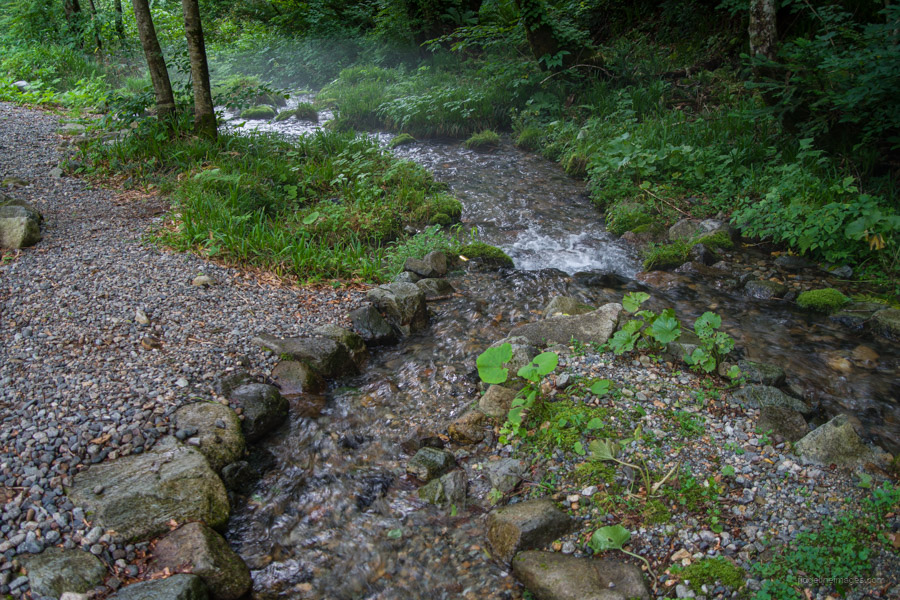
As the gas started moving in, I thought it best to take the Makimichi route, which seemed to offer some of the same scenery I missed out on the previous day in the Kurobegoro Cirque. I think it was the right decision, as for the couple of hours it took to reach Sugoroku-goya, I passed only a handful of hikers through wonderful alpine meadows and crystal-clear streams.
I arrived at Sugoroku-goya at 9:30 am, and while I certainly had time to make a summit bid for Yarigatake, it felt like I would be doing it more for the sake of it than anything else. Instead, I decided I would return in the autumn and complete the climb as a standalone peak. It was a bit disappointing, but the back-to-back days of miserable weather had taken the wind out of my sails. From there, it was a 5-hour hike down to the Wasabidaira sanso campsite. Along the way, I caught more views of Yarigatake peeking through the clouds from the Kagamidaira sanso, where I stopped by for another bowl of ramen.
.
.
.

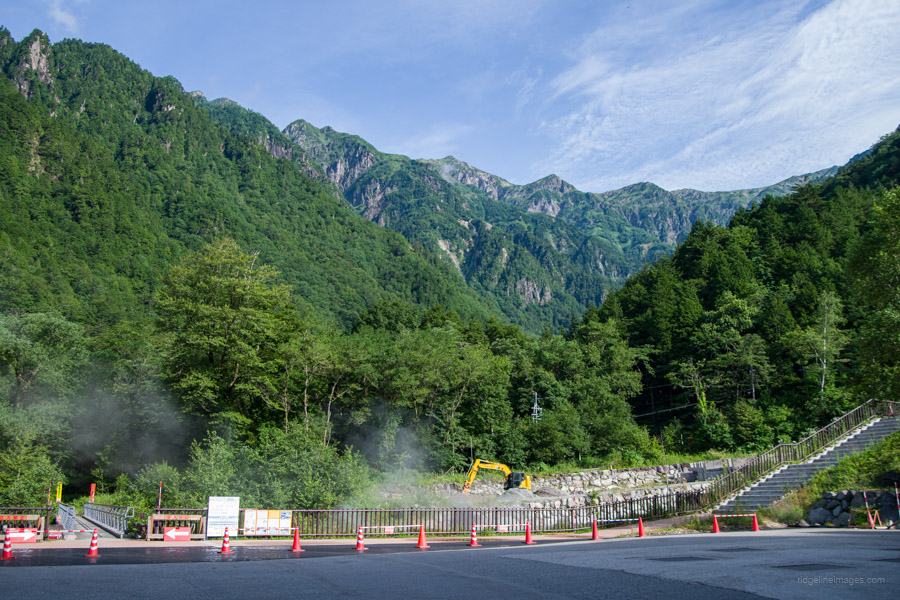
Day 7: Wasabidaira sanso わさび平山荘 to Shin-Hotaka Ropeway 新穂高ロープウェイ
1hr 4.5 km 0 m 301 m Jul 27, 2024

Route:
An easy and relaxed walk along a paved road takes you to the Shin-Hotaka Ropeway. It’s a good idea to check the bus timetable with the hut staff before leaving, as a transfer at Hirayu Onsen is likely necessary.
Diary:
While it would have been possible to finish the hike and return to Tokyo the same day, I’m glad I didn’t. The Wasabidaira sanso campsite is rather nice, nestled in a sheltered alcove with a nearby stream fed by melting snow, perfect for cooling tired feet. Also, the idea of rushing back to Tokyo’s sweltering temperatures was something I’d rather put off. I actually expected more people at Wasabidaira sanso, given the large number of hikers heading towards Sugoroku-goya, suggesting the hut and campsite there must have been chock-a-block last night.
After packing up my tent – which happened to be dry for a change – and doing a quick sweep of the campsite, I set off for the final, short walk to the Shin-Hotaka Ropeway, about an hour away. Walking in the opposite direction was an eclectic mix: holidaymakers in casual attire, a couple of groups of fly fishermen, and the typical weekend warrior backpackers. Just before the first scheduled bus arrived, I ran into a group I’d met a few times during the hike. Upon reaching Hirayu Onsen, I felt sorry for them, as they couldn’t secure seats for all five of them on the Matsumoto bus and had to detour via Kamikochi. Lucky for me, there were still two seats available, and I managed to snag one of them.
It’s fair to say this hike had a few surprises, and while I didn’t quite achieve my original goal, I’m overall satisfied. Over the seven days, I enjoyed incredible views, faced some challenges, and, as always, appreciated the camaraderie and light-hearted banter with my fellow hikers. Hopefully, this truncated version of the traverse will be useful for others unable to complete the entire route.
Thanks for reading!
Hey David,
after reading your Southern Alps Traverse and trying to prepare for my own, it’s nice to read about a hike that I actually have done. I went even shorter though from Murodo to Oritate.
Following year I combined Kasagatake and Yarigatake on another four day trip.
Hi Judith,
Had I not met up with my hiking buddy, I’m pretty sure I would have exited at Oritate as well. Like yourself, I’m now looking to climb Yarigatake as part of a three-day hike this autumn. Anyway, I hope everything is going well with your preparations for the Southern Alps Traverse, and I look forward to hearing how it goes.
Quite a few challenges, but that’s what adventures are made off!
Two nice modifications I did to this route when doing it last year were (a) start from Bambajima instead of Murodo, to climb Tsurugi via the Hayatsuki ridge. After this, stay on the ridge towards Tateyama, instead of going down to Murodo. Modification (b) was including a loop from Sugoroku-goya to visit the peaks of Suishosdake and Washibadake.
I was way luckier with the weather though!
Indeed, they are!
Nice idea starting at Bambajima (馬場島荘) and climbing Tsurugi-dake via that route, steering well clear of Murodo. However, it appears you might have to fork out for a rather expensive taxi ride, as there doesn’t seem to be a bus service!?
Planning to do a version of this traverse and be passing Sugo-no-koshi-goya just days after it closed. Tenting. Two questions:
– Since I can’t rely on getting water at the hut this late in the season, are there any known natural water sources around Sugo-no-koshi-goya or on the way to Yakushi-toge? I will have a water filter and have no issues drawing water from stagnant ponds. I also understand that any sources could have dried up and I’ll have to ask the hut the first night when I get on the ground there. Just trying to work out some plans B/C etc.
– Even if the hut is closed, can I still camp at the designated area around Sugo-no-koshi-goya if there is something like a pond to draw from? I’ve tried doing a bunch of research on this to get a definitive answer but can’t quite come up with anything official. I read your debunking article that referenced the situation with wild camping as well, so thought I’d pose that here.
Thank you thank you thank you for your amazing resources. Insanely helpful.
Hi MaeMae,
Thanks for your comment and questions.
I’ve done a bit of digging around, and your best bet would be Mayamaike Pond (間山池), about a 50-minute walk from Sugo-no-koshi-goya. Other than that, I couldn’t find any obvious water sources nearby. The pond is marked on the Yama to Kogen Chizu No.39 剱・立山 TSURUGI·TATEYAMA. I tried to track down recent photos in Yamap/Yamareco reports but couldn’t find anything useful, the only picture I came across was this one: http://takaoka.zening.info/Tateyama/Hiking/Yakushidake/Mayama_Pond.htm. To be 100% sure, I’d suggest emailing the hut staff directly: https://ltaro.com/contact/
Alternatively, what I’d probably do is fill up and carry at least 5 litres at Goshiki-ga-hara-sanso. That way you don’t have to rely on Mayamaike Pond or backtrack, and you’ll have peace of mind knowing you can get by until Yakushi-toge even if there isn’t any water.
As for your second question, yes it should be fine to pitch your tent in the designated campsite near the hut even after it’s closed. Since the toilets won’t be available, I’d recommend bringing a disposable toilet system such as the Montbell O.D. Toilet Kit.
Thanks for your time with this response. Going to check out the mapping on that water source and reach out to the hut ahead of time, good call. I’ll bring a wag bag in case I decide to dry camp there in the middle for that second day. I like the idea of having that option and enjoying the day vs a plain ole slog the whole way to the next campsite (which I’ll probably end up doing but hey). I also wanted to get to the huts for lunch ’cause that’s always fun. Thank you again!
Hi,
What a great post. I’m glad I found your website.
This and the southern alps traverse look like incredible routes. I’m tempted to try and find a way to link them together into a longer through hike.
I’m an experienced hiker albeit not in Japan. How do you think these routes would hold up in October ?? And are there any special considerations that pop to mine for hiking in Japan.
Many thanks
Tom
Hi Tom,
Thanks for your comment. The Northern Alps route is usually doable until around mid-October, depending on when the first snowfalls arrive. Keep in mind that some huts will already be closed, and pretty much all huts shut down after mid-October, which makes logistics more difficult.
In the Southern Alps, the hut situation is similar, though there’s generally less chance of early snow. Also note that buses from Hirogawara stop running after November 3rd.
Unless you’re very confident in your abilities and prepared for colder, less supported conditions, I’d recommend planning your hike for the first half of October.