.
Mt. Akadake 赤岳 – Mt. Yokodake 横岳 – Mt. Ioudake 硫黄岳
Distance: 26.1 km
Elevation change: 1409 metres
Highest point: 2899 metres
Start: Minoto Kogen Lodge
Finish: Umijiri Station (Koumi Line)
Difficulty: ▅▅▅▅▅▅▅▅▅▅ ❹
Map: Yama to Kogen Chizu 山と高原地図 [No.35 八ヶ岳 YATSUGA-TAKE]
GPX TrackKML TrackGSI MAPPDF Topo Map
Kanto’s Adventure Playground – Yatsugatake
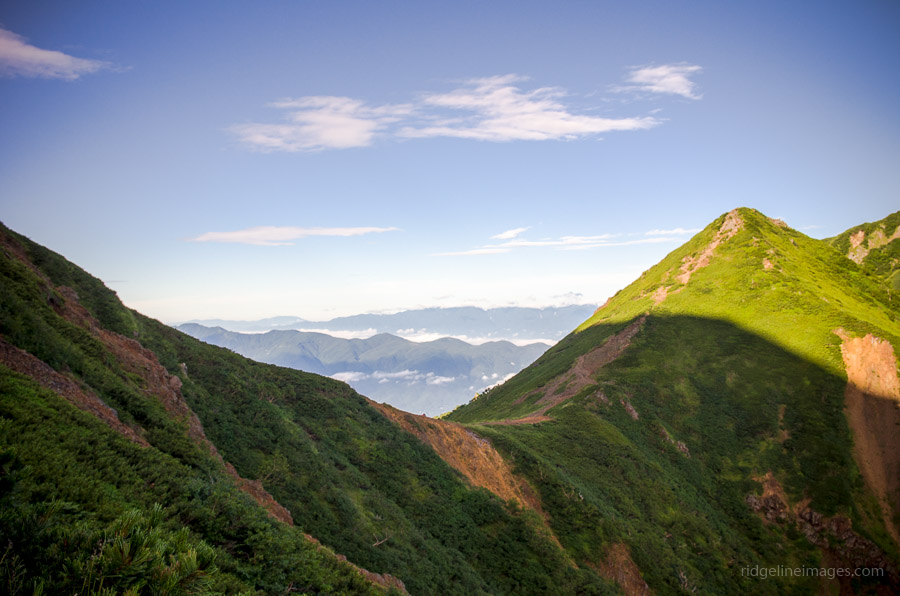
The eight main peaks that make up the Yatsugatake Renpo 八ヶ岳連峰 have long held a special affinity with Kanto-based outdoor adventurers and are climbed throughout the year. While the full chain of mountains spans some 30 km north-south, this hike takes in three of the most prominent peaks.
Day 1: Following the Minami sawa to a Rocky Campsite (6.9 km)
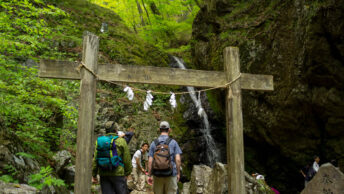
The main access to Yatsugatake is from Chino Station 茅野駅 on the Chuo Line with a connecting bus service to Minotoguchi 美濃戸口 (37 mins, 870 yen). With the busiest summer holiday period over, there were only a handful of us taking the first-morning bus. From the Minoto Kogen Lodge bus stop take the left trail which follows a graded road for the one-hour walk to the Minoto-sansou 美濃戸山荘, here you can fill up your water bottles and enjoy a relaxing lunch on the outdoor tables.
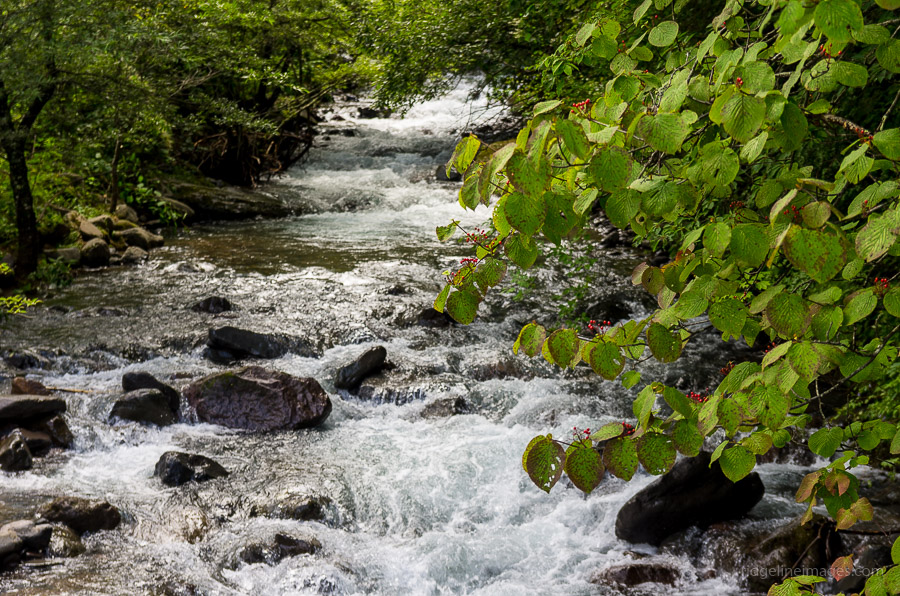
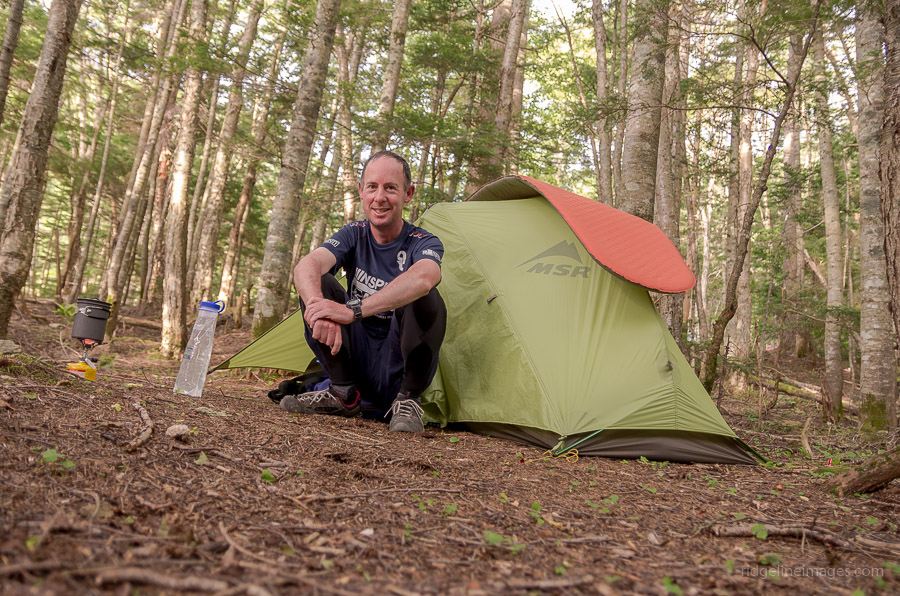
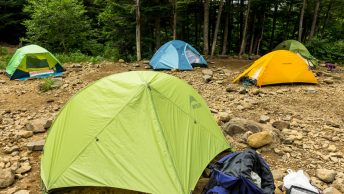
Options from the hut include taking the left trail, which heads via Kita sawa 北沢 to the Akadake-kosen 赤岳鉱泉 campsite, while the right trail shadows the Minami sawa 南沢 up to the Gyoja Hut 行者小屋. While the Gyoja Hut is closest to Mt. Akadake, the Akadake-kosen is a nicer place to pitch a tent and has its own resident hot spring. The route described in this hike takes the latter and will take around 2.5 hours to reach the Gyoja Hut (campsite 2,000 yen). The upper reaches follow a dry river bed before merging back onto the riverside easement below the hut. The tent sites here are limited and the ground is also covered in rocks.
Day 2: Spectacular Views from Another 100 Famous Mountain (7.5 km)
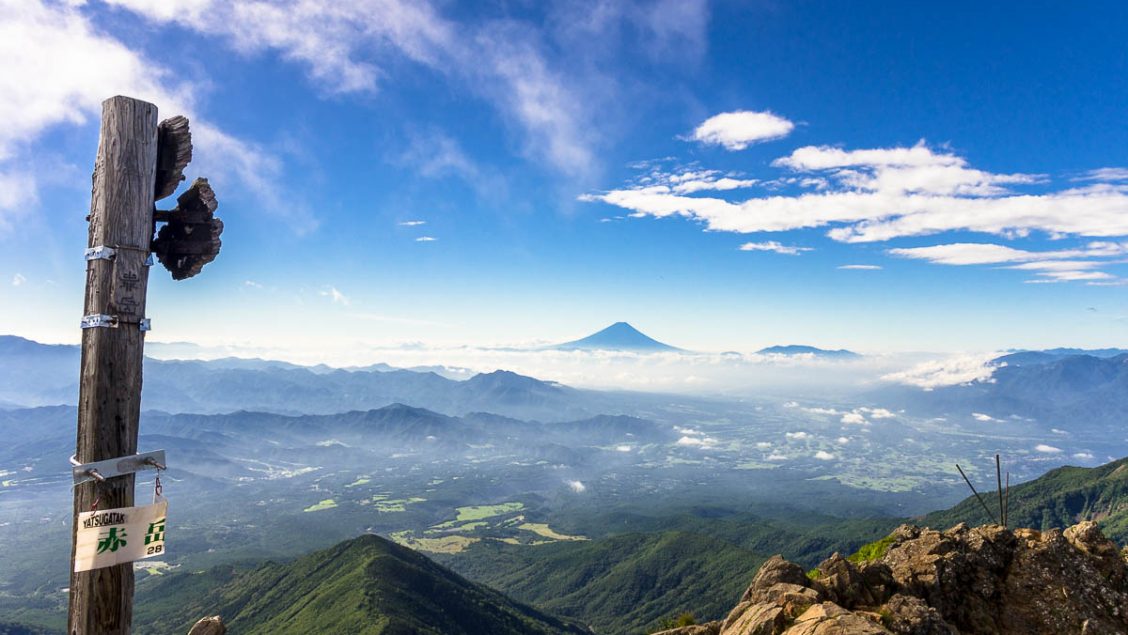
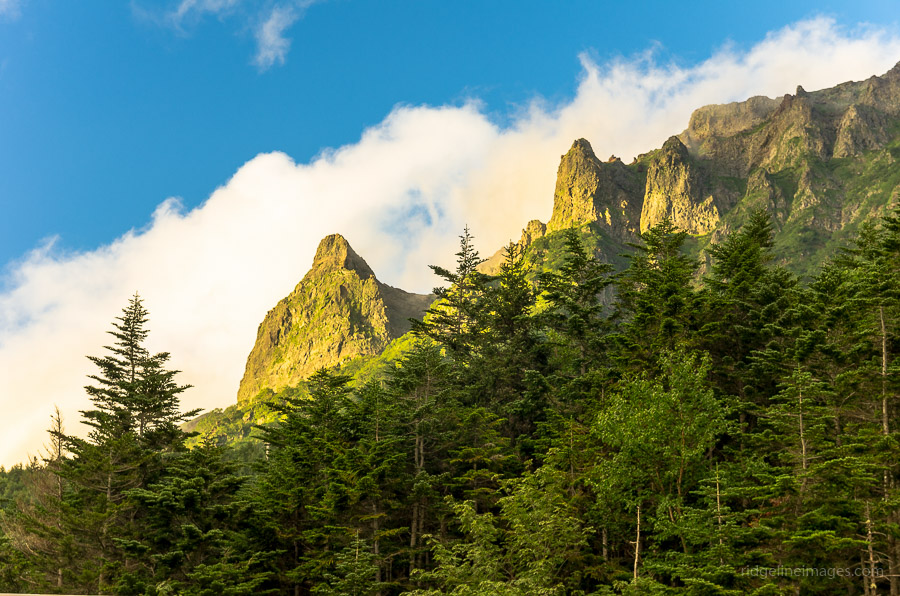
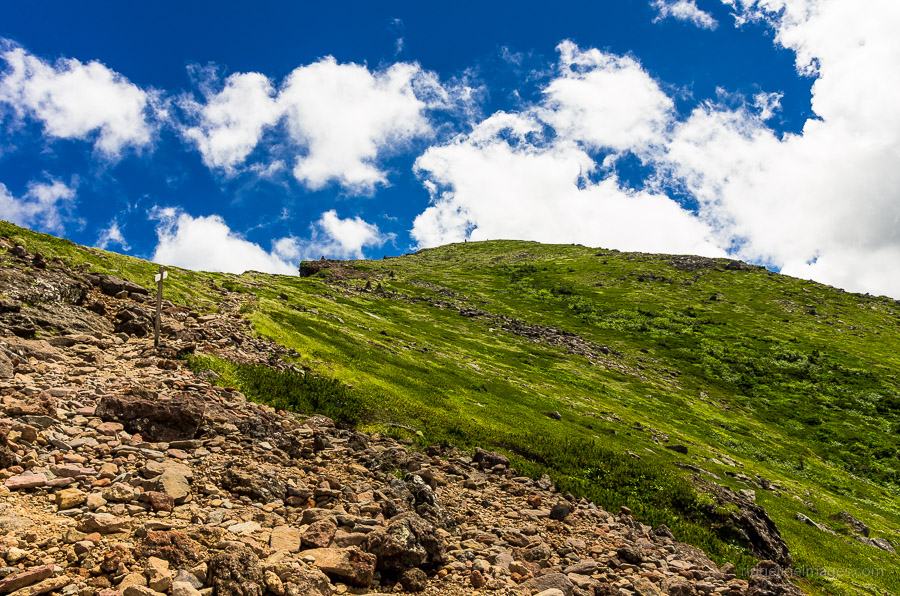
The first rousing of the morning took place a little before 3 am with some guys in a neighbouring tent feverishly preparing for a pre-dawn summit of Mt. Akadake 赤岳 (2,899m). Exiting the tent at a more reasonable 6 am, I was greeted with glorious blue skies, which provided the added incentive to quickly finish breakfast and pack up a dew-saturated tent. While most folk headed off with a day pack intent on returning to base camp, I think many looked on in mild amusement as I proceeded, heavy pack in tow, towards the summit.
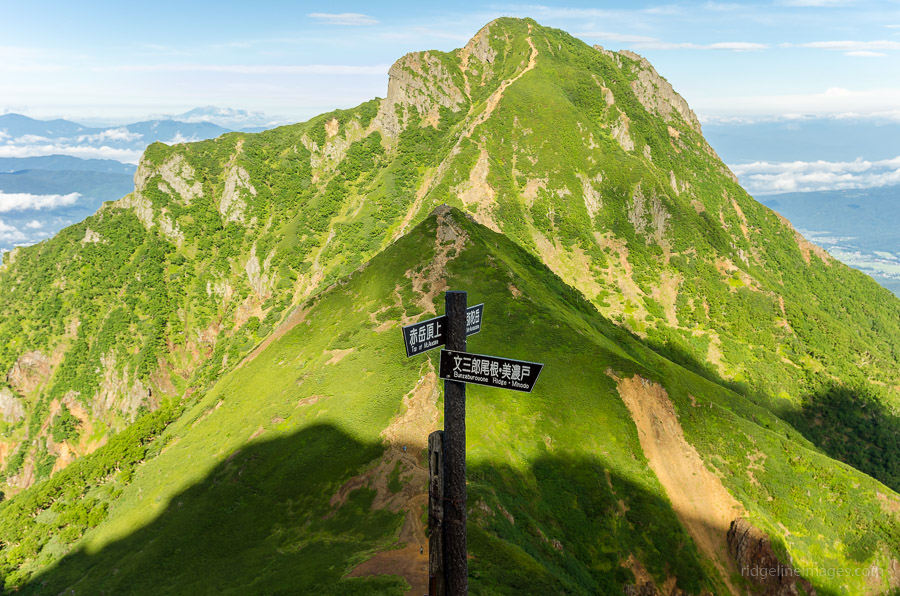
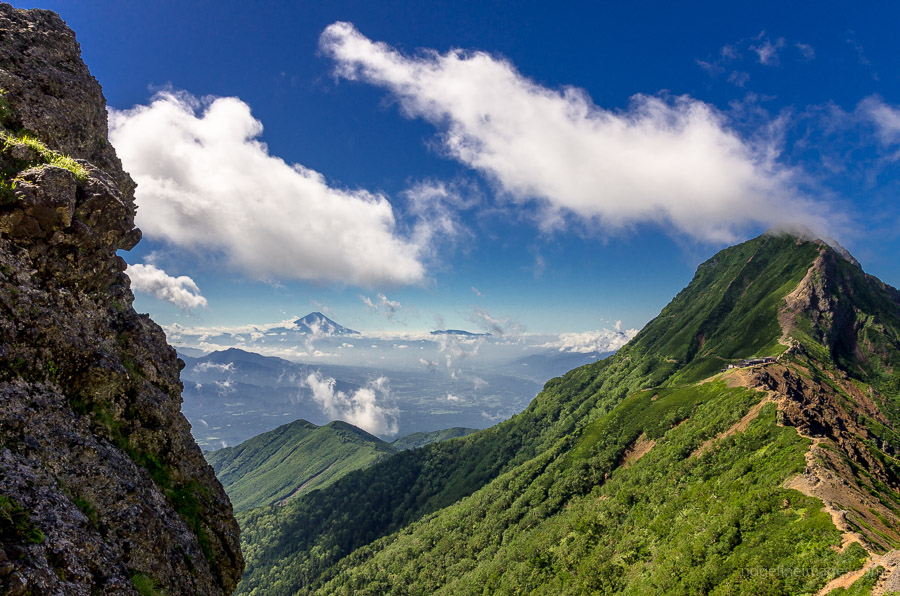
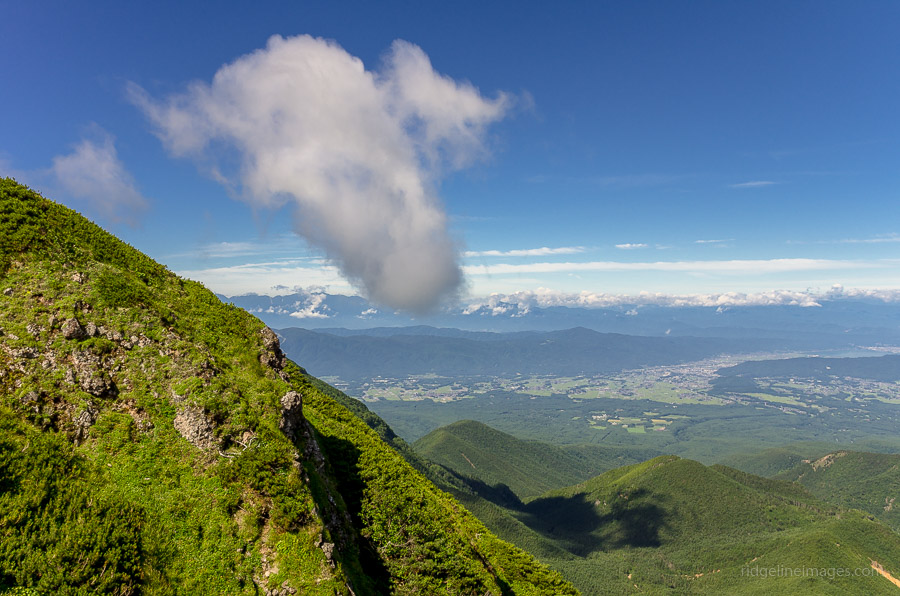
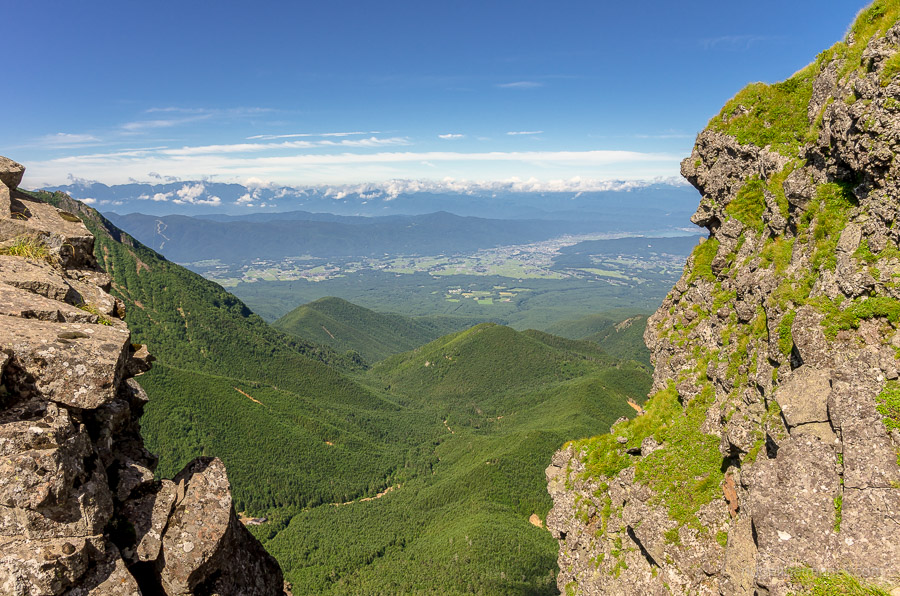
The trail to Mt. Akadake leads off from the southern edge of the campsite and after 10 minutes forks with another trail heading to Nakadake 中岳 so keep left and it should take around an hour to reach a prominent trail marker 30 minutes from the summit. Take extra care negotiating the final push and use the chains as necessary. On a good day, the views from Mt. Akadake are quite simply breathtaking and provide a wonderful vantage point to behold Mt. Fuji.
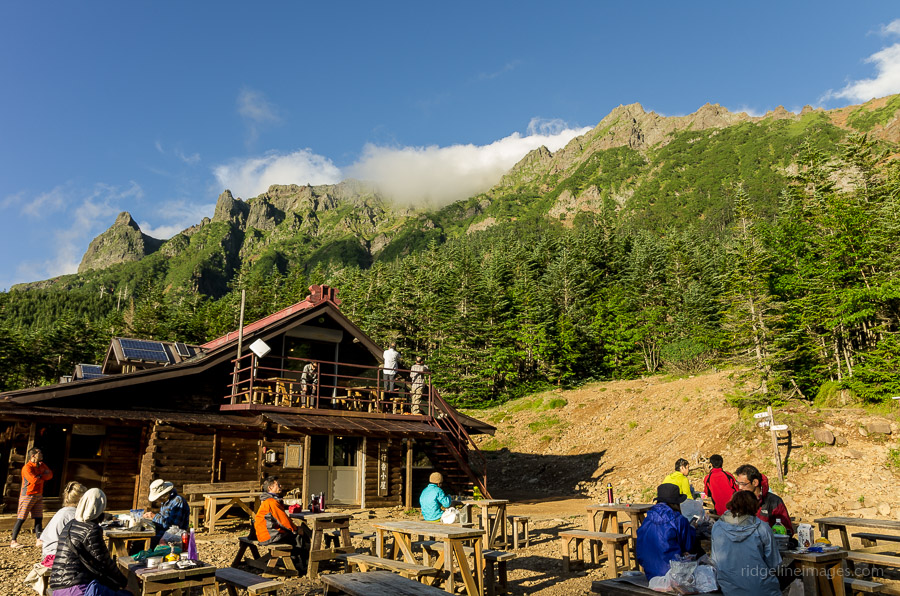
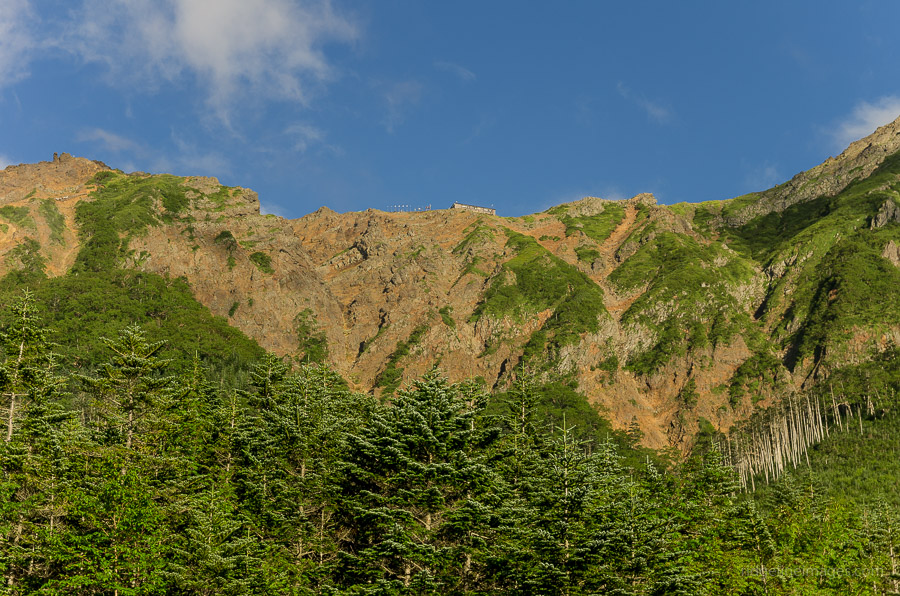
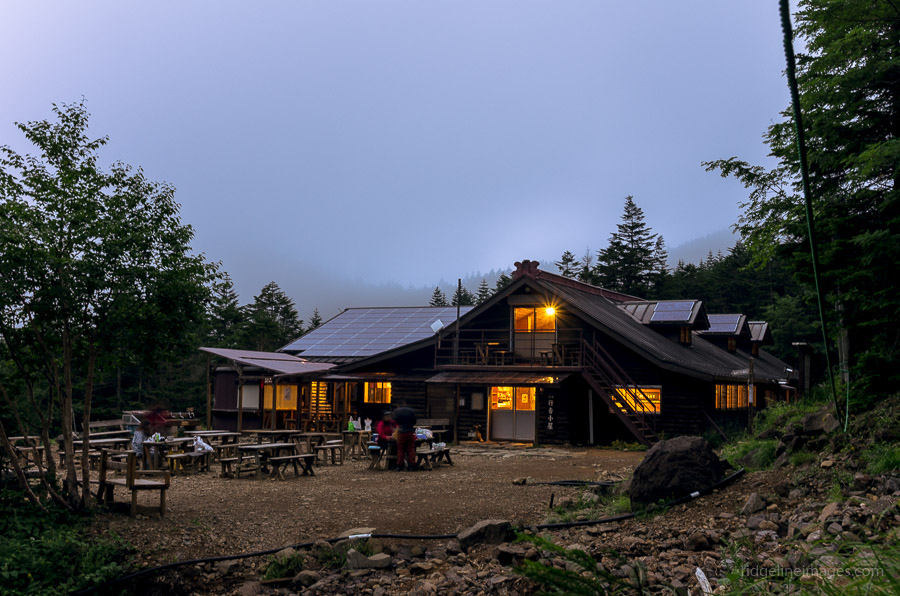
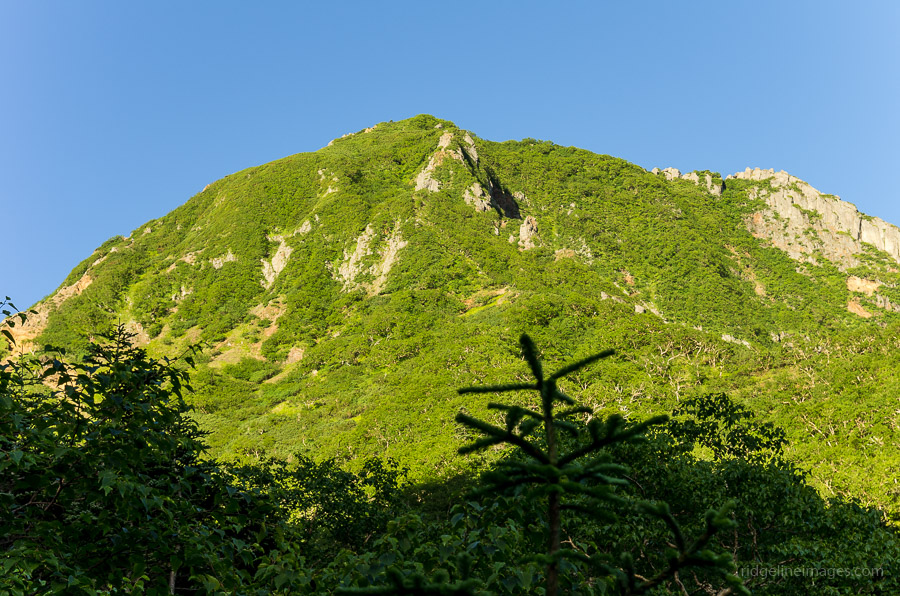
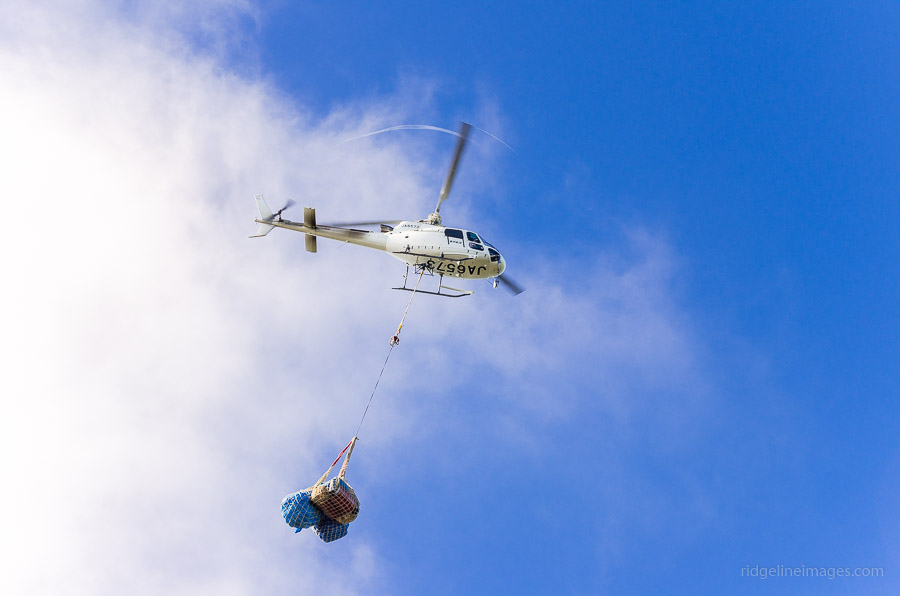
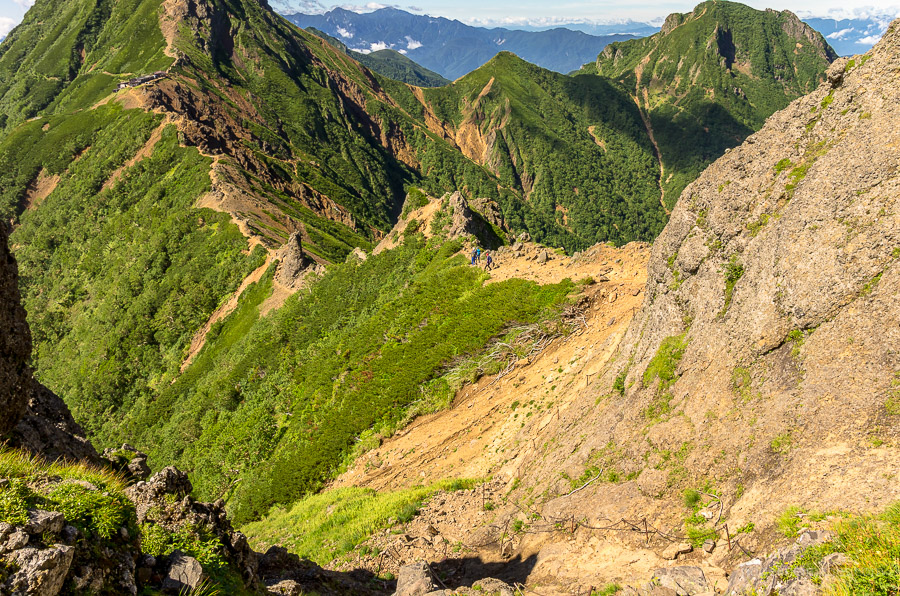
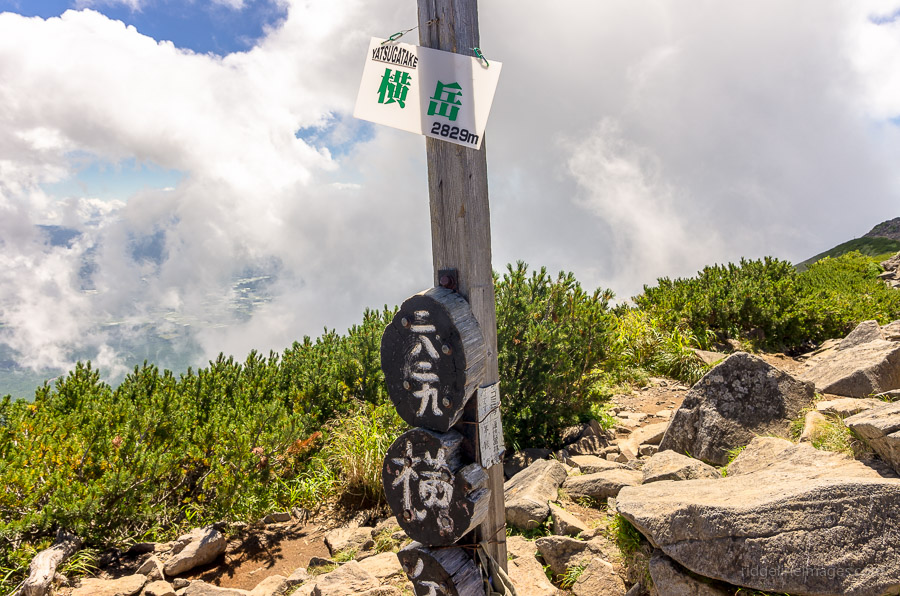
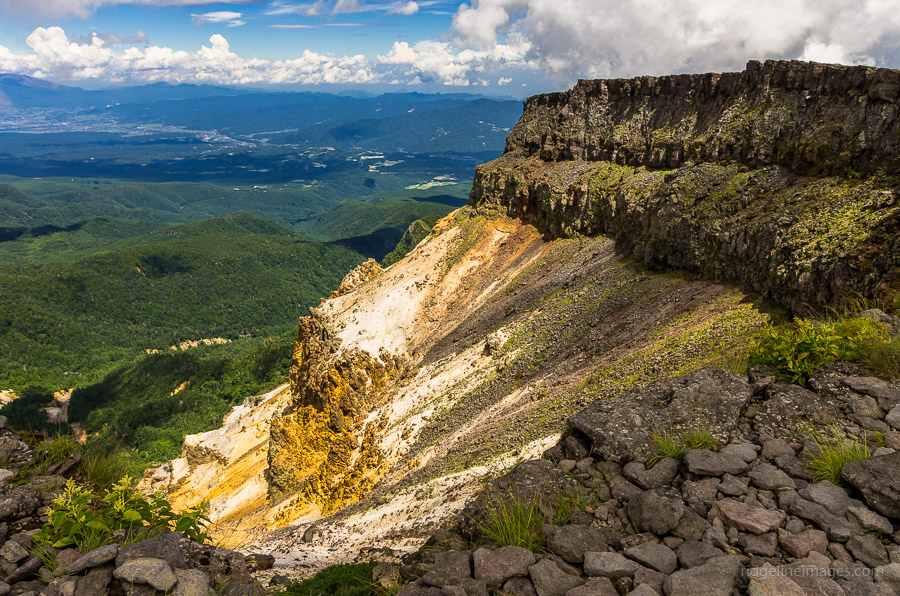
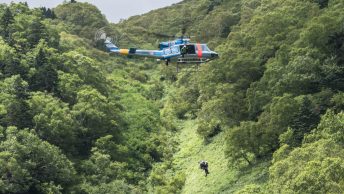
After passing the Mt. Akadake summit hut, the trail makes a rather steep descent to another nearby hut, which happened to coincide with its weekly helicopter supply drop. From here until the Ioudake-sansou 硫黄山荘 the ridgeline remains above 2,700 metres as you traverse over Yokodake 横岳 (2,829 m), and while some sections pass near precipitous drop-offs, chains and ladders maintain adequate safety. While not indicated on the map, the Ioudake-sansou does, in fact, have running water and includes one of the best mountain restrooms I’ve come across. The trail up to Mt. Ioudake 硫黄岳 (2,760 m) isn’t well defined, but seven odd rock cairns mark the approximate route. From the top, the biggest surprise came in the form of a giant explosion crater akin to the one on Mt. Fuji carved into the mountain side. The final leg loses considerable elevation as it passes by another hut towards the picturesque campsite and hot spring at Honzawa-onsen 本沢温泉 (campsite 1,000 yen).
Day 3: Following an Old Logging Road Back to the Koumi Line (11.7 km)
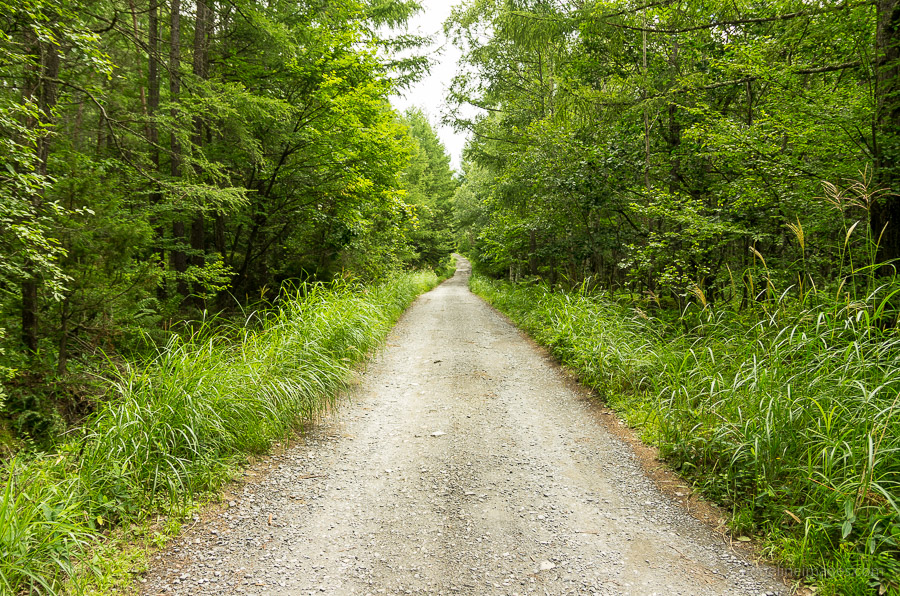
The final day, while the longest in terms of distance, is probably the easiest on the legs. From the campsite, follow a rather narrow 4WD drive track, first to a locked gate and small parking area, then a little further to the Honzawa Trail entrance, with a walking time of around 90 minutes. The trail back to the station actually continues directly across the bitumen road. Unfortunately, this rugged section of the road looks like it hasn’t been maintained in years, which is a little punishing. Along the way, note an incongruous-looking house seemingly in the middle of nowhere opposite a ruined homestead. This final section of the trail should take a little over an hour to reach Minamimaki Village. It was here that the map and the actual road layout seemed to differ and required conferring with a resident to navigate the correct course back to Umijiri Station 海尻駅. The infrequent train service on the Koumi Line means you should time your departure from the Honzawa campsite accordingly.


Hi,
I’m looking into two things regarding this trip. First, would it be possible to combine the first two days in your opinion?
Secondly, It is soon November, and I was looking at climbing the first weekend. Can you advise on the weather? I am a fairly experienced hiker, and can handle the cold, I just don’t want to be caught in a snowstorm without the proper gear.
Thanks!
Alex
Hi Alex thanks for your questions. Regarding the first point, it would take a herculean effort to combine the first two days together if you’re planning on travelling from Tokyo. While some hikes on this site can be readily condensed into fewer days, this hike definitely isn’t one of them. As the temperatures have now started cooling down, I would be preparing for subfreezing conditions on peaks over 2,500 metres from November onwards. There may also be some light snow falls, though most trails on Yatsugatake generally only get a sprinkling of cover at this time of year. Also definitely check the latest weather forecasts before heading out.
Hi, then, what would you recommend for a strenuous, two day hike? I’m looking mostly for cold weather and fuji views, but also maybe some steeper terrain/climbing to do. Otherwise, I might attempt this anyway, I’m used to doing 20-25km a day or so.
For a solid two-day hike with good views of Fuji I would be leaning towards Mt. Kumotori with a steep ascent on the first day and a long 18km stretch on the second. Also I wouldn’t put too much emphasis on distance as it can vary depending on the terrain and trail conditions. As a point of reference, hiking from Minotoguchi to Honzawa-onsen is only 13.5 km but you would be look at around 9 hrs actual walking time not including rest stops. Hope this helps.
Is it possible to mountain bike through this route?
The only section where it would be possible to ride would be from Umijiri Station to Honzawa-onsen though think more cross country then enduro / all mountain riding.
HI! I was thinking about doing this hike during the long weekend of March. Is there any way to check the current weather conditions? I don’t have all the necessary equipment to tackle snowed mountains.
I found this live webcam for the Tateshinayama and Kitayatsugatake mountains http://tateshina.shinshu-a.com/ (images updated every 3 hours). If you’re not appropriately equipped and experienced in winter mountaineering I would strongly advise not to tackle this route during the March long weekend. A much better idea would be to wait until after Golden Week where the snow has partly melted.
Thanks for your reply! Yeah, I had already quit the idea of going in March. Going to 3 days hike for my first time in the snow doesn’t seem the best idea. I will think about other alternatives for that weekend, and I’ll probably get a suitable equipment and practice in a shorter hike with a friend that is quite experienced.
Thanks also for the link! I will check it again for GW.
Hi David. Thanks for another super review. And great photos too. The blues and greens make it look almost like another world.
Do you think it’s possible to head up from Umijiri Station? Google maps shows a sort of a track heading west from the Yatsugadake Country Club, but on streetview, there’s no sign of it. I saw where you wrote about the way down being somewhat confusing. I don’t mind some bush bashing, but not that early into a big hike!
That way you came down toward Inako doesn’t show up at all. I’m torn between giving it a go and risking a major scratching up and wandering in circles, or finding another way.
Cheers for that!
Yes, it’s totally doable hiking up from Umijiri Station. Google maps is often its own worst enemy, so a better idea is pick up a copy either electronically or otherwise of the Yama-to-Kogen Yatsugatake map no.33. From Umijiri Station cross the river turn right then left at the traffic signal which heads towards Ashidaira 芦平. Continue walking along the road and look for a trail veering off to the left which should be marked Inago mountain trail 稲子登山口. As I mention in the description the trail is a little rugged in sections but is well marked and doesn’t require any bush bashing. From Umijiri Station to the Honzawa trail entrance 本沢入口 should take a little over 2 hours and after that its smooth sailing up to its namesake onsen. Failing that the other option is to take a bus from either Koumi or Matsubarako stations to Inagoyu Hot Spring 稲子湯 which is an alternate route to Honzawa Onsen – I did this on the Mt. Tengudake hike.
Great. Thank you for the directions. Together with your red line on the map, I was able to work out the path you took. It looks like a lovely peaceful walk up to the onsen. Reading your reviews always gets me motivated to get out there again and punish the legs a bit more. Thanks heaps.
[…] A special thanks goes to David from Ridgeline Images, for helping me with plotting the route from Umijiri up to the start of the trail. Here’s a thorough review of his Yatsugatake climb: https://ridgelineimages.com/hiking/yatsugatake/ […]
My boyfriend and I plan to take this route sometime in mid September. I’ve been on hikes (I’ve done Mt. Fuji and some others) but nothing quite like this yet. Is it recommended for someone with not too much experience? Is it safe enough if ever?
Also, if we are considering going straight there after work on a Friday night and camping and starting a hike in the morning, where’s a good place to camp before starting the actual hike the next day?
For novice hikers this Yatsugatake traverse will be a challenge and can’t realistically be compared to hiking Mt. Fuji, especially as you’ll be hauling your camping gear along with you. Having said that I wouldn’t consider it dangerous as the trail is easy to follow with the occasional chain and ladder to help navigate exposed areas. My question is if you start climbing on Saturday morning where are you going to camp? You’ll probably reach the Gyoja hut mid-morning and next place to camp isn’t until the Honzawa-onsen which means you’re looking 8 hours map time (not including breaks) from the Akadake or Minoto-sansou where you can camp on the Friday night. I suggest picking up a copy of the Yama-to-Kogen Yatsugatake map which shows the campsites / water holes etc.
Hello David,
Planning on staying near Matsubarako at the end of September and looking for day hikes in the area that you recommend with views. Thanks for your help.
Dale
Hey Dale,
Half your luck as Matsubarako is an awesome spot to base yourself. Three day hikes I’d recommend are Honzawa Onsen via Lake Midori (take a bus from Matsubarako Station bound for the Lake Midori Iriguchi bus stop). Akadake is also an option in which case take a bus from Kiyosato Station and get off at the Nasu Highland Park. Another idea is tackling Mt. Kobushi from the Nagano side which can be done either as a loop (as described on this site) or hiking up and down the same trail (from Shinano-Kawakami Station take a bus to the Azusayama bus stop). If you have your own wheels it would simplify the travel logistics.
Hi. Nice write up as usual. I’m wondering about transportation. I plan on doing a two-day run in early October and I’m trying to figure out the best way to get there. I don’t really care what trail head I start from, just want the easiest access. It looks like staying overnight in Chino and taking an early morning bus from there is the best option. Is there a better way? Any way to leave from Tokyo early and still be on the trail at a reasonable hour?
Hey Ryan, Minotoguchi is the quickest trailhead to access from Chino Station (travel time 48 mins). Just be aware that from August 3rd this year they are only running services twice a day on weekends and public holidays (no weekday service) at 10:20 and 13:45. The same goes for Shibunoyu (travel time 57 mins) with buses at 10:30, 11:35 and 14:55. Riding an early train from Tokyo would give you enough time to catch either first bus service. Check the timetable here https://www.city.chino.lg.jp/uploaded/attachment/15049.pdf
Thanks for the info, I guess I’ll be changing my plans. Since my only chance is October 1-2 and the first is only a Tokyo holiday, Yatsu is looking to be pretty inconvenient. I think I’ll try Tanigawadake since I can reach it by train and do a loop, as long as there are some huts open. Thanks again for the info and quick reply.
Hey David,
I’ve been a huge fan of your site and have followed quite a few of the easier hikes. I had an incident taking karasawa’s panorama course where my partner fell off and had to be lifted by helicopter (she’s fine, but was terrifying).
I was wondering if you could assess the danger of these routes during non-snow, non-rain conditions with a star system, with panorama being a 4/5 (in my estimation, feel free to disagree).
Based on your explanation of this route, for example, it feels roughly the same. I’m just sort of scarred from that experience and wouldn’t want to bring friends, who are mostly novices, on anything more dangerous than the regular karasawa route (which I’d rate a 2/5, as an example).
Thanks again for your awesome resources.
Hi Will,
Thanks for reading and commenting. First up very sorry to hear about your climbing companion’s fall but pleased to hear she is fine. The hike reports assign a difficultly rating which broadly considers the technical grade and fitness requirements. Having said that there are many factors involved in any hiking route that need to be considered when deciding if you are prepared to complete a certain hike. Regarding assessing the danger, I attempt to draw attention to such parts in the hike notes. However, to rate the hikes with a star system I feel is a bit of a tough call and best left under the general difficulty grade. For example, some hikes might have one short particularly dangerous section but otherwise fairly benign while another may be moderately dangerous for large sections. It’s debateable then which hike should get the higher star rating. Anyway, you raise a good point and it’s a poignant reminder for all of us to take extra care when out on the trail.
Hi Will,
Sad to hear that you have such an incident, but good to know that your partner is safe.
I am also a follower here and I inspired many of my hikes on David’s, but later planned them on this Japanese website https://www.yamareco.com/modules/yr_plan/step1_planner.php . It is free to register, and it tells you the estimated time and level (A to E) of each path. You can print your planned schedule and take it to the hike. In my opinion, hikes rated A or B are pretty accessible to everyone, but C+ starts to require a bit of experience. The website is in Japanese, but it’s very simple to use. I don’t know much Japanese, and I managed to use it with a bit google translate. Besides, sometimes you will find also more recent updates from the rangers, such as warning signs due to path deterioration.
For your reference, I checked the Karasawa route that David posted (https://ridgelineimages.com/hiking/mt-karasawa/) and it has a part that is C level between the two huts.